Make your creative dreams come to life with free needle felting tutorials, downloads, tips, ideas, and inspiration. Start your needle felting journey today!
Whether you’re a bit nervous about starting out, searching for a quick and easy project, hoping to create a lovely handmade gift, or eager to fill your home with seasonal needle felted decorations, my ‘How to needle felt for beginners – easy video tutorials’ will quickly set you on your creative path. You’ll be needle felting with confidence in no time, and soon you’ll be making all sorts of fantastic felted items to keep, give as gifts or sell at your local craft market.
To begin your needle felting adventure, simply pick from the contents list below and jump into the quick and easy needle felting video tutorials I’ve prepared. These are a collection of my easiest needle felting video tutorials and are designed for beginners and beyond. Even better, the impressive results will make you feel like a proficient needle felter in a very short time. My easy video tutorials really are game changers for anyone who is really nervous about starting needle felting, indeed for anyone who has never crafted before. So whether you have 5 minutes, or a few hours, there’s a project here to fit your time schedule.
If you haven’t given needle felting a go yet, you’re truly missing out! This fantastic craft is ideal for anyone, regardless of skill level, whether you’re just starting out or you’re already quite experienced. I’ve been passionate about teaching this wonderful craft since 2014 and am passing on my own skills to ease you into needle felting with confidence.
Build Your Confidence
What’s wonderful about needle felting is that it doesn’t involve any sewing or complex patterns, just a handful of needle felting wool and a felting needle. Even more exciting, once you learn how to needle felt you’ll never be stuck for inspiration! This post is packed to the brim with needle felting instructional videos to help you complete your projects from start to finish, as well as handy tips, and tricks, and I’m eager to share every bit of it with you.
Just grab your wool and felting needles, learn how to needle felt for beginners with these easy video tutorials and let’s start crafting together! Whether you’re looking to create cute animals, stylish accessories, or unique home decor, I’m here to guide you every step of the way. Let your creativity flow and watch as you transform a handful of wool into gorgeous needle felted creations.
Felting Needles Simplified
Easiest Ever Needle Felted Sheep
Make time: 2-3 hours
Skill level: Beginners
In this comprehensive needle felting tutorial designed specifically for beginners, you’ll learn how to craft your very own charming needle felted sheep.
Follow along as I guide you through each step, making the process fun and accessible even if you’ve never tried needle felting before.
Five Minute Hearts
This super easy needle felting tutorial will have you creating your own needle felted heart in no time at all! They make beautiful handmade Valentine’s gifts, brooches, DIY garlands, decorations, and perfect party or wedding décor.
Realistic Needle Felted Cakes
Skill level: Nervous beginner
Make time: 15 minutes
Make these super easy needle felted macarons in just 15 minutes. All you need is some carded wool, a felting needle, felting mat and enthusiasm. In no time at all you will have a plate of calorie free needle felted cakes. You could also make a gorgeous summer garland.
Needle Felted Ball in 3 Minutes
Skill level: Nervous Beginner
Make time: 3 minutes per ball
In this video, I’ll show you how to needle felt a felt ball – and there’s no need for any messy wet felting. You can use these felt balls as gorgeous spring garland decorations, handmade nursery decorations, or even hang them in the trees in your garden, as long as the weather allows.
Bumble Bee Brooch
Skill level: Nervous beginners
Make time: 30 minutes
In this tutorial, I’m going to show you how to make a needle felted bumble bee brooch. It’s a super easy DIY craft that’s perfect whether you’re just starting out or you’ve got a bit of experience with felting. You can create a beautiful bumble bee brooch in just 45 minutes. It’s the perfect accessory for spring and summer, or a lovely handmade gift for Mother’s Day.
Spring Bunnies
Needle felting doesn’t get any easier than with this super cute bow bunny. It’s perfect whether you’re a bit nervous about starting, just looking for a quick and relaxing project, or keen to make your own handmade needle felted gifts and decorations.
Skill level: Beginners
Make time: 1 hour
Needle Felted Mushrooms
Make time: 30 minutes
Skill level: Nervous beginners
‘KEEP IT SIMPLE’ is my mantra and my needle felting video tutorials for beginners are designed to do just that. They are the building blocks of needle felting and a perfect beginners introduction on how to get it right from the very start.
Free Printable
Packed with step by step detailed instructions and full colour photographs. You can whip up a fairy toadstool in just 30 minutes! Just download and save or print. Just click for access and no purchase or subscription necessary. TAKE ME TO DOWNLOAD
Needle Felted Hedgehog
Make Time: 60 minutes
Skill level: Nervous beginner
Learn how to make a needle felted hedgehog with this tutorial. I show you the supplies, tools, and techniques needed to make this adorable little guy! In this video I’ll guide you step by step, the process is really simple and it only takes about an hour. Soon you will have your own little huddle of hoglets.
Perfect Pumpkins
Make time: 30 minutes
Skill level: Nervous beginner
Create stylish autumn/fall decor in just 30 minutes. A super easy needle felting tutorial for beginners using core wool and carded wool.
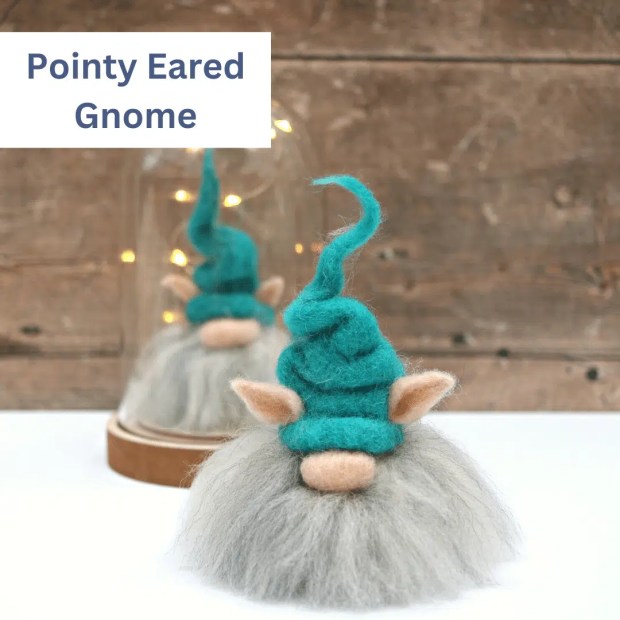
How to Needle Felt Nordic Gnomes
Make time: 25 minutes
Skill level: Nervous beginner
Needle felted Nordic style gnomes, sometimes called gonks, are one of my favourite, quick and easy needle felting projects. Hope you enjoy making them as much as I do.
Winter Wonderland Pumpkins
Create fabulous needle felted pumpkins for your winter decor in under 30 minutes. Needle felting was never so easy and your DIY autumn/fall DIY decor will look like it’s from a Homes and Gardens photoshoot.
Make time: 30 minutes
Skill level: Nervous beginner
Fairies Live Workshop
This fairy tree topper is sure to be a hit. No more need for those complicated, expensive store-bought ones that never quite look as good as you want them too. This one takes just 90 minutes and is handmade, by you with love!
Make time: 90 minutes
Skill level: Beginner
Easiest Ever Needle Felted Snowman
This is my simple, but stylish take on Frosty; complete with hat, scarf and carrot nose.
Instantly download a needle felting pattern and get started straight away! On the hunt for inspiring needle felting patterns? There are patterns for all abilities on the website, from nervous beginners to confident needle felters, there is a pattern and video tutorial for you.
Mastering Product Photography: Essential Tips for Showcasing Your Needle Felting Creations
Have you ever wondered how to photograph your needle felting projects like a pro? In today’s age of camera phones, capturing moments has never been easier. However, when it comes to presenting your needle felting projects in the best light, relying solely on smartphone cameras might not do justice to your creations. As someone who considers themselves an amateur in photography, I use both but I have discovered the value of using a dedicated camera, like my trusty Canon 400D (now upgraded to a 750D) for product photography. Unlike the quick point-and-shoot convenience of phone cameras, utilizing a DSLR allows me to pay attention to finer details through the viewfinder—a feature that younger generations might need to research on Wikipedia!
Drawing from my extensive decade-long experience photographing my beloved needle felted companions, I’m excited to unveil my top-notch tips, easy wins, and favourite equipment that have proven invaluable along the way.
Practice Makes Perfect
So, before we chat about my top tips for fantastic photography always remember: the key ingredient to great photos is practice, practice, practice! It doesn’t matter if you’re sporting the latest gear or something more basic, nothing beats putting in the time to really get the hang of things. Photography is all about finding your rhythm and developing your own style. Once you’ve got that down, snapping pics of your adorable needle felted creations becomes a breeze. Trust me, it’ll save you tons of time both behind the camera and at the editing desk. So, keep on clicking, keep experimenting, and watch your skills grow!
Affiliate Links
While I only recommend products I’ve personally used and believe in, I must disclose that some links may be affiliate links. This means if you make a purchase through these links, I may earn a small commission. However, not all links are affiliate; some direct to small businesses I’ve personally endorsed. Your trust is vital to me, and I prioritise honesty in all recommendations.
Why Are Needle Felted Pieces So Difficult To Photograph?
Needle felted pieces present unique challenges when it comes to achieving a crisp finish in photography due to several factors:
Texture: The textured nature of needle felting, created by repeatedly poking wool fibres with a felting needle, can make it challenging to capture fine details without losing clarity. The uneven surface of needle felted objects can cause shadows and highlights to appear differently in photographs, leading to a loss of definition.
Depth of Field: Needle felting often involves creating three-dimensional sculptures or intricate designs, which can vary in depth and complexity. Achieving a balanced depth of field in photography, where both the foreground and background are in focus, can be difficult, particularly when capturing close-up shots of intricate details.
Scale: Needle felted creations can range in size from small figurines to larger sculptures, each requiring different photography techniques to capture effectively. Miniature needle felted objects may require macro photography to capture fine details, while larger pieces may necessitate wider angles or specialized lighting setups to avoid distortion and maintain clarity.
Material Properties: Wool fibres, the primary material used in needle felting, have unique reflective properties that can affect how light interacts with the surface of the object. Controlling reflections and glare on the surface of needle felted creations can be challenging, particularly when photographing under bright or uneven lighting conditions.
5 Colour Accuracy: Achieving accurate colour reproduction in photographs of needle felted creations can be challenging due to the natural variability of wool fibers and the way they absorb and reflect light. Maintaining colour fidelity and ensuring consistent white balance in photographs is essential for accurately representing the original colours of the needle felted artwork, especially if you intend to sell your work.
Overall, photographing needle felted creations with a crisp finish requires careful attention to lighting, composition, and camera settings to overcome the unique challenges posed by the texture, depth, scale, material properties, and colour accuracy of the work. Additionally, post-processing techniques such as sharpening and colour correction may be necessary to enhance the final image and showcase the intricate beauty of the needle felted creations. When it comes to photographing needle felting projects, both smartphone cameras, and DSLR cameras – no longer just the domain of professional photographers – offer distinct advantages and disadvantages. Let’s explore the pros and cons of each:
Smartphone Camera
Pros:
Convenience: One of the biggest advantages of smartphone cameras is their convenience. Most people carry their smartphones with them everywhere, making it easy to capture spontaneous moments and projects without the need for additional equipment.
User-Friendly Interface: Smartphone cameras typically have user-friendly interfaces with intuitive controls, making them accessible even to beginners without prior photography experience.
Instant Sharing: With built-in editing tools and instant access to social media platforms, smartphone cameras allow for quick editing and sharing of needle felting photos with a wide audience. Especially important if you like to point, shoot, and upload straight to social media on a regular basis
Portability: Smartphone cameras are lightweight and portable, making them ideal for capturing needle felting projects on the go or in various locations.
Quality: Phone cameras are constantly evolving and improving. Who knows how advanced they will become over the next few years.
Video: Most smart phones allow you to record video.
Cons:
Limited Control: While smartphone cameras offer basic settings and editing options, they lack the advanced manual controls and customisation options found in DSLR cameras. This limitation can restrict the ability to adjust settings for optimal lighting, focus, and composition.
Image Quality: Despite advancements in smartphone camera technology, they still generally produce lower-quality images compared to DSLR cameras, especially in terms of detail, dynamic range, and low-light performance.
Limited Lens Options: Smartphone cameras have fixed lenses with limited zoom capabilities, which can be restrictive when trying to capture close-up shots or experiment with different focal lengths for creative effects.
DSLR Camera
Pros:
Image Quality: DSLR cameras typically produce higher-quality images with greater detail, clarity, and colour accuracy compared to smartphone cameras. This superior image quality is especially beneficial for showcasing the intricate details and textures of needle felting projects.
Manual Controls: DSLR cameras offer a wide range of manual controls, including aperture, shutter speed, ISO, and focus settings, allowing for greater creative control over the final image. This versatility is invaluable for adjusting settings to suit different lighting conditions and artistic preferences.
Interchangeable Lenses: DSLR cameras support interchangeable lenses, enabling you to choose the most suitable lens for capturing needle felting projects, whether it’s a macro lens for extreme close-ups or a wide-angle lens for capturing the entire scene.
Post-Processing Flexibility: For the more experienced photographer, RAW* image capture and advanced editing software provide DSLR photographers with extensive post-processing flexibility, allowing for precise adjustments to exposure, colour, and sharpness to enhance the final image quality.
Great Video Quality: Most DSLR cameras can produce excellent quality video.
*I haven’t used RAW image capture for any of the photos in this post, and it’s not essential for producing high-quality images.
Cons:
Cost and Complexity: DSLR cameras and their accompanying lenses can be expensive investments, especially for beginners or hobbyists just starting out in photography. Additionally, mastering the manual controls and advanced features of DSLR cameras requires time, practice, and technical knowledge. However, DSLR cameras are much more affordable than 10 years ago, and there are ranges to suit lots of budgets.
Portability: Compared to smartphones, DSLR cameras are bulkier and less portable, requiring dedicated camera bags or carrying cases for transportation. This can be inconvenient for photographers who prefer to travel light or capture spontaneous moments on the fly. However, DSLR cameras are becoming much more portable so there are more options for a more portable product.
In summary, while smartphone cameras offer convenience and accessibility, and DSLR cameras provide superior image quality, creative control, and versatility for capturing and showcasing the intricate beauty of needle felting projects. Ultimately, the choice between the two depends on individual preferences, budget, and the level of commitment to photography as a craft.
Enhancing Photography with Staging and Props:
In my photography journey, I’ve discovered that some of my most remarkable shots emerge through thoughtful staging and the strategic use of props, and is really useful for giving a truer idea of scale; much better than using a coin or a ruler. This approach has the remarkable ability to elevate your photographs from ordinary to extraordinary, adding that undeniable ‘wow’ factor.
Adding subtle elements like a single flower stem with vibrant color contrast can be just as impactful as a meticulously staged background. Remember, when photographing your creations, sometimes less is definitely more.
Moreover, using staging and props provides an avenue to showcase your artistry or products in a setting that feels authentic and organic, cultivating a deeper connection with your audience or customer. Personally, I’ve experienced swifter success employing this method compared to using a plain background; The trick is not to overdo it and make sure your creations take centre stage. Utilising features like portrait mode on your smartphone or DSLR enables you to achieve this captivating effect effortlessly. Don’t shy away from getting up close and personal to capture those tiny product details that can’t be seen from a distance; it’s often in those subtle details that the true beauty lies. So, embrace the power of staging and props, and watch as your photography flourishes with newfound depth and appeal.
Remove All Clutter
It’s surprising how often I’ve seen product photos where you can spot things like the edge of a mouse mat or laptop, or even worse, laundry hanging in the background, a stray coffee mug, or kids’ toys scattered around. These kinds of distractions don’t exactly scream professionalism and can make it seem like the shoot was rushed or not given enough attention. So, look around your space and spend five minutes tidying and clearing your area to avoid these photography blunders.
Natural Light
Utilising natural light is a simple yet effective way to capture needle felting projects with clarity and vibrancy. Position your setup near a large window (switch off any artificial lighting), or outdoors in a shaded area to benefit from soft, diffused light.
Capturing the mouse and sheep amidst the soft, diffused light of an overcast day outdoors not only eliminated the need for post-processing but also resulted in a stunningly sharp outcome, full of beautiful macro details. This achievement was effortlessly attained through the use of portrait mode.
Natural light helps to showcase the true colors and textures of your creations while minimizing harsh shadows and highlights. Every home/room is different so experiment with different times of day and angles to find the optimal lighting conditions for your photography.
Utilizing Portrait mode, your camera generates a depth-of-field effect, enabling you to capture photos with precise focus on the subject while artfully blurring the background, adding depth and dimension to your images.
Choosing simplicity is consistently the most effective strategy. Over the years, I’ve relied on Canva for nearly all my editing needs, finding it to be one of the most user-friendly editing suites out there. Whether you choose their free or premium options, Canva offers easy navigation and a wide range of editing tools to enhance your images.
I used three subtle changes on the images below which has really elevated the final shot:
Increase the whiteness
Increase brightness
Increase vibrance
Budget-Friendly Gear for Pro-Quality Photography
When aiming to enhance the quality of your needle felting photography, without breaking the bank, several accessible and budget-friendly options can significantly improve your results. Here are some of my favourite equipment choices and techniques. You can find links to the equipment I have used at the end of the post:
Lightboxes: Lightboxes, also known as soft boxes, are affordable and portable accessories that help diffuse and evenly distribute light around your needle felting projects. They come in various sizes and shapes, making them suitable for different project sizes. Place your needle felting creation inside the lightbox and position light sources on either side to achieve balanced illumination. Lightboxes are particularly useful for capturing consistent and well-lit photographs, especially in indoor settings with limited natural light.
Simple Vinyl Backdrop: A plain vinyl backdrop provides a clean and professional-looking background for your needle felting photography. Opt for a neutral or contrasting color such as white, black, or, as in the photo below, a bold popping purple which will complement your creations without distracting from them. Vinyl backdrops are lightweight, easy to clean, and affordable, making them a versatile option for creating a cohesive and polished aesthetic in your photographs. Simply hang the backdrop behind your setup or lay it flat on a surface to create a seamless background for your needle felting projects. Have to admit I am a bit of a backdrop addict and Club Backdrops are my go to for quality and customer service.
3. Desk Lamps or Clamp Lights: Desk lamps or clamp lights fitted with daylight-balanced bulbs can serve as additional lighting sources for your needle felting photography setup. Position the lights strategically to fill in shadows and add highlights to your subjects. Adjustable arms and swivel heads allow for precise control over the direction and intensity of light, making it easy to tailor the lighting to suit your specific needs. Desk lamps and clamp lights are affordable alternatives to professional studio lighting equipment and can be easily adjusted to achieve desired results.
By combining these budget-friendly equipment options with simple photography techniques, such as adjusting camera settings and experimenting with composition, you can elevate the quality of your needle felting photography with minimal investment of time and resources. Remember to focus on capturing the intricate details and textures of your creations while maintaining accurate colors and balanced lighting to showcase their beauty effectively.
Portrait Mode – Your Best Friend
Smartphone
In today’s world of smartphones, getting that sharp focus on your main subject with a nice blurred background is a piece of cake thanks to portrait mode. If you’re snapping with your phone, just remember to give your product some space from the background. This simple trick makes your product pop while giving you that cool blurry background effect that’s so popular on social media.
DSLR
Now, if you’re using a DSLR camera and dabbling in manual mode, playing around with the F-stop settings can do wonders. Go for those lower numbers like 1.2 or 1.4, and keep your subject away from the background. That way, you’ll nail that sharp subject with the soft, dreamy background look. Don’t be afraid to try out different settings until you find the sweet spot!
What Settings Did I Use?
Using my trustee Canon 400D I have set it at manual mode to photograph this lovely spring mouse.
This indoor shot was problematic because of poor natural light. To alleviate this problem the needle felted mouse photo was captured in manual mode using a 50mm lens, set at f/2.8 with an ISO of 800; photographing close to your project allows for a higher ISO without compromising quality. Distance shots would require more light and a lower ISO to avoid a grainy outcome. With some minor editing, voila! While I typically relied on the quick and easy auto mode, which yielded good to great results, the shift to manual mode has been enlightening. The depth of field achieved with these settings allows for a beautiful focus on the needle felted mouse whilst keeping the background in soft focus. Previously, I had used a combined lens of 18mm-55mm, often sifting through numerous photos before finding one satisfactory shot. However, the transition to a dedicated 50mm lens on this occasion is akin to a transformative experience—truly a night-and-day difference.
A decent camera and lens is a real investment!
If you’re committed to your craft business, art, or blog, investing in a quality camera and lens can be a significant investment. Long term it’s not just a purchase; it’s a dedication to enhancing the quality and professionalism of your work.
Needle felting, a delightful crafting pursuit, grants you the joy of turning raw wool into enchanting sculptures. Whether you’re venturing into this craft as a complete novice or honing your expertise as a seasoned needle felter, this blog post is ready to provide you with a wealth of valuable insights and tips. Within its pages, discover a treasure trove of knowledge to aid you in the creation of truly splendid felted masterpieces. Immerse yourself in this informative read for top-notch guidance, promising to elevate your skills and have you crafting marvelous felted wonders with ease and finesse in practically no time at all. Happy felting crafters!
WATCH SHEEP TUTORIALWATCH HARE TUTORIAL
Needle Felting Made Easy Key Points:
Choosing the Right Materials:
High-quality felting needles: Invest in fine and coarse felting needles for different tasks.
Wool roving: Select natural wool roving in various colors to bring your creations to life.
Felting pad or mat: A soft surface to work on and protect your needles.
Optional extras: Consider wire armatures, felting handles, and googly eyes for more complex projects.
Understanding Your Tools
Learn about the different types of felting needles and their uses.
Understand the purpose of your felting pad or mat and how it helps in the felting process.
Experiment with optional tools to see what works best for your projects.
Mastering The Basics
Learn how to properly hold and use felting needles to avoid accidents.
Start with simple shapes like balls and cylinders to get a feel for the process.
Creating Sculptures with Depth
Gradually add layers of wool to build up your sculpture’s volume and form.
Pay attention to proportions and symmetry for realistic results.
Use reference images or real-life objects for inspiration and guidance.
Adding Details and Textures
Experiment with different felting needle sizes to achieve varying levels of detail.
Create textures like fur, feathers, or scales by altering your poking technique.
Blend and mix colors of wool roving to achieve realistic shading and highlights.
Troubleshooting Common Issues
Learn how to fix loose or unevenly felted areas by reworking them with your needles.
Address fuzziness by gently felting the surface with a fine needle.
If your sculpture becomes too firm, use a coarser needle to soften it.
Highland Cow
Improving Your Techniques
Once you’ve mastered the basics of needle felting and crafted your fair share of adorable animals, it’s time to elevate your skills to the next level. Exploring advanced techniques can open up a world of creative possibilities.
Consider delving into the art of wire armature construction, a method that allows for more intricate and poseable creations.
Multiple-needle felting is another exciting option, enabling you to work on larger projects efficiently while achieving a smoother finish. Layering techniques provide a way to add depth and realism to your creations, as you blend colors and textures with finesse.
These advanced techniques will not only challenge your abilities but also empower you to bring your needle-felted masterpieces to life in new and captivating ways.
Following the Step-by-Step Video Tutorials
To make learning needle felting even more accessible and enjoyable, I’ve put together an extensive library of step-by-step video tutorials. Whether you’re seeking quick tips or want to follow the entire process of crafting an animal from start to finish, my videos are designed to replicate the experience of a live workshop. They’re unhurried, ensuring you grasp each technique, and they’re fantastic for boosting your confidence and skills with every completed project. You can easily follow along with the videos, pausing and rewinding as needed, allowing you to master each aspect of needle felting. With over a decade of teaching and curating inspiring kits since 2014, you’re bound to discover the perfect projects that pique your creative interests.
Improve Your Techniques
To sum it all up, needle felting isn’t just a craft; it’s a wonderfully satisfying journey into the realm of creativity. Regardless of whether you’re a newbie embarking on this fluffy adventure or a seasoned felter perfecting your skills, the treasure trove of insights, tips, and those comprehensive video tutorials we’ve discussed here will undoubtedly work their magic, boosting your felting prowess and enabling you to create wonderful needle felted animals. And let’s not forget our trusty companions : practice and patience. They’re the unsung heroes, steering us toward confidence and proficiency in the world of needle felting.
So, just go for it! Enjoy turning simple, soft wool into beautiful needle felted animals. Let your imagination run wild in this fascinating world of needle felting. Your artistic potential isn’t limited to the sky; think of it as a canvas, and your creativity guides the way!
Instantly download a needle felting pattern and get started straight away! On the hunt for inspiring needle felting patterns? There are patterns for all abilities on the website, from nervous beginners to confident needle felters, there is a pattern and video tutorial for you.
EASIEST EVER NEEDLE FELTED SHEEP VIDEO TUTORIAL!
Felt along with me, workshop style. Step by creative step.
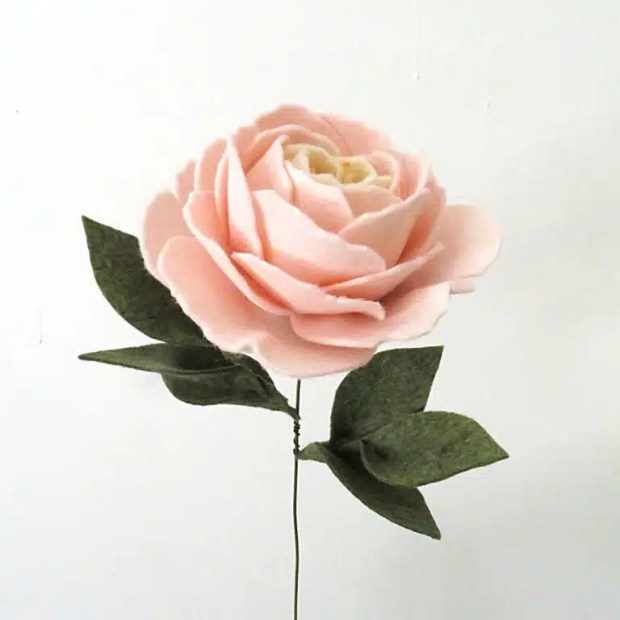
What a thrill to feature, and showcase the free tutorials, and amazing handmade collection from felt florist, The Tsubaki. They are the perfect addition to a minimalist, or simple Nordic style Christmas décor.
Indeed, my own home is full of her beautifully created cut felt flowers and stems; her Eucalyptus stems, Peonies, and Cherry Blossoms are to die for!
SCROLL DOWN FOR FREE FESTIVE TUTORIALS
Yuki works with flat felt creating intricate designs for flowers, holiday décor, wall hangings and so much more, and her amazing Floriography (the language of flowers) skills are inspired by her creative Japanese heritage and the ever changing seasons.
FREE TUTORIALS FROM THE TSUBAKI From perfect Poinsettia’s to marvellous mini trees, why not create Yuki’s beautiful creations yourself. Click on the photos below and follow the links for some festive free tutorials. You will soon find yourself begin to relax, unwind, and enjoy the process of some meditative creativity.
Bringing together her love of nature and creating using felt, Yuki Brittain started The Tsubaki in 2017. Now, just a few years later, her business is flourishing and she is fondly known as ‘the felt florist’.
Introducing Yuki Brittain from The Tsubaki
I was brought up in a very creative family in Japan surrounded by craft and people designing and making things! My grandmother made Kimonos, my grandfather taught me how to make straw shoes, my father still loves DIY and making his own fishing tools from scratch and my mother was also involved in the craft world. Naturally I absorbed a lot.
I started designing felt floral gardens after becoming a mum of 2 and deciding now was the time to follow my dreams of designing artificial flowers from felts. Creating natural looking flowers has given me a renewed energy and a connection to an artistic world I have always dreamed of. Our felt flower shop offers wedding bouquets, home flower arrangements, botanical gifts and more, all handcrafted in the UK.
ETHOS
Simplicity and calm. I attempt to create a sense of peacefulness all the way from my products to the design of my website to the service I provide. My aim is to transmit the beauty of nature into people’s homes and to give people a moment of clarity.
THE PROCESS
My inspirations come from the outside world. I enjoy walking in the woods near my home, seeing the changes in nature throughout the seasons. My ideas on what to design usually come from these moments when connecting with nature. They can come at any point when I am outside so I always carry a sketchbook to write or draw designs as soon as inspiration hits!
I am also a keen student of flowers and visit many gardens throughout the UK and keep updated with the latest trends through social media, the internet and magazines. I like to make my flowers as representative as possible to real life so I practice the designs many hundreds of times before settling on a style.
INSPIRATION
Currently I live in the countryside in Surrey. I have amazing woods within a five minute walk which I never take for granted as it gives me such a sense of belonging, amongst nature, flowers and the outdoors.
SHOP THE TSUBAKI COLLECTION
Yuki is constantly updating her designs to follow the seasons, and her beautiful website is so worth a visit, even if it is just to look at the stunning Peonies and dazzling felt flower bouquets.
If you have tried the free tutorials and fancy something a bit more in depth then Yuki has some amazing online courses. At just £20 per course this is amazing value, and the results are stunning! There is even a master class so you can do a deep dive into creating beautiful felt flowers with ‘The Felt Florist’.
BOOK AN ONLINE COURSE
Yuki has created courses designed for all levels, from a beginner to experienced flower makers. Showing you step by step how to recreate some of her beautiful designs.
FILL YOUR HOME WITH SEASONAL ‘HANDMADE BY YOU’ JOY
Tis the season to get creative and, whatever your seasonal style I have a Christmas craft project to suit. From cute and quirky, to stylish and minimal. It’s all here, on the blog, completely free, and all you have to do is fill your seasonal stockings full of inspiration, grab your wool and needles, and get felting. And of course, ten times better than shop bought and made with love by you.
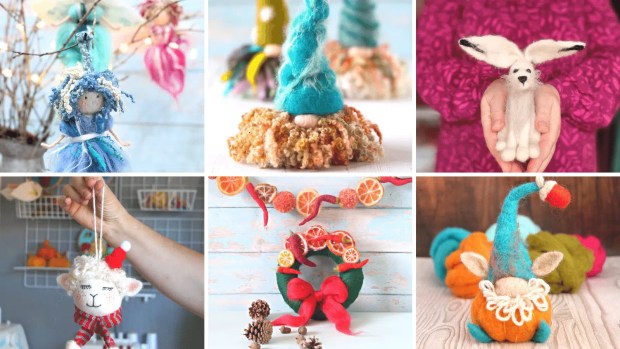
There are so many great seasonal ideas on this page you won’t know where to start. From Nordic gnomes giving you all the hygge feels, cute snowmen, baa-ble tree decorations, super stylish wreaths and garlands, to forest fairy tree toppers. There’s a felting project to suit every taste, even Christmas pumpkins. Proof, if ever needed, that pumpkins are not just for Halloween. And it has to be said, these cool winter wonderland pumpkins wouldn’t look out of place on the set of a Disney movie.
From stylish wreaths and garlands to quirky gnomes, there’s a project for every age and ability!
Check out the fabulous felting projects below, and make your holiday season merry and bright!
VIDEO TUTORIALS
The Felt Hub on YouTube is full of seasonal creativity. Just click on any of the photos below and you can felt alongside me, workshop style
SHOP NEEDLE FELTING PATTERNS
My needle felting kits and patterns have been inspiring creativity since 2014 and, if you are finally ready to take the needle felting plunge then you will find everything you need on the WEBSITE or over at ETSY
SKILL LEVEL
When it comes to these tutorials and kits, they are for all abilities. Allowing you to make your project as difficult, or intricate as you like. Keep it simple if you are just starting and build your skills. But once you have one project under your crafty belt there will be no stopping you. However, be warned, it is a highly addictive craft so be prepared to loose hours, maybe even days to this amazing hobby.
WANT SOMETHING LESS SEASONAL?
Just pop over to the home page HERE and take your pick from the drop down menus. You will find this blog is packed to the rafters with free needle felting tutorials, from learning basic shapes to more advanced projects. There are even free patterns and downloads for you to try.
BE A VIP! It’s completely free and you will receive a free, super easy, needle felting pattern, lifetime discount code, exclusive early access to new product launches and promotions, as well as notification of new tutorials and live needle felting workshops.
So, what are you waiting for? It’s time to get cosy with crafts so just grab your wool, felting needles, a big dose of enthusiasm, and maybe a glass of something nice. Cheers and happy festive felting!
Learn how To Needle Felt With Wire – Easy step by step guide
Welcome to The Felt Hub with Lincolnshire Fenn Crafts, here to feed your passion for needle felting! This easy guide to using wire for needle felting will give you a god grasp of what wire to use, and when. From realistic horns, using only wool and a pipe cleaner, to full fox armature.
FREE DOWNLOAD
Links for free download, video tutorials, and felting wire are at the bottom of the post.
YOU DON’T HAVE TO USE WIRE TO BE GOOD AT NEEDLE FELTING
It may seem an odd place to start but it is important to know that many needle felters, including myself, rarely use a full wire armature. Many new needle felters – mistakenly – think that using wire means you are better at needle felting. This is not the case at all, and the truth is, most needle felting projects don’t need it. In fact, the trustee wooden BBQ skewer can completely change the finished look and stability of your needle felting projects, without the need for any wire. Just check out my Parsley Hare needle felting tutorial on YouTube to see how amazing this tool really is.
NEVER BE WITHOUT A WOODEN BBQ SKEWER
The humble wooden BBQ skewer is in my top 3 needle felting tools. It enables you to quickly, and easily create firm needle parts for your project, without the need for wire. Using one of these will change the way you needle felt. Find out more HERE
PIPE CLEANERS CAN BE YOUR QUICK FIX FRIEND
A BBQ skewer wont work for everything though and a pipe cleaner, or two, makes it possible to add some really clever touches to your project. Especially tails and horns, flower stems, or to stop your legs doing the Fandango every time you try to get them to stand, or when your project is top heavy; why do I feel like I am talking about myself?
ADD STABILITY AND POSEABILITY
Using wire for your needle felting projects will allow you to pose your animal and add more stability. It can be used for just a tail, the legs, neck, or the whole project.
TINY FINGERS, TOES, PAWS, AND CLAWS
This requires a much finer wire and the paper covered steel wire in your pack is just the job. No need for wax, and the wool sticks well to the paper, allowing you to get those delicate details. It also works well for super thin bird’s legs and claws.
Wire gauge refers to the physical size of the wire; the smaller the wire gauge number, the larger/thicker the wire diameter.
METAL TYPES
Whilst thicker is usually stronger, the type of metal affects its flexibility. Working on a like for like gauge size, Aluminium is the softest and most flexible, copper a little stronger, and steel (the paper covered wire) is stronger still.
GOOD OLD GARDEN WIRE
The plastic covered garden wire is a great substitute if that’s what you have lying around and can’t wait to try needle felting with wire. The plastic is also quite ‘sticky’ so holds the wool well.
12 GAUGE ALUMINIUM ARMATURE WIRE: 2.00mm
Ideal for medium to large lightweight sculptures. Strong but still easily shaped by hand, and with pliers.
Ideal for medium lightweight sculptures. Strong but still easily shaped by hand, and with pliers. Pipe cleaners can be wrapped around the armature so the wool sticks and does not slip and slide.
20 GAUGE ALUMINIUM ARMATURE WIRE: 0.8mm x 10 metres
Great for smaller projects. A finer wire that can be easily shaped by hand. Pipe cleaners can be wrapped around the armature so the wool sticks and does not slip and slide.
STEEL 0.5mm PAPER COVERED WIRE (approx. 26 gauge)
Ideal for tiny fingers, toes, and claws. Wool sticks well to the paper so you can keep your limbs, hands, and toes as small as possible.
STEEL 1mm PAPER COVERED WIRE (approx. 18 gauge)
A very strong paper covered wire that is ideal for projects that are heavier, or taller, or top heavy.
PIPE CLEANERS
Where would we be without the old faithful pipe cleaners which are perfect for small, lightweight armatures, and especially useful for wrapping around wire armatures so that the wool sticks. Also adds extra strength and stability to neck, back, and limbs, whilst allowing you to felt smaller feet, toes, hands, and claws.
It’s perfect for quick horns and tails, or if you just want part of your project to be poseable or have more stability. Cotton covered pipe cleaners are all pretty much the same with regards to flexibility, unless you opt for a slightly stiffer pipe cleaner.
TOP TIP:DON’T GET HUNG UP ON THE NUMBERS
It really doesn’t matter the size of the wire, as long as it works for your project. It is also very much trial, error, personal preference, and practice.
You will find lots in The Felt Hub on YouTube. Just look for the NEEDLE FELTING WITH WIREplaylist.
DON’T BE TOO AMBITIOUS
Start with a small simple project, such as horns or tails, and legs. Get used to wrapping the wool and working around the wire before trying tiny fingers and toes. Even the most competent of needle felters usually has a little sigh before starting on those, and it takes practice to get them right, lots of practice, so be patient. Each time you try those tiny paws and claws you will get better.
ALWAYS LEARN THE BASICS OF NEEDLE FELTING FIRST
This is so important, and I can’t tell you the number of people I have seen give up because they have started on a complicated armature project before even using a felting needle for the first time. You have to walk before you run but the basics are quick and easy to learn.
SIMPLICITY CAN BRING OUT THE BEST IN YOUR PROJECTS
The mouse and cat pictured have thin wire in their legs and tail. It is super simple but adds an extra special touch. If in doubt, add a scarf as you can’t go wrong with one of those.
JOIN THE VIP FELT CLUB AND GET YOUR FREE DOWNLOAD HERE
Easy template to create an armature for your fox or dog. Making an armature is easy, with the right technique, and you can use almost any flexible wire, or pipe cleaners you already have. This simple template will make sure you get the proportions of your needle felted fox, or dog, right every time.
Exclusive free downloadsGet your proportions right every time
FILL YOUR HOME WITH HANDMADE NEEDLE FELTED DECORATIONS
As soon as Autumn arrives I am already full-blown, pumpkin spice latte sweater dresses and jumper mode. It is my absolute favourite time of year as we start to hibernate and get really creative, filling our homes with cosy homemade fall and autumn décor! Without doubt, nothing says it better than pumpkins filling the rooms of your home, especially the ones you have made yourself, and there is no better time than now to grab a cuppa, and start creating with me.
MAKE A NEEDLE FELTED GNUMPKIN WITH ME
Make time: 90 minutes (20 minutes for the pumpkin)
It is full on pumpkin season, or should I say Gnumpkin season. Basically, it is a pumpkin, gnome hybrid but, and I am sure you will agree, they are a match made in heaven. It is my absolute favourite needle felting project at the moment, and I love it more because it can stay up as part of your DIY Christmas décor. This one has a full on Autumnal flavour but I am already making one in cool winter colours.
NO CRAFT OR DRAWING SKILLS NEEDED
This super easy needle felting tutorial will have you creating your own needle felted Gnumpkin in no time at all! Making needle felting easy is what it is all about, and you don’t need any craft or drawing skills. This step by step needle felting tutorial will help build your creative confidence, whilst teaching you all the needle felting basics, and no sewing, I promise! My easy techniques tips and hacks will have you felting in no time!
DO YOU NEED THE WOOL OR FELTING KIT?
If you have just started needle felting, kits are an especially great way to get started so you can get a real feel for a new craft. In addition to this, you are only spending a small amount to get going. The website is full of inspiring kits and inspiration for every ability.
The pumpkins alone are really fabulous but let’s take it up a notch and turn it into this super stylish, Gnumpkin. In addition, the full video tutorial is at the bottom of the page – my easy step, by step, felt along with me guide. I had so much fun designing and making these, and I know you are going to love it just as much!
NEEDLE FELTED PUMPKIN
This forms the body of the gnome and is one of the easiest ever needle felting projects; you can make one of these in just 20 minutes, even complete beginners. Scroll to the bottom of the page for the video tutorial.
MAKE THE PUMPKIN BODY FIRST
LET’S GET STARTED – YOU WILL NEED:
Carded needle felting wool and wool tops – Felting needle – Felting mat – Wooden BBQ skewer or similar; this makes creating shapes so much easier.
1 Lay a handful of core wool on your felting mat and create a rough bread roll shape with your hands. With your free hand start to felt with your needle.
2 Continue the process until your wool retains its size and shape. TIP: It needs to be secure but very soft.
TIME TO ADD THE CARDED WOOL BATTING
3 Sit your shape on top of your piece of wool batting and start to wrap the batting sheet around it, pulling towards the centre of, what will be, the bottom of your pumpkin.
4 Felt the batting into the centre of the wool until it holds. Continue the process until all the core wool is covered and pull away any excess. Tip: White patches are fine as they add contrast
5 Pumpkin ready for shaping, smooth side up.
6 Using your felting needle ‘draw’ a clearly defined line around the entire pumpkin, starting from middle centre and finishing where your line started.
7 Repeat until your pumpkin is divided into eight sections.
8 Take a long, thin piece of contrasting wool top and felt securely into the lines you have just created. Again, work from centre top and finish where you started, leaving any loose strands. TIP: Any loose strands can be trimmed for neatness, but also look good as decoration. Your pumpkin is ready. Time to make a Gnumpkin.
MAKING THE PERFECT GNOME HAT
I tried a few techniques before deciding which one would give me the best result in the most simple way. I found using the trustee wooden skewer allowed me to create the perfect cone shape that didn’t flop around. The needle felted acorn is the perfect finishing touch and only takes minutes to make.
WATCH THE VIDEO TUTORIALS BELOW
GNUMPKIN VIDEO TUTORIAL
PUMPKIN VIDEO TUTORIAL
ACORN VIDEO TUTORIAL
Last but not least, learn how to add a super seasonal acorn to your Gnumpkin hat; the cherry on the cake so to speak.
Save to your Pinterest board for a daily dose of Pinspiration.
DO YOU LOVE A CREATIVE COMMUNITY? JOIN THE FELT HUB ON FACEBOOK
Join me on Facebook. It’s completely free and you will have access to live workshops, free patterns, downloads, and so many more resources, all in one place. A group created inspire, nurture, and develop your needle felting confidence (whatever level you are at), in a more private space.
This is one of the easiest needle felting projects you can make. These gorgeous needle felted pumpkins are utterly addictive and make for some really show stopping Autumn/Fall décor! Imagine having these plump beauties dotted around the house, made into garlands, or given as gifts to only your best friends.
HAVE A PUMPKIN CRAFT PARTY
They are so much fun and so easy, why not have a craft party and needle felt the afternoon away. Imagine how many of these you could make in just a couple of hours, and more fun than you can shake a witches broomstick at.
VIDEO TUTORIAL
You will find my step by step video tutorials at the bottom of this page Make time: 20 minutes
1 Roll a small handful of core wool into a very rough ball and felt to hold in place. This will only take a minute as you need to keep it soft; this is what helps create the pumpkin shape.
2 Wrap a thin piece of carded batting around the core wool and felt at the base.
TOP TIP: Don’t cover up any patches as this will enhance the finished look once you add a second layer
3 Continue to felt the wool batting towards the centre and pull away any excess. Sit it ‘bottom’ down on your mat and check the shape.
4 Working from the top to the bottom, repeat the previous step with a different colour, making sure it is pulled thin enough for the base layer to show through.
CREATING SEGMENTS
5 Lay a very thin piece of wool top across the centre of your pumpkin and felt to secure. Wrap it quite tightly around your pumpkin and felt the two ends together at the base.
TOP TIP: The base won’t be visible so you can felt really firmly. Pulling it tightly around the pumpkin creates the ‘segments’.
6 Continue as in the previous step until you have eight distinct segments. Because the core was left really soft you now have a very obvious pumpkin shape.
7 Work gently around your pumpkin with your felting needle and tidy up any loose, untidy, or lumpy sections. It needs to look good from all sides, but don’t worry too much about the base as it won’t be seen.
8 Create a stem for your pumpkin
1 Blend a little wool together2 Roll firmly and felt into a rough stem shape, keeping the end loose3 Roll firmly in your hands to firm and shape4 Continue to felt, flatten the top, and narrow the base
9 Felt the loose wool (at the narrow base) into the centre of your pumpkin. feel free to add any embellishments. I have added a lovely crochet leaf which really finishes it off. You could also add curly locks and different fibres, or acorns.
I hope you really loved this tutorial. For more pumpkin tutorials click HERE If you want to felt alongside me, workshop style, just click on the video links below.
Yes, it’s back – the pumpkin edit is here! Autumn and Fall is the time when we really start to get stuck into or craft activities again, and there’s no better place to start than my super easy tutorials, ‘How To Make DIY Needle Felted Pumpkins – Easy Autumn Crafts’.
From wool to needle felted pumpkin in just 30 minutes
Watch the tutorial below, or order the needle felting kit form the WEBSITE or ETSY
This is a super easy needle felting kit with a full, step by step, hold your hand video tutorial so you can felt along with me workshop style. These gorgeous needle felted pumpkins are utterly addictive and make for some really show stopping Autumn/Fall décor! If you order the kit you have the option to add the gorgeous crochet leaves that I bagged from another fabulous handmade maker.
Wool looks great blended for different colours and effects. Video tutorial is suitable for complete beginners to needle felting. Ideal as décor, gifts, garlands or for seasonal markets.
Watch the tutorial below, or order a Winter Wonderland needle felting kit form the WEBSITE or ETSY
Pumpkins are most definitely not just for Christmas and, with my Winter Wonderland pumpkins you can keep them up right through to the new year.
They are cool, wintry, glamourous, and look like they came straight out of a Disney movie. They are also one of my most popular Autumn craft kits, and why wouldn’t they be?
WATCH VIDEO TUTORIAL
FIRE AND ICE NEEDLE FELTED PUMPKIN – MORE GLAMOUROUS THAN AN EPISODE OF DYNASTY
Make a seasonal statement this year and create a bold and glamorous, full size ‘Fire And Ice’ pumpkin.
MAKE TIME: 1 hour
Your autumn and fall handmade décor just got super stylish.
YOU WILL NEED:
Core wool – enough for full size pumpkin, approximately 30g
Carded red wool – 15g
Wool tops – 5g
Silk fibres and silk throwsters waste
Felting needle – 38 star is a good all rounder
Felting mat
Watch the tutorial below, or order the needle felting kit form the WEBSITE or ETSY
Totally unique, your autumn and fall handmade décor just got super stylish. Watch the needle felting tutorial below and can create your own ‘Fire And Ice’ full size pumpkin in just 30 easy minutes.
This one wouldn’t look out of place in a Homes And Gardens feature and, as always, I have carefully selected the wool and fibres and, for a touch of seasonal glamour, it is topped with fiery strung beads.
WATCH VIDEO TUTORIAL
EASY DIY AUTUMN WREATH
In just two hours you will have your own beautiful DIY wreath. You can adapt and change the colours, or go for pastels which look gorgeous. Whatever colours you decide on, you will have a beautiful seasonal arrangement that is unique and looks like you have just bought it from a boutique craft shop. You could even create a beautiful autumn/fall garland with pumpkins and acorns, to finish the look.
MAKE TIME: 2 hours
YOU WILL NEED:
Core wool – 30g
Carded wool in seasonal colours – 5g of each
Wool tops – 5g of each
Vine wreath
Acorn caps
Felting needle – 38 star is a good all rounder
Felting mat
Wooden BBQ skewer
Hessian ribbon
Watch the tutorial below, or order the needle felting kit form the WEBSITE or ETSY
Create stylish autumn/fall décor with this beautiful DIY needle felting kit, which is incredibly easy to make and an ideal needle felting project for any ability. Full written instructions plus a video tutorial will make this project a breeze, even for the most nervous of beginners.
It’s perfect for you if you’re looking for an exciting new creative outlet to bring some color into your life! With easy instructions, step-by-step video tutorial, and plenty of supplies, anyone can create their own beautiful Autumn wreath in just a couple of hours. Why not add an acorn garland for that extra touch of handmade seasonal creativity and, with my easy needle felting techniques, each acorn only takes a few minutes to make.
WATCH VIDEO TUTORIAL
TOTALLY TRADITIONAL DIY PUMPKINS
MAKE TIME: 30 minutes
YOU WILL NEED:
Core wool – 10g for medium pumpkin
Carded orange wool – 10g
Wool tops – 5g
Felting needle – 38 star is a good all rounder
Felting mat
If totally traditional pumpkins are your thing then these are ideal. It is one of my first pumpkin tutorials and is as popular as ever. As with all of my DIY pumpkins, it is a super easy, super fast, and fun project.
Watch the tutorial below, or order a Winter Wonderland needle felting kit form the WEBSITE or ETSY
Once you have made one you won’t be able to resist making another, then another… Soon you will be buried under a big pile of pumpkins and wondering if you have enough friends, and family to give them to. Watch the tutorial below, or order the needle felting kit form the WEBSITE or ETSY
Learn how to needle felt a picture and create your own stunning 2D needle felted Cornish seascape, bursting with colour and character. Video tutorial links are at the bottom of this post and this beautiful project is suitable for beginners, and experienced needle felters, taking around eight hours to complete. I have carefully selected all the materials, wool, and fibres to give you the best possible outcome for your project, so if you are working from my Needle Felting Kit everything you need is already there. That also includes to linen, printed design and carbon paper to trace it onto your fabric, ready to start needle felting.
VIDEO TUTORIALS ARE AT THE BOTTOM OF THE POST
If you haven’t tried needle felted pictures before, I know you are going to love this design. It was a joy to create and the bold colours, and design, really sing. Adding the cheeky three dimensional Seagulls really brings it to life, as do the rolling waves with the gorgeous silk strands. The result is a mix of Cornish impressionism meets Balamory, and my love of the sea.
WHAT YOU WILL NEED/CONTENTS
If you are working from the kit, everything you need is in your box. If you are working from the pattern, and your own supplies, you will need:
Approximately 40g of mixed wool colours. I have used approximately 18 different colours: a mix of carded wool, wool tops, silk blends, and silk throwsters waste.
Carbon paper for tracing the design but you can copy directly onto the fabric
Frame, driftwood, or similar to display. It can also be mounted onto card using double sided tape
HOW TO NEEDLE FELT: THE BASICS
Caution: This activity is for adults and older children – 12 years and older – and then only with strict adult guidance and supervision due to the very sharp needles. Do not allow children to attempt this project alone!
HOW TO USE YOUR FELTING NEEDLE?
Felt is made using the barbed needles and repeatedly and by carefully stabbing into the wool fleece. This will tangle the fibres together until the wool becomes firm, and, following the instructions, create your own needle felted project.
Before you start you project it is important to know a few basics about needle felting but equally important is that this is YOUR creation. You may decide to make changes. BRILLIANT! Make it your own. If you make a mistake, then remove it by gently tugging with a standard dress pin and try again. Most importantly, be patient and enjoy this gorgeous project. Take your time and remember “the devil is in the detail” so tempting though it is, don’t rush when you are getting near the end of your project. Sit back and decide on your finishing touches. Make it simple, quirky, or as detailed as you like…
You need to take extra precautions to watch your fingers because, as you hold and turn your project, there is a greater chance of poking through the wool right into your finger; use finger guards if this helps.
Use the foam pad wherever possible and remember to always poke your needle in a straight line, no matter the angle, so as not to break your needle.
The finished project will be unique to you so feel free to use your imagination. Be patient as these lovely creations deserve the time they take to make, and you will quickly get used to the needle felting process. Once you have finished this project there will be no stopping you!
Upon completion sit back, admire, and tell your friends and family “I did that!”
PLEASE REMEMBER THAT THESE PROJECTS ARE COLLECTABLES, NOT TOYS! KEEP THEM AWAY FROM PETSAND SMALL CHILDREN!
3 Feel free to add your own details and use your own artistic license for the finishing touches.
4 ENJOY! If this is your first needle felting project allow yourself to be a beginner and build your creative confidence. It’s not a sprint to the finish and you are going to learn some fabulous new skills. Hopefully, this will be just the start of your needle felting journey.
5VIDEO TUTORIALS – You will find so many helpful tutorials on my YouTube channel, from nervous beginners to intermediate level. Have a look at the playlists and find what is most suitable for you on the: Lincolnshire Fenn Crafts YouTube channel
ABOUT THIS PROJECT
Skill level: Beginners to confident needle felters
Make time: 6 to 8 hours
STYLE
Think Cornish coastline meets Balamory, which was actually set in Tobermory. Full of vibrant colours and details, I approached it like a paint by numbers, colour between the lines, sort of project. It is beautifully simple and, apart from the seagulls and some sea detail, this project is completely flat felted. It is not difficult and is soothingly repetitive. You can pick it up whenever you feel like it, have a break and do some more.
TECHNIQUE
As the technique for most of the project is the same, video tutorials and the pattern will guide you through the different sections, from tracing the picture, using the fabric, type of needles to use, laying down the fibres, outlining the details, and building up some of the areas to add dimension, detail, and contrast.
ADD YOUR OWN FLAIR
If you are a confident crafter, or this isn’t your first needle felting gig, feel free to blend your own colours, add fabric scraps, beads, and your own details.
IS IT YOUR FIRST TIME FELTING ON LINEN?
If so, it will feel quite strange for the first ten minutes, but you will quickly get used to the different work surface. This is also a popular choice for flat felted animal portraits.
WHY LINEN?
I love experimenting with different fabrics for flat needle felting and, there are several reasons why linen/Calico works really well for this project
It needs to be a close weave linen/Calico so that your needle doesn’t damage the fabric or create holes in the weave.
Perfect for tracing your image onto in detail, which you just can’t do with a wool felt base.
It is also a great base for this project as you want the fibres to lay as flat as possible, with no distortion, allowing for tiny details to be added without getting lost.
THE WOOL
If you are working from the kit you will find mostly carded wool and a few wool tops. In addition there are some beautiful silk fibres, and wool silk blends which add great contrast and interest to the finished piece.
USING YOUR OWN WOOL STASH
Almost any felting wool can be used with ease for this project. Just grab as many bright and bold colours you can from your wool stash.
WHAT FELTING NEEDLES DO I NEED?
The entire project can be completed with one needle. I found the 38 star needle to be my favourite for this project, and I also used the 7 needle punch tool but removed 2 of the needles as I found it penetrated the foam mat surface more easily.
You can also use a needle felting pen tool, or a wooden multi tool with 3 needles. All the needles and tools can be found in the tools section on the Lincolnshire Fenn Crafts website.
WHAT FELTING MAT SHOULD I USE?
I have used a large foam mat – 30cm x 30cm – with a wool felt topper to protect it. However, any felting mat will do, including a soft wool mat, or hessian mat.
ALWAYS USE A PROTECTIVE TOPPER!
Whatever surface you are working on, I always advise using a topper to protect your mat. Anything from a wool/cotton blend to 100% wool is suitable. It will stop your work from sticking to your felting mat and significantly extend its working life, saving you money and reducing landfill waste. Your wool topper can be sustainably and easily replaced.
LIFT YOUR WORK REGULARLY FROM THE FELTING MAT
This is especially important when flat needle felting or needle felting a picture. If you don’t lift your work regularly you will find it much harder to peel from your mat. It is normal for your work to stick but this is reduced if you keep moving it, especially when using a multi needle tool.
YOU WON’T GET IT WRONG
Because there is no right and wrong when it comes to this project, and adding your own preferences and details. It is more important that you work on your technique to give you the best possible result. Take your time and make sure to take regular breaks. I would recommend you complete this project in three or more sittings.
WATCH THE VIDEO TUTORIALS
I love questions so please feel free to message me at:
Welcome to The Felt Hub, here to feed your passion for needle felting! This easy felting tutorial will show how to needle felt with wire, and create realistic needle felted horns, using only wool and a pipe cleaner. It’s easy, fun, and a great way of getting more detail and dimension into your needle felting projects.
A GREAT TUTORIAL FOR BEGINNERS, TO CONFIDENT NEEDLE FELTERS
Need help to start needle felting, or improve your existing needle felting skills? My easy techniques, tips, and hacks will have you felting in no time, showing you how to needle felt with wire and create these realistic animal horns. The design on these animal horns would often need to be done with clay, but I’ve found a way that’s much easier and no waiting for clay to dry. It is also lighter than clay, so avoids any stability issues, plus you can pose, and move them to any shape and angle you want. All you need is a little felting wool and a pipe cleaner and you can make your own realistic horns in no time at all.
Scroll down for the tutorials or read on if you are brand new to needle felting.
JUST LEARNING TO NEEDLE FELT?
Click to get started with easy tutorials
I have been teaching needle felting, with absolute passion, since 2014 and I’m here to help! From the novice who has never needle felt before, all the way up through an experienced crafter – I have tutorials for every skill level. You can start by checking out myHOW TO START NEEDLE FELTINGguide or if you’re looking for some simple basic shapes to get you started check out THE BASIC SHAPESsection on this blog I get really excited about teaching people how easy and fun it is to create beautiful items with wool and a felting needle and, my hope is that you will feel empowered after learning these new skills to try lots more craft projects.
Just saying… Once you get started you may lose hours, even days. However, it is one of the best rabbit holes you can fall down!
Creating realistic horns for your needle felted sheep is really quick and easy, and doesn’t require the use of clay or wax. Plus, I always prefer to work with wool whenever I can and found that using wool, rather than clay, allowed me to be more creative with the details.
HEBRIDEAN SHEEP
I have put together a written tutorial, and a video tutorial, for this technique which I have used to make the impressive horns for my needle felted Hebridean Sheep. These sheep are stunning, and many have two sets of horns. They have luscious black coats which turn to shades of black and golden brown in the warmer months. However, you can adapt this needle felting technique for whatever needle felted animal you are making.
You need to take extra precautions to watch your fingers because, as you hold and turn your project, there is a greater chance of poking through the wool right into your finger; use finger guards if this helps. Always use your felting mat to work on.
FELTING NEEDLES WILL BREAK IF NOT USED CORRECTLY
Remember to always poke your needle in a straight line, no matter the angle, so as not to break your needle.
Both horns will be made as one piece on one pipe cleaner; this technique means that you won’t need to make two separate horns that would need to poked, then be glued into the head. It’s also much simpler and quicker.
1 Mark a 2cm gap in the centre of your pipe cleaner and do not attach any wool to this area. It will make attaching the ears to the head much easier.
2 Wrap a little around the centre of the pipe cleaner and felt with your needle two or three times, until it holds.
3-4 Keeping your fingers close to the pipe cleaner (so the wool doesn’t pull away), start to wrap the wool tightly around the pipe cleaner. TOP TIP: Keep the wool flat between your thumb and finger so the wool doesn’t twist and become lumpy and uneven
5-6 Continue wrapping until you get close to the end of the pipe cleaner. IMPORTANT! Keep the overhang at the end of the pipe cleaner to a minimum as this will be the tip of the horn, and will be the narrowest part.
7 Wrap the wool back down to where you started, felting as you go, and thicken at the base.
8 Continue to shape, aiming for approximately 1cm diameter at the base to just a couple of mms at the tip. Make sure it is felted firmly and smooth by using your needle at a diagonal angle.
9-11 Firm the end by rolling in the palm of your hand with the tip of your finger. Repeat for the other horn.
12 Time to add some surface detail.
13 Take a very thin strip of your light carded wool and attach to the base of the horn. TOP TIP: Make sure it is thin enough for the darker brown to show through.
14-16 Turn and wrap along the horn leaving small gaps as you go. Felt very gently too secure.
18 Your horns are now complete and ready to attach to your project.
The gap you left in the middle of the pipe cleaner allows you to attach to the head without any lumps and bumps. The overall effect looks as if the horns are actually part of the head, instead of just plonked on top.
VIDEO TUTORIAL
If you are more of a visual learner you can felt alongside me in The Felt Hub on YouTube, which is packed with needle felting video tutorials for every skill level!
CONCLUSION
That’s it! You now know how to create a needle felted animal horns with wire. This is a great technique to use if you want to add some extra realism and detail to your animals, and no need for any clay, wax, or tricky techniques. Just beautiful natural wool, a felting needle, and enthusiasm! I can’t wait to see what you create! In the meantime, be sure to check out more of my TUTORIALS for other simple and exciting ways to add details to your needle felted animals. Have you tried adding wire before? Let me know in the comments below?
Hedgehogs are a much rarer sight in our gardens than they used to be and I remember my dad getting my 11 year old self, and younger brother out of bed at midnight to see a visiting hedgehog in our garden. What a treat and such cherished memories! Whilst you may not see the real thing very often, at least you can have your own handmade hoglet to keep you company all year round. So, I present my needle felted version of our beloved hedgehog and how using a reverse felting needle creates fabulous spikey details.
Did You Know?
Hedgehogs are lactose intolerant so bread and milk is not good for them! Find out what they really love to eat on The Woodland Trust blog at the bottom of this post.
Skill level: Complete beginners and beyond Make time: 1 hour
Time to settle down with creativity, a cuppa, maybe a slice of cake, and join me for a full tutorial teaching you new needle felting tips, tricks and techniques.
If you want to encourage hedgehogs in your own garden here are a few guidelines from James Martin, content editor of the WOODLAND TRUST
What do hedgehogs eat, and how to feed them?
Evidence suggests this decline is most severe in rural areas and hedgehogs are actually faring better in our towns and villages than the countryside. This means gardens can be an important refuge for the species. One way you can help any visiting hogs is to provide some food. But what do hedgehogs eat and what should you feed them?
FOOD FIT FOR A HEDGEHOG
Insects and other invertebrates are the hedgehog’s main natural food source. A typical diet includes:
Beetles
Earwigs
Caterpillars
Earthworms
Millipedes
Fly larvae
What to feed hedgehogs?
As opportunistic eaters, hedgehogs will readily consume food left out in your garden. The best foods to provide are:
Meat-based cat or dog food
Specially-made hedgehog food
Cat biscuits
As well as providing food, you can put out a shallow dish of water to ensure any visiting hogs stay hydrated.
What not to feed hedgehogs
The following foods should be avoided when feeding hedgehogs:
Bread and milk (hogs are lactose intolerant so milk can make them ill. Bread has little nutritional value)
Mealworms (thought to cause health problems when eaten in large quantities)
So don’t be nervous. Starting a new craft can be exciting but also a little confusing. Needle felting is no different and the array of wool, tools and accessories can send you into a confusing tailspin.
The truth is, you don’t need a lot to get started with needle felting, and it is also a budget friendly hobby. That is until you become addicted, which you will, and then no amount of felting wool will ever be enough!
That’s why I always recommend a needle felting starter kit to get you going, so you can test the needle felting waters. They are inexpensive and have absolutely everything you need to complete each project from start to finish. It avoids you feeling overwhelmed and helps to build your creative confidence. All you have to do is open the box and add enthusiasm.
MY TOP 5 FELTING KIT RECOMMENDATIONS
Here are my top 5 recommendations for beginners kits. They all come beautifully boxed and are perfect for storing your supplies! No sewing, no tricky patterns and they take just a few hours of your time! They also use our gorgeous British wool, carefully selected for its excellent needle felting properties.
Complete stunner and he knows it! This, along with the Herdwick Sheep, is the most popular beginners kit. It is such fun to make and you can follow the instructions to the letter, or add your own touches. As well as detailed instructions you can felt along on YOUTUBE by following the beginners playlist.
My favourite sheep from the Lake District is an ever popular needle felting kit. Great for building your needle felting confidence, this super kit will soon have you warmed up and ready for your next project. As well as detailed instructions you can felt along on YOUTUBE by following the beginners playlist.
A gorgeous little project that has enough wool to make two of our favourite UK garden birds. A perfect project to create with your bestie or, one for you and one to give away. There is also a great video tutorial HERE showing you how easy it is to create a perfect wing shape without the need for a cookie cutter.
What’s not to love with this design? Even better, you can change the markings to represent your own four legged friend. As well as detailed instructions you can felt along onYOUTUBE by following the beginners playlist.
If you are looking for a home for the wee little fairies and forest dwellers, then this is right up your street. Lot’s of different techniques and a great needle felting kit for beginners. Any self respecting gnome or fairy would be thrilled to have the keys to this house! As well as detailed instructions you can felt along to the video tutorial HERE
WANT TO KNOW MORE ABOUT NEEDLE FELTING?
Join the THE FELT HUB with Lincolnshire Fenn Crafts
When it comes to crafts and wool storage, there is no such thing as a spare room; what an utterly ridiculous concept!? However, the easier it is to access our precious wool the more felting can be done. So, assuming we don’t have an entire house free for wool storage, what is the solution to storing our wool efficiently and safely?
There are three simple but important rules for keeping your wool in the best condition:
Direct sunlight will, over time, bleach the colour out of your wool. A brightly lit room is fine (moths hate the light) as long as your wool is in containers that protect it from UV rays or the containers are facing away from the light. IMPORTANT! Don’t use sealed bags in a warm room because the moisture will build up inside and moisture is also wools enemy.
Much of my wool is in a very brightly lit room (below) but I remove it from the plastic bags and store it in black bins with lids, or open fronted stacking boxes, facing away from the windows. I don’t have any problems with fading wool or moisture (even in the summer) because the air can still circulate. No moth problem either because they hate bright light. For smaller amounts in bright rooms you can use cardboard shoe boxes, craft boxes, drawers, jute bags, etc.
What if you can’t store it in a brightly lit room?
If you are keeping wool in a dark room, drawer or cupboard – and many of us do – make sure they are in airtight containers or bags; this will keep the moths out; if you are concerned about moisture then pillowcases are a great solution or, wrap some kitchen roll or a tea towel around your wool before sealing. Silica gel sachets are also another moisture deterrent. Also, if your wool is stored for long periods, it is good practice to take it out occasionally air it and check for moisture.
Moth Deterrents Without Chemicals
A proactive approach is always best and Lavender and Cedar are good natural deterrents as the smell confuses the moths, throwing them off the scent in the hunt for your precious wool stash. However, neither will kill an infestation and, if the moth eggs are already there you will need to remove and dispose of the contaminated wool. There are hundreds of ‘remedies’ on the internet for getting rid of them but, as with everything, prevention is better than cure. Thankfully, in the nine years I have been using wool I have never had a moth problem (or used Lavender and Cedar) so, hopefully, neither will you.
Storage Ideas
I recently asked my Facebook communityhow they were storing their wool and they had some cracking storage solutions for large, and small amounts of wool which I thought I would share with you.
Jane has inventively stashed her wool in cardboard poster tubes with all the colours cleverly sticking out of each end. Or, if If you want quick access to all your lovely wool, then Lesley’s easy desk set up, using takeaway containers, is just the job. It’s also a great way of ogling your wool stash and thinking about which wool you are going to try next?
Sharon has stored all her lovely wool and locks in these handy compartment boxes. I think I have seen similar in B&Q and Argos? The tool storage aisle is always a great place to look and probably cheaper than the hobby stores. Sock drawer organisers are also a great way to store your wool in a similar way. It’s also a great portable solution so you can take your wool anywhere.
How’s this for super space saving ingenuity? Michelle has come up with a great solution for storing small amounts of wool in these fab jam jars which are the perfect shape for getting as much in a small space as possible. The six sided hexagon means that no space is wasted and is also the very reason that bees use the same pattern in their hives.
Open ended stacking trays are a great solution for storing wool, especially for a business that needs to store a lot of wool in the most efficient way possible. Door tidy’s are also a great way of utilising your space and keeping everything in one place.
Lin has cleverly used plastic shoe storage boxes and labelled each one so she can grab what she needs at a glance, and I love my craft drawers on wheels.
Kathy’s suitcases are an imaginative solution for storing your wool. However, Verity’s cat had other ideas???
I know there are hundreds more storage ideas but I hope this has given you some inspiration for keeping your own wool stash in the best condition possible and, if you are still struggling for space then the only option really is a second home???
If you want regular creative updates from me just sign up below.
Happy felting! x
Want to know more about felting wool? Here’s a great WOOL GUIDE for you.
Helping you create perfectly shaped, firm needle felted projects that a more experienced needle felter would be proud of!
Your ears have pricked up now, haven’t they? Well, I have used ALL the needle felting tools over the years and I still end up using just a handful on a regular basis. However, a few years ago I discovered the magic of the humble BBQ skewer and it changed the way I needle felted?
Now, to some of you this will be old news but to many, especially those new to needle felting, it will become a revelation! A needle felting epiphany of sorts, and you will wonder how you ever managed without it, even though it was sat in your kitchen draw the whole time. Even better, total cost, only a few pence or cents, assuming you bought them as a multi-pack.
The BBQ skewer is, to needle felters what string is to farmers and, once discovered, you will use it as your go to felting tool. It will give you the confidence to try new styles that you may be finding tricky with your current technique. You can also use any wool, be it carded or wool tops.
For instance, the legs , head and body of this fabulous hare (link for tutorial below) have all been made around a BBQ skewer, and not a wire in sight! And, believe me, those legs are long! Wherever possible I like to work without wire so this works well for me. Even when I use wire for animals it is usually just for the legs, and maybe the neck. That said, if you are working much bigger then you will find using wires really helps form and stability.
What this magical wooden stick allows you to do is to create perfect symmetry for your legs in super fast time. They end up really firm so no floppy, saggy legs (not a good look) and no need for wire. Making firm, perfectly shaped heads is a dream and lengthening and tapering the body shape is a breeze.
From hedgehog noses to Christmas trees, gnomes, mushrooms, cactus, bumble bees and bunnies… the list of things you can create is endless, and even the snail shell was made around the skewer. Mind boggled yet?
Make super fast and simple balls, bunnies and bees. Felted balls only take 3 minutes and these little projects are perfect for using scraps of wool. Now it really is boggled isn’t it? 😮
Now go and dig out your BBQ skewers and have some needle felting fun. If you can’t find them they will probably be at the bottom of your kitchen drawer, covered in a sticky substance of unknown origin 🤢
Become a VIP Felt Club member! It’s free and you will receive a free needle felting pattern, lifetime discount code, exclusive early access to new product launches and promotions, as well as notification of new tutorials and live needle felting workshops!