
What Felting Needles Do I Need? Easy Guide
KEEP IT SIMPLE
Here is my quick, easy guide to felting needle sizes and shapes. Size is the most important so don’t get hung up on whether it’s a star, a triangle, or a twisted needle. I am going to give you the short version and what I like to use, as my own personal preferences. I will also tell you about the felting needle tools I couldn’t live without!
This is a very common question, along with WHAT WOOL SHOULD I USE? It can be confusing when you first start needle felting. I prefer the simple approach and advise just one, or two sizes to start with; 38 star is a good all rounder, and 40 triangle for finishing your work. Once you are more confident with your needle felting you can try others if you want to.

WHAT ARE FELTING NEEDLES AND WHAT DO THEY LOOK LIKE?
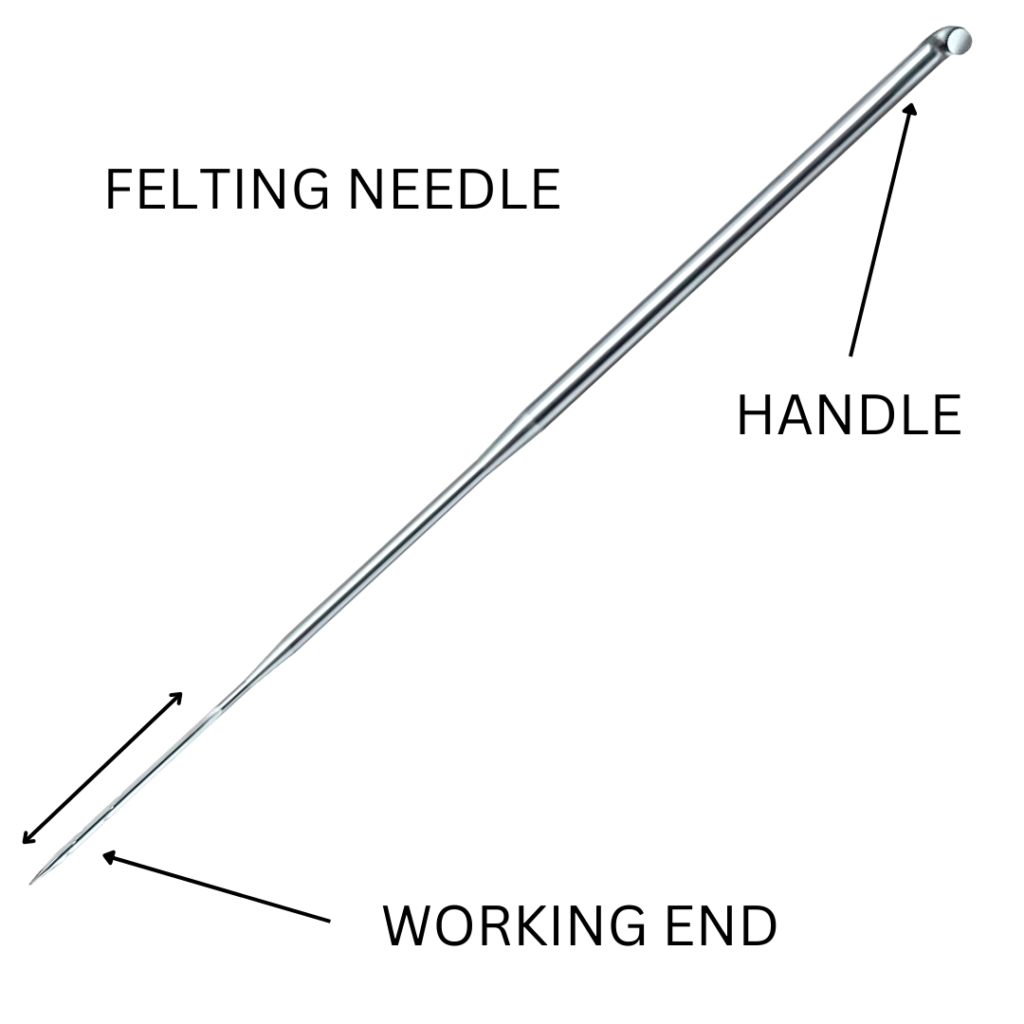
Felting needles are specialized needles that originated from industrial felting machines. They mat and tangle wool fibres together, locking the fibres into place, allowing you to create beautifully simple needle felted shapes, or complicated sculptures. If you have just started needle felting you will enjoy my post on HOW TO USE YOUR NEEDLES WITHOUT BREAKING THEM

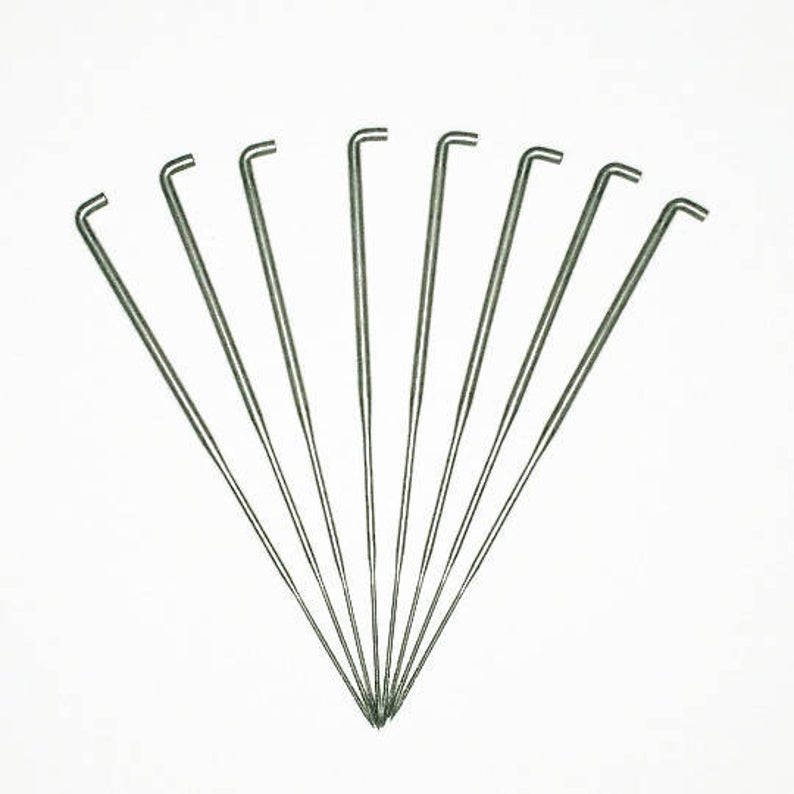
NEEDLE SIZES
The higher the number, the finer – and more easily broken – the needle. There is a huge range of needle sizes for different applications but I have only ever used sizes 36 to 42, and size 38 and 40 are what I use pretty much all of the time.


Tiny barbs on the end of the felting needle tangle up the wool fibres. This enables you to sculpt different shapes and pictures.
FELTING NEEDLE SHAPES


ALWAYS HAVE A GOOD ALL ROUNDER
My go to is the 38 star felting needle, a great all rounder, is pretty robust and can complete needle felting projects from start to finish. I use this needle all the time as I like the four sides for faster felting. However, it is down to personal preference and a 36 is great for getting projects started. Then swap to a 38 as your project becomes more felted.
Top tip: Reduce needle marks by inserting your needle diagonally when finishing/smoothing the top layer. Rolling the body part in your hands (before attaching) is a fast and efficient way of smoothing your piece – your hands are just as important a tool as your needle!


Creating Fine Details And Surface Work
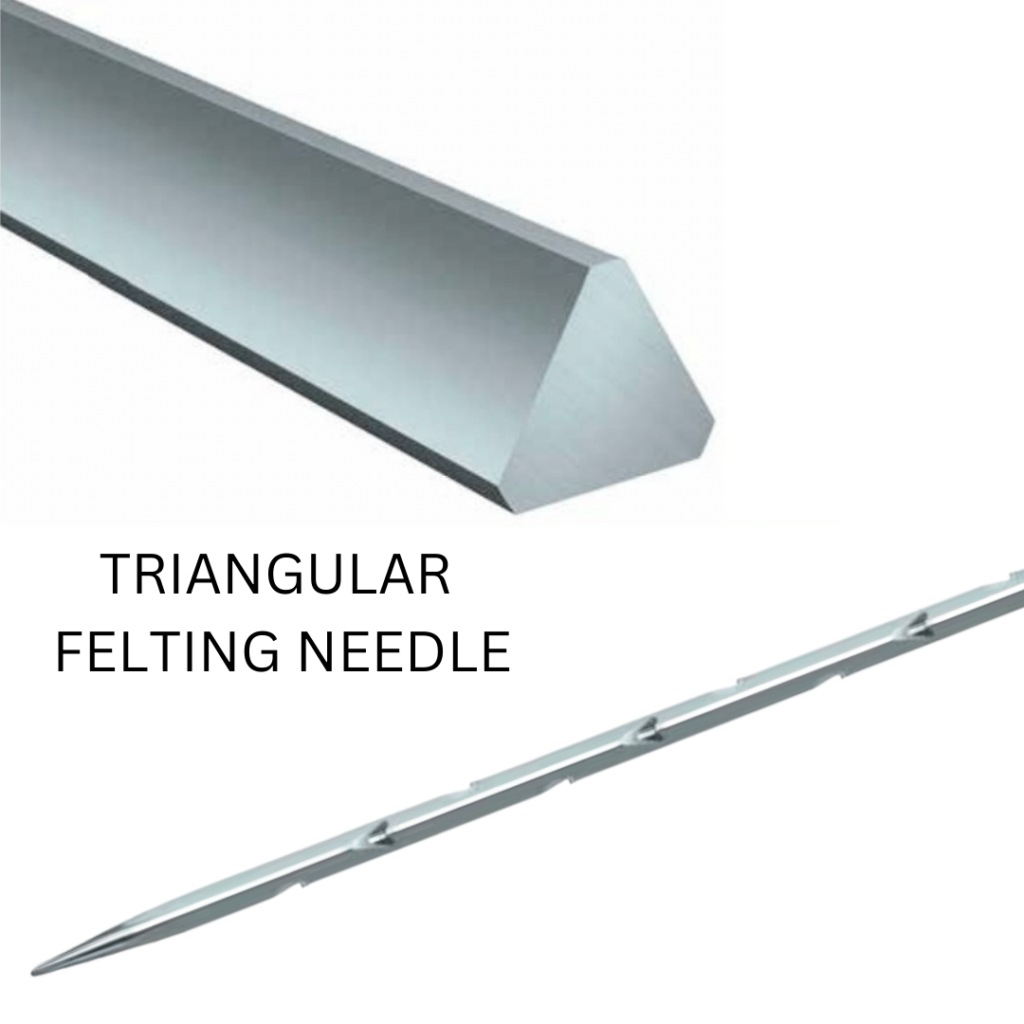
40 TRIANGULAR NEEDLE
This is ideal for much finer detail but bends more easily so don’t be heavy handed with it. I use this when I am finishing delicate eye and nose detail, especially if the head is quite soft and I don’t want to distort the lovely shape I have made. It is also great for reducing needle marks on the top layer. You will notice that this needle is thinner, bends more easily than the 36/38 and is much more prone to breakage if bent too much.
Top tip: Not really suitable for using to needle felt around a wire armature. Make sure you have built the shape first to avoid breaking your needle.
REVERSE FELTING NEEDLE
The barbs of a reverse felting needle go in the opposite direction and pull the felted wool back out. The subtle or dramatic effects you can create are really impressive, and I used mine to ‘rough’ up the top of my moon gazing hare’s head to add character and dimension. I’ think it worked really well and I’m really pleased with the results. The wool is natural Grey Jacob and is one of my favourite wools to needle felt with.
I also use it in my Flamingo needle felting pattern to ‘fluff’ up the body and base of the neck. And it’s also great for use on 3 dimensional cats and dogs.
The size 40 is more subtle but I used the size 32 reverse needle on my needle felted pig and the results are more dramatic. It proved excellent for pulling through the Romanov wool from the centre of the project. This creating dynamic contrast on the top coat.


Video Tutorial – Reverse Felting Needle
TWISTED NEEDLE
I have tried this needle a few times but, to be honest, end up going back to my 40 triangle for fine surface detail. However, its first barb is closer to the tip of the needle so ideal for really delicate surface work, and where getting the smoothest finish possible is top priority. It really is, horses for courses, so if you are ready to try a different needle it give it a go.
MY FAVOURITE FELTING NEEDLE TOOLS
None of the following are necessary but I use them all the time for certain projects and they really help speed up the felting process. Especially useful if you are now a needle felting addict (you know who you are…) and unofficial member of the Lincolnshire Fenn Crafts NFA group, ‘Needle Felters Anonymous’. Hmm, I’m thinking T-shirts and badges…
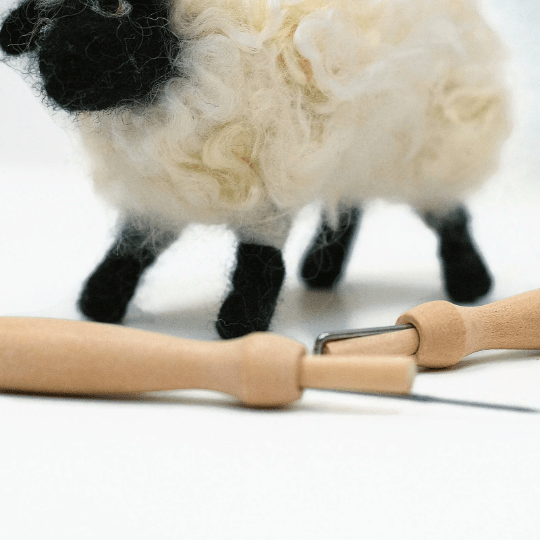
Wooden needle holder (Tulip holder):
Can be bought with 3 or 4 needle holes, uses standard needles (supplied) and needles are removable and interchangeable. My preference is the 3 needle holder (using 38 or 40 triangular or star) because it can be used for starting off your 3D shapes quickly as well as being used for flat felting e.g. big bunny or hare ears.
Top tip: If flat felting, taping two needles together or using a coarser needle, such as a 36 will speed up the process.


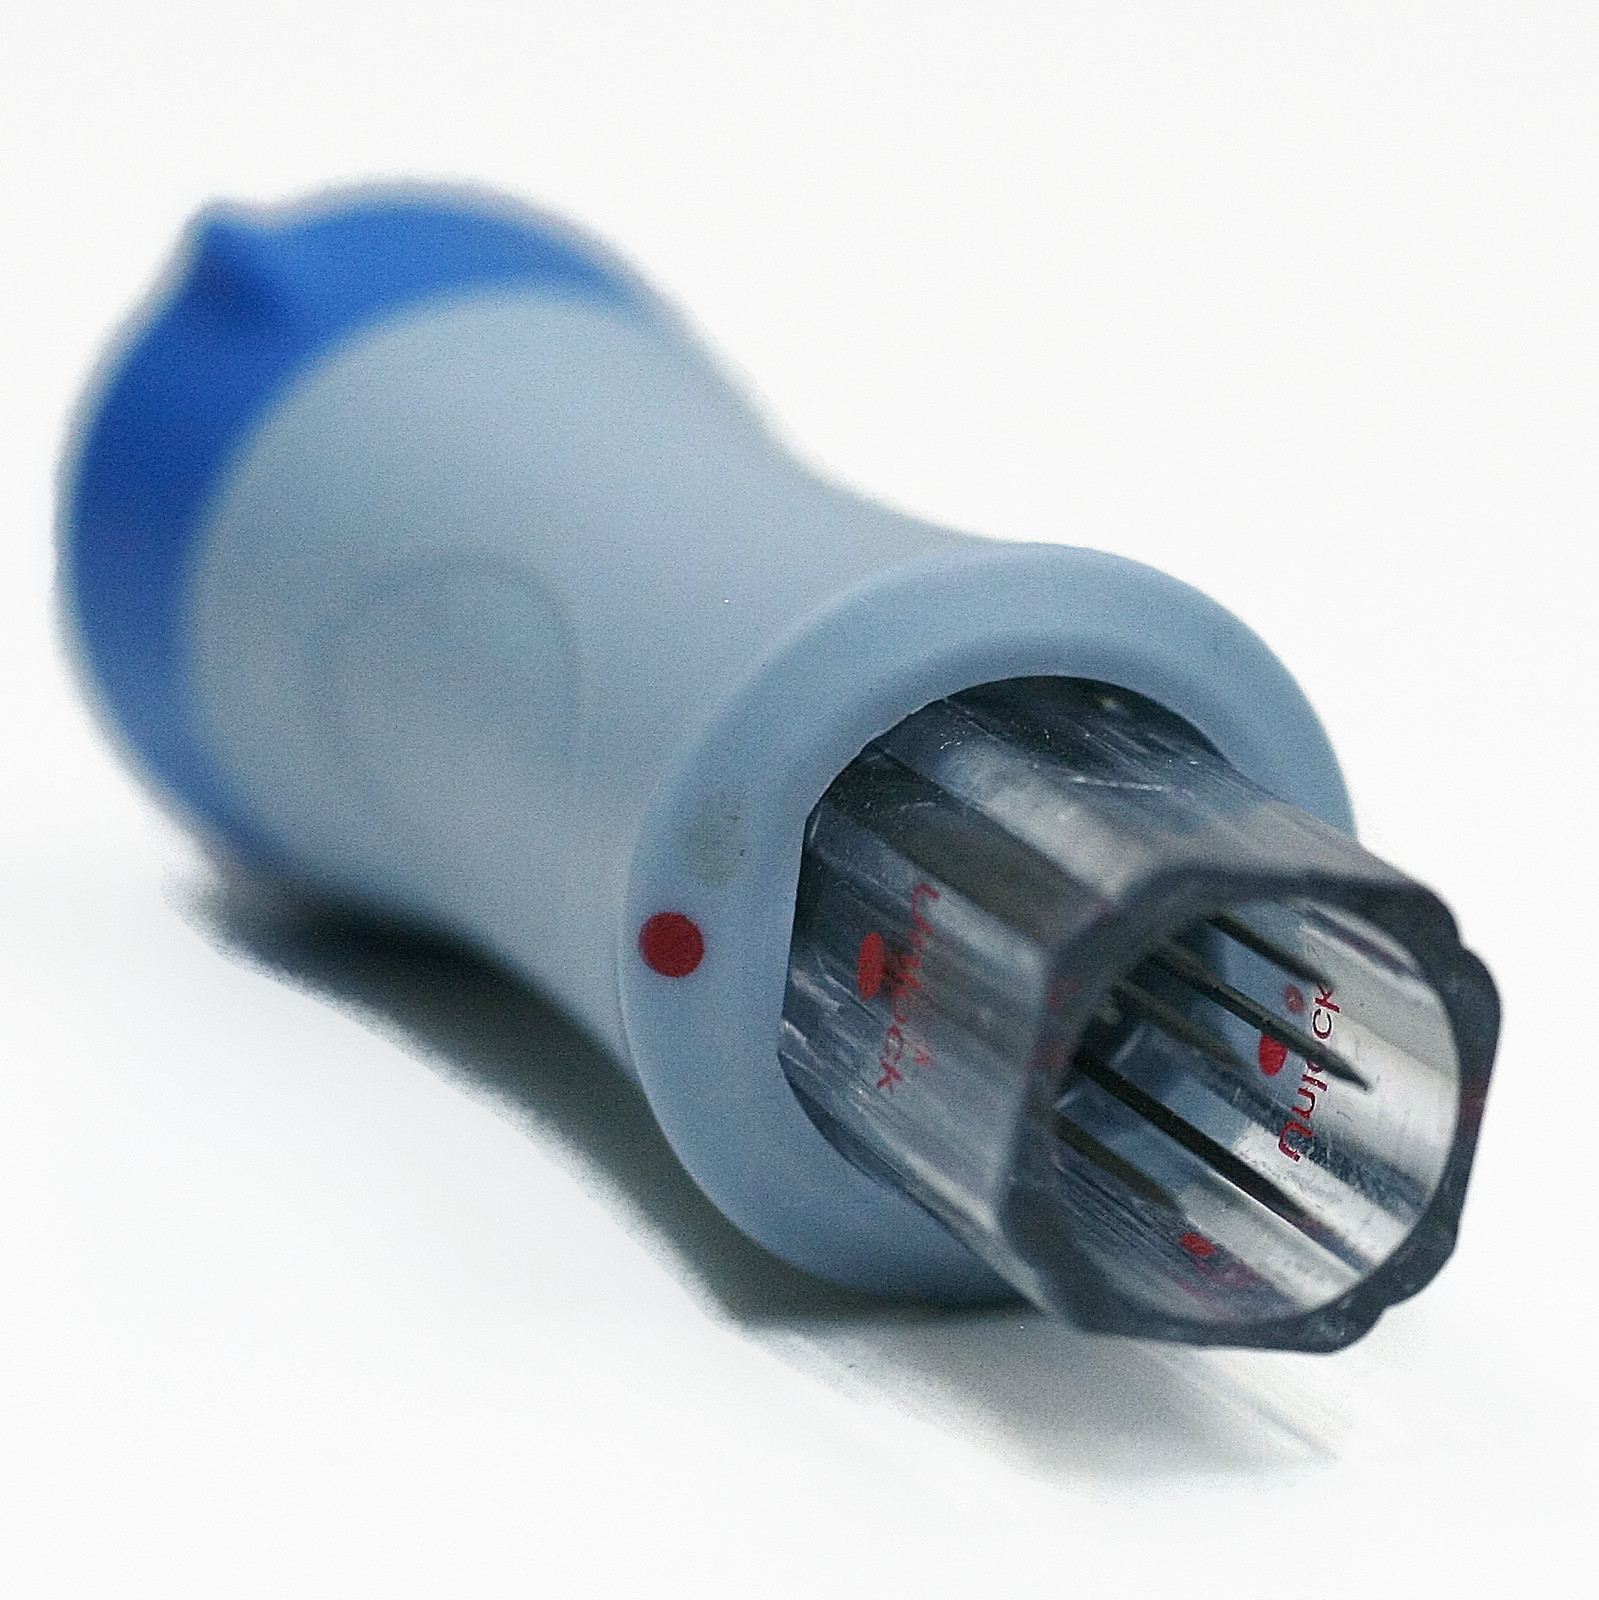
NEEDLE FELTING PEN
A great tool for use with 3 needles when you are needle felting a flat piece such as ears, wings, and pictures, or anything 2 dimensional. It can also be used with a single needle for 3 dimensional objects. Or if you are felting for long periods or have dexterity problems and find felting needles become uncomfortable to hold. It comes supplied with needles which can be changed for different sizes. All needles are replaceable and interchangeable with different sizes.
Save money: You will see these in pink (Clover tool) and blue. The blue is half the price of the pink and the difference…one is from Hong Kong and one is from China?


Multi tool/punch tool
Bring on the big guns! Seven needles (5 if you use the CLOVER TOOL) replaceable and interchangeable, with retractable guard. I can’t tell you how much I use this for flat felting. It’s great for ears, brooches, legs (before they are rolled and shaped), pictures etc. I use this one on my felting rice mat, and it powers throughso many flat felting projects. Especially ears, wings, legs, gnome hats, poppy/flower petals, pictures at a rate of knots! It doesn’t work as well on foam as it tends to bounce if you use more than 3 needles.
Top tip: Ideal for teaching the kids because of the locking, retractable guard and much less prone to breakage.
Save money: Same applies as for the felting pen above


Wooden needle holder
This is very useful if your fingers are sensitive to the thin top of the felting needle. Or if you have mobility issues in your hands, or are felting for long periods.

Best Felting Mat For All Multi Needle Tools
A really popular alternative to foam and completely biodegradable and sustainable. You can put the whole lot in the compost when it eventually wears out. I use it for all of the above as well as my foam. I make my own hessian felting mats and it is super easy to make your own. If you have an old hessian/burlap shopping bag then they work really well. Top Tip: Lay a piece of craft felt or cotton on top of your rice bag to make it last longer.


More Beginner Needle Felting Tutorials
Here are some useful guides and tutorials
- GUIDE TO NEEDLE FELTING WOOL
- 5 THINGS YOU NEED TO START NEEDLE FELTING
- BEGINNERS TUTORIALS
- FREE NEEDLE FELTING PATTERN
Do You Enjoy Working From A Pattern?
Needle felting patterns are an excellent way to begin, and I’ve been designing and creating them since 2014. My patterns include everything you need to get started create a whole range of needle felted characters and projects including hares, dogs, gnomes, mushrooms, cats and so much more. Projects can range from just an hour to as long as six hours, and with over 60 exciting patterns available, there’s definitely something for everyone, regardless of your skill level or personal taste.

Happy creating and please watch those fingers (not Netflix) as it hurts!