How to make your own curls for needle felted sheep

So you have spent hours making your fabulous needle felted sheep, only to realise you don’t have any curls to finish it. Grrrr! Not to worry, just grab a ball of wool, yarn or similar and make your own. It’s really easy and creates a whole new look for your needle felted animals; Scroll down for video tutorial.

It is also very calming and saves you sitting by the post box like this, impatiently waiting for your curly wool to arrive.

VIDEO TUTORIAL

Here is a quick video (part 2) showing you how easy it is. I have used a coarse rug yarn but any yarn with an element of wool in it will do.

Use any yarn you have in your craft box; It is easier to apply if it has some wool content. I have used a coarse rug yarn and a really soft Merino for these two gorgeous sheep.

Create beautiful texture with standard yarn

You will also find out how to add this lush, art yarn (video part 1) to your projects. I used a 40 triangle needle as it is a little easier but a standard (usually a 36 or 38 gauge) will do just fine.

Video part 1 – Art yarn application

Sheep needle felting kits using this fabulous art yarn are available on the Lincolnshire Fenn Crafts website

Happy creating. Sandy x

Sewing Eyes Onto Your Needle Felted Animal

In just five minutes and four easy steps!

Needle felted eyes look great but I also love the sparkle and shine you get from a glass bead. I always find it funny that, when some of my students have spent hours creating their needle felted animal, they say they find sewing on the eyes the hardest part. I think it is because they seem a little bit fiddly but here is a quick way of doing it, in five minutes and four easy steps.

1 Use black thread and needle and sew through the side of the face – where your eyes will sit – and repeat a few times until your thread is secure.

2 Pop your bead onto the tip of your needle and pull it through.

3 Push your needle back through to the other side and pop on your second bead.

4 Repeat the process a few times until you can pull quite firmly on your thread, and both beads are secure. Finish by sewing through the back of the head a and cut the thread.

CLICK HERE FOR MORE BEGINNERS TUTORIALS

CLICK FOR NEEDLE FELTING KITS

Shows how to sew eyes onto needle felted animals

Beads can be used for all your needle felted animals.

CLICK FOR VIDEO TUTORIALS

HAPPY FELTING!

Adding Face Details To Your Needle Felted Animals

One of the trickiest things to do when creating face details is getting the really fine lines for the mouth and nose. It’s something I always spend time on with my workshop students so they don’t feel disappointed with the finishing touches. Practice, practice practice is the answer, a firm base on which to work, and less is more when it comes to the wool. When I say less is more, think even less than that. You only need the tiniest strand of wool to create really impactful details, add in a few simple techniques and you will soon be adding those details with confidence.

Top Tip: If it doesn’t look right don’t try and rectify it. Pull the wool off and start again. I often do this and it takes much less time than trying to fix the problem. Also, preparation is key so make sure the head is firm before starting. If the head is soft and squidgy you aren’t going to get the nice straight lines you want to achieve and your sheep or animal will look like they’ve been on the sauce.

Whatever your design, this technique can be applied to your project in many different ways.

Let’s get started and, if you haven’t made your head yet just click the link for the video tutorial: HOW TO CREATE A BASIC HEAD SHAPE

1 Create an impression of the mouth – Do this by ‘drawing’ the mouth onto the face with your felting needle. ‘Draw’ a V for the nose, a line down the centre and two shallow curves each side. Go over the lines you have drawn until they are clearly visible and defined. This is where your wool is going to sit and makes it so much easier to maintain a nice, even shape.

2 Roll a very, very thin wisp of wool between your fingers to gently mat it together (not vital but it helps). If you don’t think it is thick enough you can go over it again later. However, start with too much and it ends up looking like you have drawn it on with a felt tip. Place it on the top left of the V shape you have created and gently tack it down towards the bottom of the V shape. Top Tip: Make sure the wool is at least twice the length you need as it will be pulled into the face as you felt; you can trim it later.

3 Continue back up the V shape and leave the ends loose.

4 Use another thin strand of wool (longer than you will need) to create the line down the centre. Top Tip: Keep the wool taught with your free hand. This will help create a straight, even line and avoid a drunken grin.

5 Leave all the strands loose until you have completed the mouth.

6 As before, use a very thin strand of wool and felt along the mouth. Repeat for the other side.

Top Tip: Don’t be precious over the shape of the curve as this can be teased into shape before you finish.

7 Make sure the wool is secure before trimming and shape the mouth by gently rubbing the tip of you finger on the wool – in the centre – to pull it down slightly.

8 Your head is now ready for the eyes and that’s another easy tutorial. You can watch it Here or keep scrolling for the written tutorial.

Top Tip: Sometimes the mouth can look a little off centre or lopsided. This is easily fixed by squeezing, and moving the head in your fingers – wool is still quite pliable, even when felted – until the features straighten out.

Create fabulous features for all your needle felted creations.

How to sew eyes onto your needle felted animal

Needle felted eyes look great but I also love the sparkle and shine you get from a glass bead. I always find it funny that, when some of my students have spent hours creating their needle felted animal, they say they find sewing on the eyes the hardest part. I think it is because they seem a little bit fiddly but here is a quick way of doing it, in five minutes and four easy steps.

1 Use black thread and needle and sew through the side of the face – where your eyes will sit – and repeat a few times until your thread is secure.

2 Pop your bead onto the tip of your needle and pull it through.

3 Push your needle back through to the other side and pop on your second bead.

4 Repeat the process a few times until you can pull quite firmly on your thread, and both beads are secure. Finish by sewing through the back of the head a and cut the thread.

How To Needle Felt Mushrooms – Easy Tutorial

This tutorial uses the super easy, soft sculpture technique style of needle felting., using soft core wool. Once you have tried it you will fall in love with its simplicity and versatility. If you want to go straight to the mushroom tutorial click below, if you want to learn a little more before you start then read on.

Types Of Needle Felting

There are so many wool options for needle felting that it can make the room spin but really, needle felting mostly falls into just three categories. Yes, there are more but these are the most commonly used, and all you need to be familiar with when you are just starting out.

1 Flat felting: Pictures, brooches and, in my case, really big bunny ears

Flat felting: Needle Felted Picture

2 Firm sculpture: I like to use the coarse British wool tops/roving for this style.

Firm felting: Needle felted hares with flat felted ears

3 Soft sculpture (it’s really squidgy): Uses wool batting sheets (wool that has been carded into short fibres) and core wool, which is essentially stuffing and is what you wrap your batting sheet around.

Soft needle felted sculpture: it’s really squidgy

Creating needle felted soft sculpture is so easy and there is no end to what you can create; pumpkins are my favourite and there’s a video for that too. All you need is some wool batting, core wool, a felting base (foam pad or hessian mat) or a needle felting kit.

What Is Core Wool?

I just want to quickly talk about core wool as it often causes confusion. Core wool, for soft sculpture, is like toy stuffing and you wrap the batting sheet around it. It is made up of uneven, short fibres and is a little bit lumpy; perfect for our project. It is usually the ‘scraps’ of wool that can’t be used for firm felting or spinning, is cheaper than wool tops/roving and is mostly white or grey.

Five minute tutorial

Here’s a quick guide to making a mushroom cap with core wool at the centre. This only takes around five minutes or you can watch the video tutorial which also works alongside the, ‘Shroom With A View’ needle felting kit.

1 Scrunch the core wool firmly into the shape of a bread roll and hold the centre to keep in place. Use your felting needle in a straight in and out motion (around the sides) to secure the shape. TIP: It doesn’t matter if the shape is uneven or untidy because the whole piece will soon be covered. Continue turning and felting the whole piece for a few minutes until you have your rough shape and size; it will be really squidgy, quite loose and won’t be a perfect shape.

2 Lay your wool batting sheet on your felting pad and put your core wool in the centre. Pull the batting sheet firmly around your core wool and felt into the centre.

3 Gather the batting firmly towards the centre, so it doesn’t have any sags, and felt in place. Pull away any excess. Top Tip: Only felt in the centre as this will keep the top and sides of your mushroom free of needle marks.

4 Your finished ‘shroom cap ready for it’s spots and maybe a chimney or two.

4

Take Me To Full Mushroom Turorial

The possibilities are endless Once you have learned this quick and easy technique you will soon be making, well anything and every thing you want; enchanted gardens, pumpkins, ‘shrooms, snowmen. The list goes on and on and I am still trying to give away the mountain of pumpkins I made last year.

Supplies If you don’t have any wool or needles then they can all be found on the website, alongside the ‘Shroom With A View and Honey Pot Cottage needle felting kits. TAKE ME TO WEBSITE

TAKE ME TO PUMPKIN TUTORIAL

WATCH HEDGEHOG TUTORIAL

If you are brand new to needle felting then pop over to the essential blog post for beginners: THE DO’S AND DON’TS OF NEEDLE FELTING

Happy creating x

Est. 2013
© 2013 Lincolnshire Fenn Crafts

How To Needle Felt Cute Animal Faces

LEARN TO NEEDLE FELT WITH CONFIDENCE

I love creating new needle felting video tutorials for you all, and anything that gives you the confidence to try this amazing craft is a win win for me. You can felt along with or without a a Lincolnshire Fenn Crafts Needle Felting Kit and all you need is a cuppa, felting needle, mat and your wool stash. My videos are perfect for even the most nervous of beginners and this one shows how to create really simple, but super cute, details for your animal faces, in just ten minutes! I’m not kidding, it really is only ten minutes.

KEEP IT SIMPLE

This has always been my mantra and the video tutorials on this blog and YouTube are designed to do just that. They are the building blocks of needle felting; a perfect beginners introduction on how to get it right from the very start.

As well as standalone video tutorials they also perfectly compliment my range of needle felting kits; if you have purchased a kit then you can happily needle felt along with each tutorial as you work through the different stages of your project.

I hope these short videos will help you build confidence as you needle felt along with me, workshop style. It’s such a wonderfully addictive craft. No sewing, wires or tricky patterns and all you need is enthusiasm.

Click For All YouTube Video Tutorials

JUST STARTED NEEDLE FELTING?

Then there is so much on this blog to help you get needle felting with confidence. My Dos And Don’ts For Beginners is a great place to start!

DO YOU NEED A FELTING KIT, TOOLS, OR WOOL?

If you don’t have any needle felting supplies at all then my online shop has everything you need. From wool, to felting needles, and complete starter kits; for nervous beginners to confident needle felters. I have designed and put together every single kit myself, and there is a huge range to choose from.

VIDEO TUTORIAL – HOW TO NEEDLE FELT SHEEP FACES

These techniques can be used on almost any animal, from sheep, dogs, seals, rabbits… the list is endless. It’s not hard but just takes practice and, if it goes wrong, don’t worry. Just pull it off and start again; that’s what learning a new craft or technique is all about.

The Lincolnshire Fenn Crafts Sheep

Est. 2013
© 2013 Lincolnshire Fenn Crafts

How to needle felt realistic animal eyes in 8 easy steps

Take Your Needle Felting To The Next Level

Ready to dive into needle felting those adorable animal eyes? Hang on tight, because below I’ve whipped up a super-duper easy tutorial just for you. This gem is all about taking your needle felting projects to the next level with the very same 8 step method I love to use on my own projects. Now, if those nerves are getting the best of you, no sweat! Give it a whirl with a couple of trial runs. And guess what? My guidance is always in easy-peasy steps, so take your time and start again if you’re not happy with the first one or two.

Are You A Complete Needle Felting Newbie?

There’s a whole lineup of newbie-friendly video tutorials waiting for you. I’m talking about my “needle felting for beginners” series, where I break it down – heads, legs, bodies, and ears. It’s like getting a free front-row seat to my workshops, minus the biscuit breaks. These videos stand tall on their own, but let’s not forget they’re a match made in heaven with the needle felting kits from Lincolnshire Fenn Crafts. So, here’s to some joyful felting! Get those hands busy and let the fluffy magic unfold!

Happy felting! 

TAKE ME TO YOUTUBE TUTORIALS

SHOP NEEDLE FELTING KITS

How To Needle Felt Realistic Animal Eyes

Copy of EASY EYES 1
Copy of EASY EYES 2
Copy of EASY EYES 3
Copy of Copy of EASY EYES 4
Copy of Add a EASY EYES 5
Copy of EASY EYES 6
Copy of EASY EYES 8 (5).jpg
Copy of EASY EYES 9.jpg

Say hello to Hamilton!

pinterest hamilton

This simple technique can be applied to most needle felted animals; the Winter Hare is life size.

EYELASHES

Let’s talk eyelashes – the cherry on top, the breeze on a summer day. Trust me, it’s the easiest bit to jazz up your critter. And below I’ve whipped up a quickie four-step guide.

Eyelashes are the quickest – we are talking a couple of minutes – and easiest feature you can add to your projects. They also create a striking finishing touch to your animals features.

how to eyelashes

COMPLETE BEGINNERS START HERE

Est. 2013
© 2013 Lincolnshire Fenn Crafts

needle felted pig

How To Make A Needle Felted Pig

IMG_9412.JPG

As I sat down to make a sheep at the weekend I decided to take some of my own advice and step out of my comfort zone. I have been wanting to make a pig for months but time, as always, ran away with me and other aspects of the business demanded my attention. So, I changed tack and pulled up various images of pigs on Google; even if your creations are not true to life a photo is always great for reference, proportions etc.

Now, you would think pigs, with their simple shapes and obvious snout wouldn’t be too hard… Not so. Their perceived simplicity means that there is nowhere to hide when it comes to making mistakes and that body and head shape took way longer than I expected. However, now I know what I would change for the next one. Overall I am pretty pleased with the end result but I would definitely do a few things differently next time; bigger snout; change how I assembled it; more work on the face.

IMG_9390

As far as technique is concerned I tend not to use full body armatures*, preferring to work with a much more solid shape and my favourite British wool tops. Instead, I used 1mm paper covered wire for the legs only to aid stability and create a leaner leg. I prefer paper covered wire as the wool holds much better when wrapping and negates the need for any messy waxes or glue. I wrapped each leg in a base layer of white Jacob top then added another layer of carded Corriedale flesh leaving the trotters exposed for contrast.

*Some pieces require a full armature, especially if you want to pose your piece when it’s finished. Carded wool usually works best for this and creates a much softer sculpture requiring much less use of the felting needle.

The body core is grey Jacob top which is a lovely coarse wool top that felts really easily and is still one of my favourites after six years of working with it. Felting the core really firmly allowed me to shape the wool once it was finished creating a nice curve along the back. See video tutorial: HOW TO CREATE A FIRM BODY

I actually made the body, head and snout as one piece but would definitely make the snout separately next time because it lost a lot of its definition and I had to build it up again.  I then covered the whole piece in a lovely carded Corriedale flesh, felting just until it held using my 38 needle at a diagonal angle to reduce needle marks.

You may be wondering why the core colour is a complete contrast to the top layer; this enabled me to create that lovely dark wiry detail that you will see on many pig breeds which sits in dark contrast to the really light top coat. This contrast is achieved by using a 32 reverse needle to pull through the dark grey Jacob wool top, enabling it to sit on top of the flesh colour. Wool tops work really well for this as they have a much longer fibre length than carded wool which allows them to be pulled through the body without breaking off.

IMG_9394

Ears were the easy part and using a photograph for reference makes it much easier to get the correct shape and proportions. My needle felted ears tutorial shows you my favourite, super easy technique for creating animal ears: TAKE ME TO THE TUTORIAL

IMG_9413.JPG

Finally, I covered a short piece of 0.5mm paper wrapped wire in carded flesh to create the curly tail; roll vigorously in the palm of your hands once the wool is attached. This will create a lovely firm finish which stops the wool from ‘sagging’ when it is curled.

IMG_9426.JPG

Add a couple of glass beads for eyes and hello Twiggy The Piggy*

*I claim no responsibility for the name. Blame lies solely with my good friend, Nancy (author of the amazing Maine Coon cat tutorial) who named her ‘Twiggy The Piggy’. I told her it was only marginally better than Babe but she insisted… 

Needle felting kits for all abilities are available on the website and Etsy:

TAKE ME TO NEEDLE FELTING KITS

IMG_9403 - Copy (3).JPG

Est. 2013
© 2013 Lincolnshire Fenn Crafts

needle felted sheep picture

How To Needle Felt A Picture

All photographs and finished pictures are Lincolnshire Fenn Crafts originals so please make sure to credit my pictures as inspiration should you decide to use them as reference for your own picture. This also applies to all social media and blog pages. Copies of my picture must not be sold! However I am happy for them to be gifted as long as full credit is given. All copyright laws apply.

I have had lots of requests to put together a quick guide to get you started on needle felting a 2D/3D picture so, using my own pictures as inspiration, here it is. It is suitable for all abilities (including complete beginners) and you can work at your own level and at your own pace. If this is your first time needle felting then please watch my beginner video tutorials to familiarise yourself with basic techniques:

HOW TO NEEDLE FELT

BASIC SHAPE VIDEO TUTORIAL

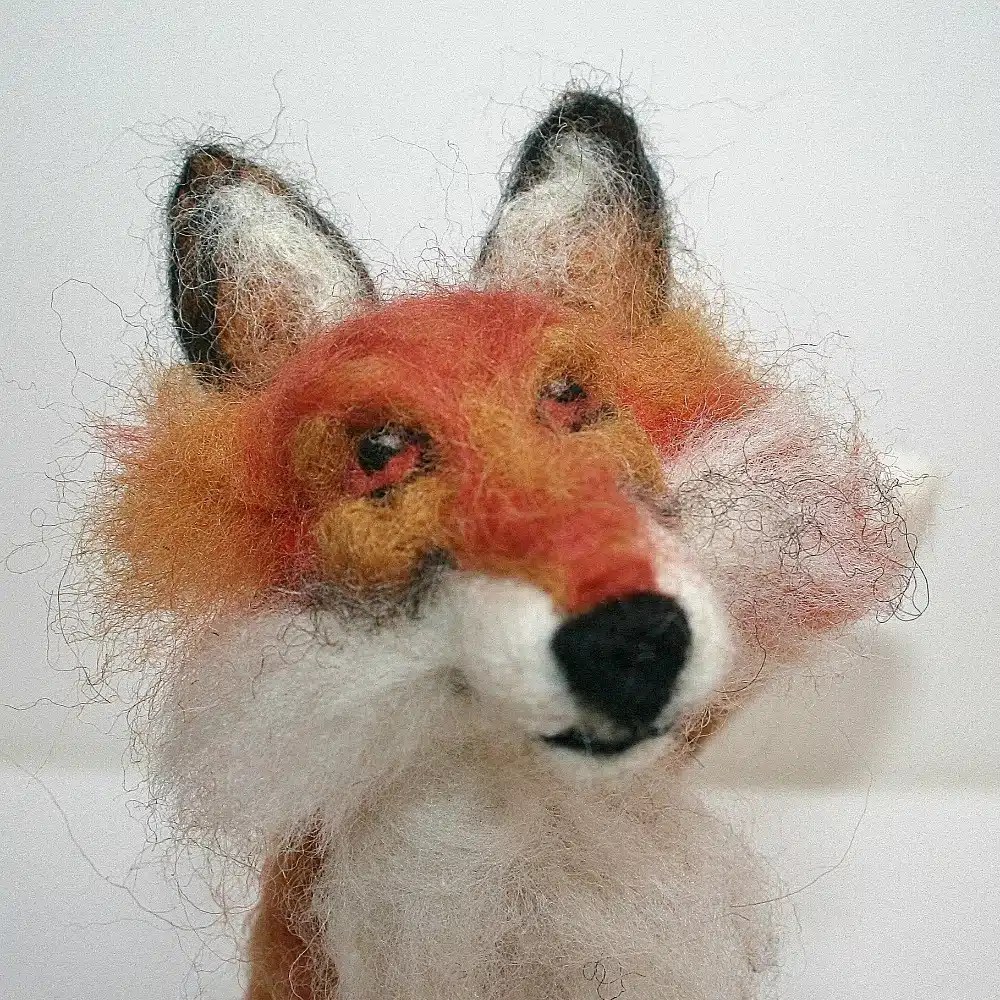
If you are new to needle felting, or don’t have many colours, I have put together a picture pack containing a carefully chosen wool selection, natural pre-felt and natural effect fibres that can be used for needle felting and wet felting. I will be focusing on needle felting but you can adapt to suit whatever project you are working on.

Shop Picture Needle Felting Kit

Preparation and planning is really important. I find using a photograph of a landscape, animal, woodland scene etc for reference/inspiration really helpful. It can be the roughest of guides or very specific to the photograph or image you have in mind. You may have a particular animal you want to incorporate into the picture which is also a great starting point; anything goes.

For this guide I am creating fields as the backdrop with a 2 D wooden gate, Herdwick Sheep and pebble wall in the foreground. It is called, ‘Watching Me, Watching Ewe.’ I know, cheese on toast right… but it was too good an opportunity not to. You should hear my pirate jokes. I save those for special occasions, usually workshops.  #sorrynotsorry to anyone who has been at the receiving end of them…

Enough pre-amble, lets get started.


1 – Using a piece of *pre-felt for the back of your picture take a marker or chalk to, very roughly, draw out your idea on to the pre-felt: ZERO DRAWING SKILLS REQUIRED. This way you can ensure that you can fit in all the elements you want to use.

* I always use pure Shetland but any 100% wool felt is OK. Size of the pre-felt I used for this picture is approx 20cm square. A 30cm square is included in the picture pack.

2 – I am making a *Herdwick picture with a landscape backdrop and stone wall to get lots of 2D elements in there. It’s quite a small picture; 20cm square to fit into some lovely shadow boxes I have. Also, starting with a smaller picture means there is less white space to fill which can be a little daunting and it takes less time.

*All photographs and finished pictures are Lincolnshire Fenn Crafts originals so please make sure to credit my pictures as inspiration should you decide to use them as reference for your own picture. All copyright laws apply.

Instructional diagram on needle felting herdwick sheep

3 – Mark your colours and objects so you know where your wool and 2D elements are going to sit. Keep it as simple as possible and remember these are just your guide lines.

4 – Time to get out your wool and needles. I am using a star 36/38 needles (good all rounders) and a punch tool (7 needles) to speed up the process.

5 – I felted the landscape first but you can start wherever you want depending on your picture style. I will be felting on my 2D elements later and adding embellishment. Lay your colour on, or between the lines, you have drawn, and use your needle to gently felt into place. It doesn’t have to be firmly felted but should stay in position.

I have used a mix of coarse wool tops and some semi carded wool tops that I had a lot of.

img_4216

6 – Continue to gently needle felt your selected colours until the back ground is full.

7 – If you are happy with the layout then go ahead and felt the whole background more firmly (but not too flat), peeling it off your mat at intervals so it doesn’t stick. If you are doing a lot of flat felting then I recommend a rice filled hessian or strong cotton felting pad and a punch tool. Trust me, you will thank me later for cutting your felting time by three quarters.

Don’t worry if you have covered up some of your lines; remember they were just a guide.

IMG_4220.JPG

You can also blend colours either by hand or using blending brushes (glorified dog brushes). For this picture I used a blend of Shetland blue top, light blue silk fibre and light grey Swaledale top for the sky.

IMG_4222.JPG

8 – I wanted a distinct line separating the fields and used very thin strips of dark brown Jacob wool top to achieve this. Felt the lines quite firmly into the pre-felt which will push it down and give a little more depth.

IMG_4225.JPG

Time to create some 2D elements.

9 – Wall

I have used lots of muted colours to create the pebbled wall appearance. Avoid all ‘flat’ colours by blending different colour wool by hand; if using the landscape box some colours will not need blending as they will already have texture and different shades. A soft palette works really well for this style of picture e.g purple blended with white, dark grey blended with white or light grey

Make your stones by rolling your wool into a very rough ball shape (this is not the shape you will end up with but will create dimension) and felting all over with your needle. Keep the wool moving as it firms up and don’t try to make it even; have you ever seen even shapes on a dry stone wall… Make quite a few different shapes and sizes; mine are  approx 1.5cm to 2.5cm then place them on your picture in the walled area to see how many more you will actually need.

IMG_4225.JPG

Once done stitch or glue them into position; I’m not a purist and whichever you choose is fine. Clearly, using glue is so much faster and a strong fabric glue will do just fine as long as you give it a little time to dry. Using glue also allows you to move your pebbles about before the glue dries; you will be ready for a cuppa at this stage anyway.

IMG_4287.JPG

10 – Time to make the Herdwick sheep head (or whichever animal you have chosen).

Please follow the link to the video tutorial: How to needle felt a head shape  You will want to flatten the back of the head so it sits nicely on your picture. You can then needle felt your eyes or use beads (included in the picture pack).

11- Start with a small length of white wool (approx 2g) and roll into a rough oval shape felting (stabbing gently with your needle) and tucking in the ends as you go.  Gently felt until it holds its shape and turning as you felt. Continue to felt until you have achieved a rough egg/oval shape. Now flatten the back of the head by needle felting until it sits flat on the picture but don’t attach it yet; it’s ears are missing.

12 – Ears: For the ears take a pinch of white wool. Lay it on your pad and draw a rough circle with your felting needle and fold the wool around the line you have drawn, felting it into the centre. Turn over (to prevent from sticking) and repeat a few times, leaving one end loose (to attach to the head) and felt until flat, smooth and slightly firm. Repeat for other ear. Attach the loose end of each ear to the side of the head and felt or sew into position so it is peeping over the wall.

13 – Gently felt on very thin wisps (even thinner than that) onto the face to create the nose and mouth. N.B. Easiest way is to roll very thin wisps of wool between your fingers before felting to the face. Alternatively, you can sew on using black or dark grey thread.

IMG_4289.JPG

IMG_4308.JPG

14 – Add your gate by rolling and felting your brown wool into short lengths and overlapping for effect before gently felting into position. You may reposition a few times before you are happy with it.

15 – Add your wool for the body of your animal but don’t felt it flat and keep it quite loose as this will create dimension. I have used loose curly grey locks.

IMG_4311.JPG

16- Now add your foreground details. I have used greens and some locks for a grassy feel but be as creative as you wish. You could add flowers, butterflies, bees etc.

herdwick card artwork.JPG

17 – Finishing touches make all the difference and as you can see I have used french knots (easy and absolutely no need to be perfect). YouTube French Knot Tutorial. Curly locks also add more interest and dimension.

IMG_4314.JPG

There you have it. Super easy 2D picture tutorial.

IMG_4316.JPG


I have done a few pictures which are so worth the time they take. Here are a few more ideas for inspiration.

‘Asleep Under The Cherry Tree’ A gift for my daughter.

Again, I have used French Knots as well as beads for interest and detail.


‘Midnight At The Northern Lights’ 

Midnight is the name of my hare in the picture and inspiration came from my dream of visiting the  Northern Lights.


IMG_1995midnightIMG_2000


You can also use wet felted pictures as a base and then add  two dimensional effects using needle felting. Free motion embroidery works really well on wet felted backgrounds. Below is a very unfinished picture waiting for me to decide what to do next. I have needle felted onto Shetland pre-felt then wet felted the whole scene incorporating locks and silk fibres.

There are lots of YouTube videos showing wet felting techniques: Wet Felting Tutorial


IMG_7860.JPG

So there you have it. The possibilities are endless and I hope this guide has inspired you to try something new. Happy creating!

If you would like a picture pack then please click on the link below for the website. You can also find my favourite selection of needle felting accessories and tools.

Shop website wool bundle

Est. 2013
© 2013 Lincolnshire Fenn Crafts

needle felting demonstration

Needle felted firm legs – Video tutorial

One of the questions I get asked the most is, “how do I get my legs really firm?” In the needle felting world  floppy and saggy legs on your animals are a no, no! They are the finishing touches that add stability and dimension to your animal so don’t spoil it by being impatient and not taking the time it needs to get it right (approx 10 to 15 minutes for each leg). My short, real time video tutorial quickly teaches you how to avoid common needle felting mistakes by showing you the tips and needle felting hacks I have learned along the way. Hope it helps you improve your needle felting skills and remember: You can add wool but not take it away!

Website


needle felted herdwick sheep

Herdwick Sheep And Winnie The Pooh

Herdwick three ways. My favourite sheep. Natural, sustainable and completely biodegradable; what more do you want from a craft…

Have a fabulous week everyone and always remember that crafts are the perfect, instant respite when the stresses and strains of daily life start to get on top of you. So, today is officially my ‘Crafts As Therapy’ Monday. Failing that, just read a few Winnie The Pooh quotes; if that doesn’t work then we are all doomed and should stay in bed for the rest of our lives…

“I am not lost, for I know where I am. But however, where I am may be lost.” —Winnie-the-Pooh

Use the basic shapes video or tutorial to make the head and body then be as creative as you like. Sheep are the easiest way to start needle felting and you don’t even need to add the legs: BASIC SHAPE VIDEO 

If you fancy something more seasonal then the NEEDLE FELTED PUMPKIN VIDEO is perfect!

IMG_4752IMG_4755IMG_4799IMG_4734

For more craft inspiration follow me on PINTEREST