Make your creative dreams come to life with free needle felting tutorials, downloads, tips, ideas, and inspiration. Start your needle felting journey today!
If you’re ready to dip your toe into the world of needle felting, this super easy needle felting pattern is a great place to start. It’s perfect for even the most nervous of beginners. With this step-by-step guide, you’ll be creating fabulous needle-felted mushroom, then all sorts of characters, in no time. You can grab your free printable guide below—just click for instant access, no purchase or subscription necessary. So, get started needle felting today! Read on to find out.
Needle felting is an easy and addictive crafting technique where you use a special needle with barbs to mesh wool fibers tightly together. This process transforms the fluffy wool into denser forms, allowing you to make simple or detailed and expressive characters, animals, sculptures, or decorations. What’s great about needle felting compared to other felting methods is that you don’t need water to do it. You just need some wool, a felting needle, and a dash of creativity to start creating amazing things. It’s an brilliant, eco friendly way to craft unique items using simple tools and your imagination.
Why Start Needle Felting?
For starters, needle felting is incredibly rewarding. There’s something special about transforming fluffy wool into detailed, solid pieces by just repeatedly stabbing it with a needle. The process itself is simple to pick up, which makes it an excellent hobby for crafters of all ages and skill levels. Plus, it’s a great way to make personalised gifts, unique home decor items, or even small items you can sell.
These are not regular needles! Felting needles have barbs that tangle the wool fibers together as you poke the wool.
3. Felting Pad
You’ll need a surface to work on that protects both your table and your needles. Foam pads or rice filled hessian mats are popular choices.
4. Finger Guards (Recommended)
These can help protect your fingers from getting poked, which can happen easily when you’re focusing on your crafting.
Step-by-Step Guide for Beginners
My free downloadable guide provides you with an easy-to-follow introduction to needle felting. Here’s a quick overview of what you’ll learn:
Step 1: Preparing Your Wool
You’ll start by selecting your colors and pulling your wool into manageable pieces. This preparation makes the felting process smoother.
Step 2: Shaping Your Creation
Next, you’ll form the wool into the basic shape of your mushrooms. The guide will show you techniques for rolling and shaping the wool effectively.
Step 3: Adding Details
After the basic shape is ready you will put it together and add some fun details. This step really brings your character to life.
Step 4: Final Adjustments
The last step involves refining your shape and making sure everything is firmly felted together. You’ll learn how to smooth out the wool and secure all the pieces.
Tips for Successful Needle Felting
Start Simple: Don’t overwhelm yourself with complex projects right away. Start with simple shapes and gradually move to more detailed projects.
Be Patient: Needle felting can be a bit time-consuming, especially if you’re working on a detailed piece. Take your time and enjoy the process.
Protect Yourself: Always use a felting pad, and consider finger guards. Felting needles are sharp!
Most Important: Have Fun!
Needle felting is a fun and accessible craft that allows you to express your creativity in a unique way. Whether you’re making cute animals, whimsical figures, or stylish home decor, the possibilities are endless. With this guide and your free pattern, you’re well on your way to becoming a skilled needle felter. So why wait? Download the guide, gather your materials, add enthusiasm, and start felting today!
Download Your Free Pattern
Make time: 20-30 minutes
Skill level: Nervous beginners
Ready to start your needle felting journey? Click here to download your free beginner’s pattern. This pattern is specifically designed to be easy to follow and fun for first-timers. No need to buy anything or subscribe—just click, download, and start felting.
If you don’t have wool or needles then a needle felting pattern is the perfect way to get started. All you have to do is open the box and add enthusiasm!
FILL YOUR HOME WITH SEASONAL ‘HANDMADE BY YOU’ JOY
Tis the season to get creative and, whatever your seasonal style I have a Christmas craft project to suit. From cute and quirky, to stylish and minimal. It’s all here, on the blog, completely free, and all you have to do is fill your seasonal stockings full of inspiration, grab your wool and needles, and get felting. And of course, ten times better than shop bought and made with love by you.
There are so many great seasonal ideas on this page you won’t know where to start. From Nordic gnomes giving you all the hygge feels, cute snowmen, baa-ble tree decorations, super stylish wreaths and garlands, to forest fairy tree toppers. There’s a felting project to suit every taste, even Christmas pumpkins. Proof, if ever needed, that pumpkins are not just for Halloween. And it has to be said, these cool winter wonderland pumpkins wouldn’t look out of place on the set of a Disney movie.
From stylish wreaths and garlands to quirky gnomes, there’s a project for every age and ability!
Check out the fabulous felting projects below, and make your holiday season merry and bright!
VIDEO TUTORIALS
The Felt Hub on YouTube is full of seasonal creativity. Just click on any of the photos below and you can felt alongside me, workshop style
SHOP NEEDLE FELTING PATTERNS
My needle felting kits and patterns have been inspiring creativity since 2014 and, if you are finally ready to take the needle felting plunge then you will find everything you need on the WEBSITE or over at ETSY
SKILL LEVEL
When it comes to these tutorials and kits, they are for all abilities. Allowing you to make your project as difficult, or intricate as you like. Keep it simple if you are just starting and build your skills. But once you have one project under your crafty belt there will be no stopping you. However, be warned, it is a highly addictive craft so be prepared to loose hours, maybe even days to this amazing hobby.
WANT SOMETHING LESS SEASONAL?
Just pop over to the home page HERE and take your pick from the drop down menus. You will find this blog is packed to the rafters with free needle felting tutorials, from learning basic shapes to more advanced projects. There are even free patterns and downloads for you to try.
BE A VIP! It’s completely free and you will receive a free, super easy, needle felting pattern, lifetime discount code, exclusive early access to new product launches and promotions, as well as notification of new tutorials and live needle felting workshops.
So, what are you waiting for? It’s time to get cosy with crafts so just grab your wool, felting needles, a big dose of enthusiasm, and maybe a glass of something nice. Cheers and happy festive felting!
FILL YOUR HOME WITH HANDMADE NEEDLE FELTED DECORATIONS
As soon as Autumn arrives I am already full-blown, pumpkin spice latte sweater dresses and jumper mode. It is my absolute favourite time of year as we start to hibernate and get really creative, filling our homes with cosy homemade fall and autumn décor! Without doubt, nothing says it better than pumpkins filling the rooms of your home, especially the ones you have made yourself, and there is no better time than now to grab a cuppa, and start creating with me.
MAKE A NEEDLE FELTED GNUMPKIN WITH ME
Make time: 90 minutes (20 minutes for the pumpkin)
It is full on pumpkin season, or should I say Gnumpkin season. Basically, it is a pumpkin, gnome hybrid but, and I am sure you will agree, they are a match made in heaven. It is my absolute favourite needle felting project at the moment, and I love it more because it can stay up as part of your DIY Christmas décor. This one has a full on Autumnal flavour but I am already making one in cool winter colours.
NO CRAFT OR DRAWING SKILLS NEEDED
This super easy needle felting tutorial will have you creating your own needle felted Gnumpkin in no time at all! Making needle felting easy is what it is all about, and you don’t need any craft or drawing skills. This step by step needle felting tutorial will help build your creative confidence, whilst teaching you all the needle felting basics, and no sewing, I promise! My easy techniques tips and hacks will have you felting in no time!
DO YOU NEED THE WOOL OR FELTING KIT?
If you have just started needle felting, kits are an especially great way to get started so you can get a real feel for a new craft. In addition to this, you are only spending a small amount to get going. The website is full of inspiring kits and inspiration for every ability.
The pumpkins alone are really fabulous but let’s take it up a notch and turn it into this super stylish, Gnumpkin. In addition, the full video tutorial is at the bottom of the page – my easy step, by step, felt along with me guide. I had so much fun designing and making these, and I know you are going to love it just as much!
NEEDLE FELTED PUMPKIN
This forms the body of the gnome and is one of the easiest ever needle felting projects; you can make one of these in just 20 minutes, even complete beginners. Scroll to the bottom of the page for the video tutorial.
MAKE THE PUMPKIN BODY FIRST
LET’S GET STARTED – YOU WILL NEED:
Carded needle felting wool and wool tops – Felting needle – Felting mat – Wooden BBQ skewer or similar; this makes creating shapes so much easier.
1 Lay a handful of core wool on your felting mat and create a rough bread roll shape with your hands. With your free hand start to felt with your needle.
2 Continue the process until your wool retains its size and shape. TIP: It needs to be secure but very soft.
TIME TO ADD THE CARDED WOOL BATTING
3 Sit your shape on top of your piece of wool batting and start to wrap the batting sheet around it, pulling towards the centre of, what will be, the bottom of your pumpkin.
4 Felt the batting into the centre of the wool until it holds. Continue the process until all the core wool is covered and pull away any excess. Tip: White patches are fine as they add contrast
5 Pumpkin ready for shaping, smooth side up.
6 Using your felting needle ‘draw’ a clearly defined line around the entire pumpkin, starting from middle centre and finishing where your line started.
7 Repeat until your pumpkin is divided into eight sections.
8 Take a long, thin piece of contrasting wool top and felt securely into the lines you have just created. Again, work from centre top and finish where you started, leaving any loose strands. TIP: Any loose strands can be trimmed for neatness, but also look good as decoration. Your pumpkin is ready. Time to make a Gnumpkin.
MAKING THE PERFECT GNOME HAT
I tried a few techniques before deciding which one would give me the best result in the most simple way. I found using the trustee wooden skewer allowed me to create the perfect cone shape that didn’t flop around. The needle felted acorn is the perfect finishing touch and only takes minutes to make.
WATCH THE VIDEO TUTORIALS BELOW
GNUMPKIN VIDEO TUTORIAL
PUMPKIN VIDEO TUTORIAL
ACORN VIDEO TUTORIAL
Last but not least, learn how to add a super seasonal acorn to your Gnumpkin hat; the cherry on the cake so to speak.
Save to your Pinterest board for a daily dose of Pinspiration.
DO YOU LOVE A CREATIVE COMMUNITY? JOIN THE FELT HUB ON FACEBOOK
Join me on Facebook. It’s completely free and you will have access to live workshops, free patterns, downloads, and so many more resources, all in one place. A group created inspire, nurture, and develop your needle felting confidence (whatever level you are at), in a more private space.
Grab a cuppa and mince pie and get creative with me, You can felt along with me or just watch and save for later. All you need is a handful of wool, any colours or type, and a felting needle. A cocktail stick will come in useful but it’s not essential.
OK, so maybe her attention is more on the mince pie than the needle felted gnome but, she does love wool and loves watching me needle felt. That counts, right?
VIDEO TUTORIAL Scroll down for written tutorial and materials list.
Nordic and Scandinavian style decor is so popular and I just love it. What I especially love are the charming Nordic gnomes. You may also see them referred to as Nisse, Tomte and Tonttu. Our house is full of them and they are super easy so here’s a tutorial for you.
If you have never needle felted before or are an experienced felter this is a wonderful way to start and get you in the festive mood. It’s simple and relaxing and so much fun to make.
This is just one style to get you started but there are so many variations that soon, like me, you will be tripping over them. So grab a cuppa, mince pie and some festive cheer and get creating.
1 – Hat: Make this first so the body fits the hat; much easier than trying to fit the hat to the body! You can go as small or tall as you like but this hat, when completed, is approx 20cm. The triangle template measurements are approx; base 10cm (slightly curved) and sides 12cm .
Layer your hat wool on your felting mat and pop your hat template on top of your wool, leaving a few extra centimetres of wool around each side. Top tip: Your wool shouldn’t be too thick but make sure you can’t see the felting mat through it
Make sure you can’t see through the wool
2 – ‘Draw’ a line around the triangle with your needle to create a very rough outline
‘Draw’ around the template
3 – Remove template and draw around the line a couple more times. This will be your fold line.
Make sure your line is visible
4 – Fold in the sides one at a time and start to felt to create a triangle; it will be a very rough shape to start with but you will tidy this up as the wool becomes more felted so stop fiddling with it!
Stop at the fold line
5 – Gently fold and felt each side until you have this rough shape; keep the excess at the top of your triangle because this is going to create your lovely pointy hat shape.
Repeat for all three sides
6 – Gently pull away from the base you are using, turn and repeat. Tip; any felting base will do (foam, rice bag etc), whatever your preference.
Keep turning regularly so it doesn’t stick to the base
7 – Keep repeating the process until it starts to firm up.
Continue felting until it holds its shape
8 – Time to tidy up the shape; use your finger to fold in the sides that need straightening (doesn’t have to be perfect). Be slow and careful so as not to stab your finger; you can use a finger guard but I find they just annoy me. However, I have lots of customers who get on with them just fine.
Be careful, the needle is sharp
9 – Your approx finished triangle which should be soft but firm and holds its shape.
Your finished hat shape; it doesn’t have to be perfect
10 – Fold in half and felt along the side to mesh the fibres together. Keep turning and repeating until the hat is now firmly felted along the side so it doesn’t pull apart when you gently pull it.
Fold in half and felt along the seam
11 – Open up the base of the hat and tidy up the line by folding in any rough edges and felting. Keep turning and felting until you are happy with the shape at the base of your Tomte hat.
12 – Roll just the top 2/3 cm of your hat between the palm of your hands to firm up the top and point. This improves the look as well as allowing you to tip the point over to the side at a jaunty angle.
Roll the tip in the palm of your hands to create a pointy hat
Use any colours you want for the hat
Basic Body Shape
Body shapes don’t get much easier than this. Don’t be too precious about needle marks and dimples because most of this will be covered by its big beard.
1 – Roll your wool (I have used natural white Shetland) into a basic barrel shape. It will do this automatically as you start to roll. Start with less than you need and build it up.
Most important! Do not start to felt with your needle until you have rolled at least half of it really tightly; trust me, this will save you a lot of felting time and applies to all body shapes made this way!
2 – Start stabbing all over with your needle (mind your fingers) as you continue to roll and remember to keep it tight. Tip: Check to see if your hat sits on top and if the body is too small add some more wool and felt again. If it’s too big then continue to felt where the hat will sit to reduce the size.
3 – Continue to turn and felt until you have a more even and neater shape. You may end up with a narrower end which is fine because you will pop the hat onto this. Pay particular attention to the base which needs to be flat for stability. Tip; you can also press on the base once felted as the wool is pretty malleable.
4 – Flatten the base until it sits without wobbling.
5 – Pop on your hat and felt, gently, all around the edge until it is felted securely onto the body making sure the hat seam is at the back.
6 – Make the nose by rolling a pinch of white or flesh coloured wool in your hands just to rough it up. Place on your mat and continue to felt with your needle, turning all the time. Now place back into the palm of your hands and roll vigorously until really firm and smooth. Tip; you may have to do this a couple of times to get it right as it is very easy to add too much wool and have a huge nose if you have never needle felted before. Less is always more when it comes to needle felting.
7 – Place the nose on its side, just under the front of the hat and felt the end into the body.
9 – As you do this the nose will naturally rise into its correct position. Continue to felt around the base until it is firmly attached. The base of the hat should be sat just above the nose.
10 – Decide what type of beard you are going to have. I have used grey Jacob but use whatever colour you wish. Curly locks also look really great.
11 – If using a straight wool pull off a small section and fold in half and start by felting it onto the body just under the nose. Don’t worry about it being longer than the body because you will trim it to size (or not) once it is attached.
12 – Continue to felt along the fold and attach it up the side of the nose and along the hat line. Tip; you can push the wool under the hat line with your needle (don’t bend it or you may break the needle) for a neater finish.
13 – Now trim your beard to your desired shape and style. I like mine quite ‘raggy’ so once I have got the length I then snip into the sides.
There you have it. One fabulous Tomte Christmas gnome! You can crease the hat or keep it straight. I like both. Told you it was easy!
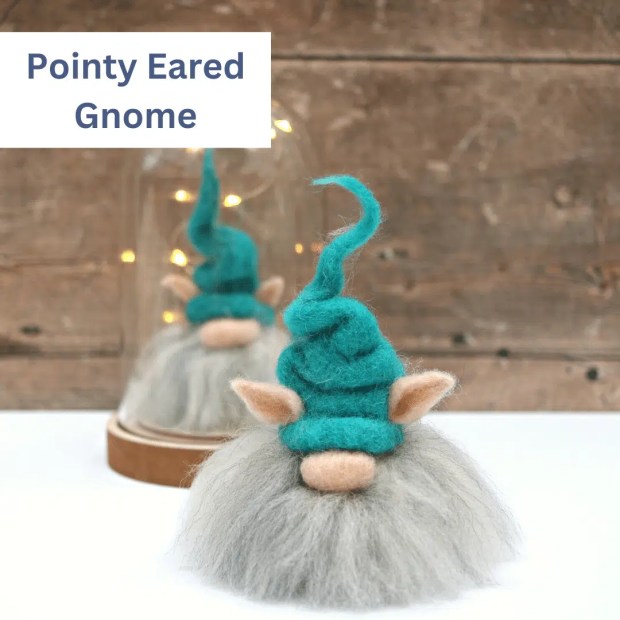
Try different wool and add some fabulous locks for a different look. For the gnomes below I have used a lush teal batting with green silk fibres for the hat, and plant dyed, hand spun locks for the beard. The gnome on the right has a beard of grey Masham shot through with white silk.
But why would you stop there when the variations and colours are endless!
A question I am often asked by new or beginner felters is how to complete the more fiddly finishing touches of a needle felting project. The small size and need for symmetry is something many struggle with when felting sheep ears, but it really doesn’t need to be a complicated process. The below video tutorial will show you all the techniques, tips, and tricks you need to create perfect sheep ears in just 15 minutes; or just 10 if you cut out the waffle.
Tiny ears are simple once armed with the right technique.
This video tutorial builds upon the written tutorial to show the entire process of creating and attaching sheep ears to your creation. If, like me, you are a visual learner and prefer to follow along with someone else, this real-time video tutorial is the one for you!
All photographs and finished pictures are Lincolnshire Fenn Crafts originals so please make sure to credit my pictures as inspiration should you decide to use them as reference for your own picture. This also applies to all social media and blog pages. Copies of my picture must not be sold! However I am happy for them to be gifted as long as full credit is given. All copyright laws apply.
I have had lots of requests to put together a quick guide to get you started on needle felting a 2D/3D picture so, using my own pictures as inspiration, here it is. It is suitable for all abilities (including complete beginners) and you can work at your own level and at your own pace. If this is your first time needle felting then please watch my beginner video tutorials to familiarise yourself with basic techniques:
If you are new to needle felting, or don’t have many colours, I have put together a picture pack containing a carefully chosen wool selection, natural pre-felt and natural effect fibres that can be used for needle felting and wet felting. I will be focusing on needle felting but you can adapt to suit whatever project you are working on.
Preparation and planning is really important. I find using a photograph of a landscape, animal, woodland scene etc for reference/inspiration really helpful. It can be the roughest of guides or very specific to the photograph or image you have in mind. You may have a particular animal you want to incorporate into the picture which is also a great starting point; anything goes.
For this guide I am creating fields as the backdrop with a 2 D wooden gate, Herdwick Sheep and pebble wall in the foreground. It is called, ‘Watching Me, Watching Ewe.’ I know, cheese on toast right… but it was too good an opportunity not to. You should hear my pirate jokes. I save those for special occasions, usually workshops. #sorrynotsorry to anyone who has been at the receiving end of them…
Enough pre-amble, lets get started.
1 – Using a piece of *pre-felt for the back of your picture take a marker or chalk to, very roughly, draw out your idea on to the pre-felt: ZERO DRAWING SKILLS REQUIRED. This way you can ensure that you can fit in all the elements you want to use.
* I always use pure Shetland but any 100% wool felt is OK. Size of the pre-felt I used for this picture is approx 20cm square. A 30cm square is included in the picture pack.
2 – I am making a *Herdwick picture with a landscape backdrop and stone wall to get lots of 2D elements in there. It’s quite a small picture; 20cm square to fit into some lovely shadow boxes I have. Also, starting with a smaller picture means there is less white space to fill which can be a little daunting and it takes less time.
*All photographs and finished pictures are Lincolnshire Fenn Crafts originals so please make sure to credit my pictures as inspiration should you decide to use them as reference for your own picture. All copyright laws apply.
3 – Mark your colours and objects so you know where your wool and 2D elements are going to sit. Keep it as simple as possible and remember these are just your guide lines.
4 – Time to get out your wool and needles. I am using a star 36/38 needles (good all rounders) and a punch tool (7 needles) to speed up the process.
5 – I felted the landscape first but you can start wherever you want depending on your picture style. I will be felting on my 2D elements later and adding embellishment. Lay your colour on, or between the lines, you have drawn, and use your needle to gently felt into place. It doesn’t have to be firmly felted but should stay in position.
I have used a mix of coarse wool tops and some semi carded wool tops that I had a lot of.
6 – Continue to gently needle felt your selected colours until the back ground is full.
7 – If you are happy with the layout then go ahead and felt the whole background more firmly (but not too flat), peeling it off your mat at intervals so it doesn’t stick. If you are doing a lot of flat felting then I recommend a rice filled hessian or strong cotton felting pad and a punch tool. Trust me, you will thank me later for cutting your felting time by three quarters.
Don’t worry if you have covered up some of your lines; remember they were just a guide.
You can also blend colours either by hand or using blending brushes (glorified dog brushes). For this picture I used a blend of Shetland blue top, light blue silk fibre and light grey Swaledale top for the sky.
8 – I wanted a distinct line separating the fields and used very thin strips of dark brown Jacob wool top to achieve this. Felt the lines quite firmly into the pre-felt which will push it down and give a little more depth.
Time to create some 2D elements.
9 – Wall
I have used lots of muted colours to create the pebbled wall appearance. Avoid all ‘flat’ colours by blending different colour wool by hand; if using the landscape box some colours will not need blending as they will already have texture and different shades. A soft palette works really well for this style of picture e.g purple blended with white, dark grey blended with white or light grey
Make your stones by rolling your wool into a very rough ball shape (this is not the shape you will end up with but will create dimension) and felting all over with your needle. Keep the wool moving as it firms up and don’t try to make it even; have you ever seen even shapes on a dry stone wall… Make quite a few different shapes and sizes; mine are approx 1.5cm to 2.5cm then place them on your picture in the walled area to see how many more you will actually need.
Once done stitch or glue them into position; I’m not a purist and whichever you choose is fine. Clearly, using glue is so much faster and a strong fabric glue will do just fine as long as you give it a little time to dry. Using glue also allows you to move your pebbles about before the glue dries; you will be ready for a cuppa at this stage anyway.
10 – Time to make the Herdwick sheep head (or whichever animal you have chosen).
Please follow the link to the video tutorial:How to needle felt a head shape You will want to flatten the back of the head so it sits nicely on your picture. You can then needle felt your eyes or use beads (included in the picture pack).
11- Start with a small length of white wool (approx 2g) and roll into a rough oval shape felting (stabbing gently with your needle) and tucking in the ends as you go. Gently felt until it holds its shape and turning as you felt. Continue to felt until you have achieved a rough egg/oval shape. Now flatten the back of the head by needle felting until it sits flat on the picture but don’t attach it yet; it’s ears are missing.
12 – Ears: For the ears take a pinch of white wool. Lay it on your pad and draw a rough circle with your felting needle and fold the wool around the line you have drawn, felting it into the centre. Turn over (to prevent from sticking) and repeat a few times, leaving one end loose (to attach to the head) and felt until flat, smooth and slightly firm. Repeat for other ear. Attach the loose end of each ear to the side of the head and felt or sew into position so it is peeping over the wall.
13 – Gently felt on very thin wisps (even thinner than that) onto the face to create the nose and mouth. N.B. Easiest way is to roll very thin wisps of wool between your fingers before felting to the face. Alternatively, you can sew on using black or dark grey thread.
14 – Add your gate by rolling and felting your brown wool into short lengths and overlapping for effect before gently felting into position. You may reposition a few times before you are happy with it.
15 – Add your wool for the body of your animal but don’t felt it flat and keep it quite loose as this will create dimension. I have used loose curly grey locks.
16- Now add your foreground details. I have used greens and some locks for a grassy feel but be as creative as you wish. You could add flowers, butterflies, bees etc.
17 – Finishing touches make all the difference and as you can see I have used french knots (easy and absolutely no need to be perfect). YouTube French Knot Tutorial. Curly locks also add more interest and dimension.
There you have it. Super easy 2D picture tutorial.
I have done a few pictures which are so worth the time they take. Here are a few more ideas for inspiration.
‘Asleep Under The Cherry Tree’ A gift for my daughter.
Again, I have used French Knots as well as beads for interest and detail.
‘Midnight At The Northern Lights’
Midnight is the name of my hare in the picture and inspiration came from my dream of visiting the Northern Lights.
You can also use wet felted pictures as a base and then add two dimensional effects using needle felting. Free motion embroidery works really well on wet felted backgrounds. Below is a very unfinished picture waiting for me to decide what to do next. I have needle felted onto Shetland pre-felt then wet felted the whole scene incorporating locks and silk fibres.
There are lots of YouTube videos showing wet felting techniques: Wet Felting Tutorial
So there you have it. The possibilities are endless and I hope this guide has inspired you to try something new. Happy creating!
If you would like a picture pack then please click on the link below for the website. You can also find my favourite selection of needle felting accessories and tools.