Make your creative dreams come to life with free needle felting tutorials, downloads, tips, ideas, and inspiration. Start your needle felting journey today!
When it comes to crafts and wool storage, there is no such thing as a spare room; what an utterly ridiculous concept!? However, the easier it is to access our precious wool the more felting can be done. So, assuming we don’t have an entire house free for wool storage, what is the solution to storing our wool efficiently and safely?
There are three simple but important rules for keeping your wool in the best condition:
Direct sunlight will, over time, bleach the colour out of your wool. A brightly lit room is fine (moths hate the light) as long as your wool is in containers that protect it from UV rays or the containers are facing away from the light. IMPORTANT! Don’t use sealed bags in a warm room because the moisture will build up inside and moisture is also wools enemy.
Much of my wool is in a very brightly lit room (below) but I remove it from the plastic bags and store it in black bins with lids, or open fronted stacking boxes, facing away from the windows. I don’t have any problems with fading wool or moisture (even in the summer) because the air can still circulate. No moth problem either because they hate bright light. For smaller amounts in bright rooms you can use cardboard shoe boxes, craft boxes, drawers, jute bags, etc.
What if you can’t store it in a brightly lit room?
If you are keeping wool in a dark room, drawer or cupboard – and many of us do – make sure they are in airtight containers or bags; this will keep the moths out; if you are concerned about moisture then pillowcases are a great solution or, wrap some kitchen roll or a tea towel around your wool before sealing. Silica gel sachets are also another moisture deterrent. Also, if your wool is stored for long periods, it is good practice to take it out occasionally air it and check for moisture.
Moth Deterrents Without Chemicals
A proactive approach is always best and Lavender and Cedar are good natural deterrents as the smell confuses the moths, throwing them off the scent in the hunt for your precious wool stash. However, neither will kill an infestation and, if the moth eggs are already there you will need to remove and dispose of the contaminated wool. There are hundreds of ‘remedies’ on the internet for getting rid of them but, as with everything, prevention is better than cure. Thankfully, in the nine years I have been using wool I have never had a moth problem (or used Lavender and Cedar) so, hopefully, neither will you.
Storage Ideas
I recently asked my Facebook communityhow they were storing their wool and they had some cracking storage solutions for large, and small amounts of wool which I thought I would share with you.
Jane has inventively stashed her wool in cardboard poster tubes with all the colours cleverly sticking out of each end. Or, if If you want quick access to all your lovely wool, then Lesley’s easy desk set up, using takeaway containers, is just the job. It’s also a great way of ogling your wool stash and thinking about which wool you are going to try next?
Sharon has stored all her lovely wool and locks in these handy compartment boxes. I think I have seen similar in B&Q and Argos? The tool storage aisle is always a great place to look and probably cheaper than the hobby stores. Sock drawer organisers are also a great way to store your wool in a similar way. It’s also a great portable solution so you can take your wool anywhere.
How’s this for super space saving ingenuity? Michelle has come up with a great solution for storing small amounts of wool in these fab jam jars which are the perfect shape for getting as much in a small space as possible. The six sided hexagon means that no space is wasted and is also the very reason that bees use the same pattern in their hives.
Open ended stacking trays are a great solution for storing wool, especially for a business that needs to store a lot of wool in the most efficient way possible. Door tidy’s are also a great way of utilising your space and keeping everything in one place.
Lin has cleverly used plastic shoe storage boxes and labelled each one so she can grab what she needs at a glance, and I love my craft drawers on wheels.
Kathy’s suitcases are an imaginative solution for storing your wool. However, Verity’s cat had other ideas???
I know there are hundreds more storage ideas but I hope this has given you some inspiration for keeping your own wool stash in the best condition possible and, if you are still struggling for space then the only option really is a second home???
If you want regular creative updates from me just sign up below.
Happy felting! x
Want to know more about felting wool? Here’s a great WOOL GUIDE for you.
Get ready to spruce up your space with some autumn charm and make your own autumn wreath. Say hello to your new favorite DIY project: crafting your very own autumn wreath. With just a few simple materials and a bit of creativity, you can create a stunning needle felted wreath that will add a touch of cosy elegance to any room.
This DIY tutorial is perfect for beginners and experienced crafters alike. Whether you’re a seasoned pro or just dipping your toes into the world of crafting, you’ll find this project to be a breeze. And the best part? You’ll be amazed at how quickly you can whip up this beautiful needle felted pumpkin and acorn wreath!
With easy-to-follow instructions and step-by-step guidance, you’ll be creating adorable needle felted pumpkins and acorns in no time. Plus, I’ve got a handy video tutorial to walk you through the process, so you can follow along at your own pace.
So why wait? Dive in and get started on your autumn wreath today! Check out the materials list, below to gather everything you need for this fun and fabulous project.
MATERIALS LIST:
Seasonal wool tops and carded wool for your pumpkins and acorns
P Is For Pastel Pumpkins: Embracing a Delicate Palette
Explore the charm of pastel pumpkins as an enchanting departure from conventional color schemes. This serene woolen palette offers an ideal touch for spring or winter decor, infusing spaces with cool elegance.
Watch The Video Tutorial
Join me as we dive into the delightful world of needle felting together, step by step. With my laid-back and easy-to-follow video tutorials, you’ll gain the skills and confidence you need to adorn your home with charming handmade autumn decorations. Whether you’re a seasoned crafter or just starting out, my tutorials are designed to make the process enjoyable and accessible for everyone. So grab your materials, settle in, and let’s get crafting! Together, we’ll fill your home with the warmth and beauty of your own unique handmade creations.
Have a needle felting question?
Feel free to ask me anything! I absolutely adore questions, especially when it comes to needle felting. Whether you’re curious about technique tips, project ideas, or just want to chat about all things related to this wonderful craft, I’m here to help. No question is too big or too small, so don’t hesitate to reach out. Let’s dive into the world of needle felting together and explore all the creativity it has to offer!
Instantly download a needle felting pattern and get started straight away! On the hunt for inspiring needle felting patterns? There are patterns for all abilities on the website, from nervous beginners to confident needle felters, there is a pattern and video tutorial for you.
Craft your own seasonal happy space with a needle felted pumpkin or two, or three, or fill the whole house (as I do) with these glorious DIY projects that will take us into autumn/fall and beyond.
Make pumpkins with personality using carded wool or wool tops
Scroll down for video tutorials
I am a firm believer that pumpkins are absolutely not just for Halloween and I have you covered with three pumpkin tutorials that will take you right through September to December and Christmas. Yes, of course there’s a Christmas pumpkin!
If you are nervous about starting needle felting then this is the project for you!
Not only are they fabulous needle felting project but, they are also one of the quickest and easiest needle felting projects to make, taking a mere 30 minutes! They will add instant impact to any room, and are impressive seasonal gifts for friends and loved ones and, If the weather permits, they look wonderful on an outside dining table or strung as a garland from a tree or deck.
Keep it simple or go for all out bling and glamour. Go traditional or opt for a style that the cast of Frozen would be envious of. Whatever your style, there really is a needle felted pumpkin for everyone and no needle felting experience necessary; just a few needle felting supplies and a big dollop of enthusiasm.
There are three video tutorials to choose from – traditional, fire and ice and winter wonderland – and you could have all three made in just 90 minutes!
I have popped a materials list above each one but these are just suggestions and anything goes. Don’t worry if you haven’t any carded wool as there is also a tutorial using wool tops. See I told you I have you covered!
Happy creating and I would love to see your pumpkin photos to add to the community gallery. You can email them to me at: info@lincolnshirefenncrafts.com or send them to me via my FaceBook page.
Do you need wool or supplies?
Links for kits, wool and needles are also below or SHOP WEBSITE
Hi and welcome to my ultimate guide to needle felting.
I’m Sandy, creator, owner, designer, chief cook and bottle washer at Lincolnshire Fenn Crafts.
Since 2014 I have taught thousands of people to needle felt through my tutorials, videos, workshops and extensive range of inspiring needle felting kits. Whether you are a nervous beginner or a confident crafter, you will discover a wealth of needle felting guides and resources at your creative fingertips. Let’s craft a happy space together!
SO, WHAT DO YOU NEED TO START NEEDLE FELTING?
Not much at all as it happens and you don’t have to spend a lot of money either! It’s a budget friendly hobby that requires very little space and zero experience and all you need is:
1 FELTING WOOL
2 FELTING NEEDLE
3 FELTING MAT
4 GOOD TUTORIALS
5 ENTHUSIASM
FELTING WOOL
Wool tops or carded wool are both great to needle felt with. Avoid Merino wool tops and go for a coarser wool like Jacob, Shetland or Romney.
CLICK HERE FOR MY ULTIMATE WOOL GUIDE AND QUICK LOOK, HANDY CHART
FELTING NEEDLES
Just one or two standard felting needles will get you started. I like to use a 38 star as a good all-rounder.
You will need a foam, hessian, or wool mat. A piece of firm foam is what many people use but there are other mats you can try. I tend to use a mixture depending on the project.
Ignore all the fancy needle felting creations you see online and start with a simple needle felting project or tutorial. It is so important to allow yourself to be a beginner and build up to those fancy creations you have been drooling over.
When it comes to needle felting enthusiasm goes a long, long way! It’s all you need to get started; you don’t need to be artistic, just enthusiastic. Allow yourself to be a beginner and you will pick up the needle felting basics in no time. You may prefer to start with a needle felting kit , especially if you don’t have any equipment. It is a budget friendly way to get started and allows you to see if you enjoy this fabulous craft without ending up with lots of equipment.
I adore this season in my garden, eagerly anticipating the possibility of my 19-year-old Cordyline blooming for the third time. The wait for this magnificent plant to flower, starting as a humble shrub, has been considerable, but the aroma it emits is simply divine—reminiscent of Jasmine with subtle notes of caramel.
MAKE YOUR OWN NEEDLE FELTED PLANTS
With plants and gardening at the forefront of my thoughts, I’ve designed a selection of super cool needle felted cacti you can make yourself, perfect as pin cushions, or for your felting needles. Plus, they promise to never exhibit any unpredictable or inexplicable signs of fading away, ensuring endless crafting enjoyment.
Just like always, I put a ton of effort into the design phase, crafting projects that I’m sure you’ll fall in love with. I enjoy passing on the techniques I’ve picked up since 2013, and I’m meticulous about choosing the perfect wool and fibers for each piece. It took me about six tries to get the cacti design just right! So, rest assured knowing that every time you start a new project, you’ve got top-notch materials lists and instructions to guide you along. Go ahead and dive into your crafting adventures with confidence – puns included!
Instantly download a needle felting pattern and get started straight away! On the hunt for inspiring needle felting patterns? There are patterns for all abilities on the website, from nervous beginners to confident needle felters, there is a pattern and video tutorial for you.
Video Tutorial: Scroll down to follow my step by step video tutorial
If you already have the wool then you can watch the video below. North Sea Coast is inspired by my Yorkshire upbringing, not far from the coast, and my dear dad with his roots along the Humber. Those of you familiar with the North Sea Coast will know not to expect golden sands and palm trees. The North Sea is moody and has real attitude which is what I have tried to convey in this project; slightly abstract and full of texture! However, this is just my take on it so feel free to add artistic license, and a palm tree or two, if that’s the vibe you want. There’s no rules and it’s your project, not mine, so just go for it!
Use different fibres to add depth and characterEmbellish with beads for contrast
You will need wool, silk fibres, plant dyed art yarn and embellishments you see in the photographs, as well as a piece of Shetland pure wool felt which will be the base of your picture. DOWNLOAD THE PATTERN HERE The accompanying video is also available so if you are a complete beginner, or don’t need any wool or fibres, you can felt along with me.
WATCH VIDEO AND FELT ALONG WITH ME
WHAT IS THE PICTURE SIZE?
It really doesn’t matter. I have used a piece of Shetland pre-felt approximately 25cm x 25cm but have also used a much smaller piece to pop in a frame. I can also see this on the front of a greetings card to sell or just give to the besties in your life. Any piece of flat felt will work as a canvas for your picture, just make sure it has a good amount of wool in it and isn’t just acrylic felt.
Happy Felting!
Ready To Start Needle Felting? You will love reading these as well!
Instantly download a needle felting pattern and get started straight away! On the hunt for inspiring needle felting patterns? There are patterns for all abilities on the website, from nervous beginners to confident needle felters, there is a pattern and video tutorial for you.
Mini Bunny needle felting video tutorial – for even the most nervous beginners. With supporting printable pattern download on the website.
This is the easiest of easiest needle felting projects, only takes around 30-40 minutes and is just a whole heap of relaxing fun. Whether you are a nervous first time needle felter/crafter, just want to have some relaxing creative fun or want to fill the house with gorgeous handmade bunny decorations, this is a great project. The process and technique for this pattern is really easy and straightforward. Your secret weapon is the BBQ stick you will be using which makes creating the body shape so much easier and super fast. It really is the needle felting tool you never knew you needed but was in your kitchen drawer all the time.
I was surprised how much I enjoyed making these because cute and cartoony normally isn’t my thing. But, it seems I am a cute and colourful convert just because of how relaxing it was and, there’s no denying, those pastel colours are pretty lush. Even as a seasoned needle felter it is incredibly satisfying to complete something quickly and easily, knowing what the end result will be, and then repeating the process again. I was completely focused and really just felted away in quiet contemplation. There is something immensely calming about creating simple projects and repeating a task – part of the human psyche I guess – so much so that I ended up making four of them and will be making more for an Easter garland.
YOU WILL NEED:
Needle felting wool – Approx. 5g, any type or colour.
Standard felting needle – size 38 is a good all-rounder.
Wooden BBQ skewer (or similar) for shaping
Felting mat
Click HERE for the downloadable pattern at a special price of just £1.50.
See the full range of needle felting kits, punch needle kits, accessories and handmade items over at the WEBSITE
Meet the family. Well, some of them…
Over 40 carefully and lovingly designed needle felting kits to choose from. Each kit is a complete starter kit and so, contains everything you need including detailed instructions, lots of colour photographs, an actual size template as your size guide, quality wool (mostly British) and everything you need to complete each project. Kits are suitable for absolute beginners and advanced beginners.
No sewing. No wires. No glue. No stuffing. Open the box and get started… All you need to add is a little patience and enthusiasm!
If you like to see it done just scroll to bottom for video tutorial!
I was a couple of years into needle felting before I tried a reverse felting needle and now I wouldn’t be without it. The special effects you can create are endless and super cool, taking your needle felting to a different level. A reverse needle does exactly what it says and instead of felting and compressing the wool it pulls the already felted wool back out, creating dramatic, or subtle effects. It adds instant character to a project and is simple and easy to use.
I love the subtle effect it created on top of the head of the head of this moon gazing hare, giving it a dreamy fuzziness.
Look at the subtle effect atop the head of this moon gazing hare
I use two sizes of needle; 32 and 40 gauge. As with standard felting needles, the higher the number the finer the needle and the more subtle the effect.
I have used the size 32 most recently (although a size 40 would have done the job just as well), on my bee brooches to create the fuzzy body and eyebrows. I also used a contrasting white core for more effect and visibility.
When I made this brooch the eyes looked a little lost so I used the reverse needle just above the eyebrow to pull out some of the core white wool.
I repeated on the other eye then trimmed it back. As you can see, the effect is great and those eyes really pop!
Trim to your preferred length
I wanted to create a similar effect all over the body to create that lovely fuzzy effect. Repeatedly use the reverse needle until you have pulled all the lovely wool through then trim quite short to create a neat finish that allows the white and dark to compliment each other.
When I decided to needle felt my first pig I really wanted to create the coarse top layer you see on a lot of pigs that sits on the peachy skin. I used a Romanov wool core but any coarse dark will do; grey Jacob is perfect and one of my favourites. It created exactly the look I was aiming for using a 32 reverse needle.
There’s no limit to what you can use it on and I think the hedgehogs were crying out for a reverse felting needle makeover. I know you can get the realistic spikes but this was much more fun. I created a grey Jacob core with a brown Shetland carded top and went at it quite fiercely with a 32 reverse needle. You can watch the full hedgehog tutorial HERE
See how I have picked up the grey I pulled through plus a little of the brown. Give it a twizzle for instant spikiness and a gorgeous ‘Prickle’ of hedgehogs; yes that is the actual collective noun for a group of hedgehogs. My heart… 🦔
So, there you have it. Just a few of the cool things you can do with a reverse felting needle. Experiment on your own projects and just have some fun with it. Happy felting!
SCROLL TO THE BOTTOM OF THE PAGE FOR VIDEO TUTORIAL
The wool bundle to create this gorgeous garland can be purchased on the LFC website: SHOP HERE
Temperatures are below freezing, the days are still short, we can’t go out anywhere, the shops are shut… but hey, the heating’s on, there’s food in the cupboard, my dog is there for constant cuddles and we have crafts for company. That’ll do me for now.
In an effort to bring some colour into our lives I am stuck on pretty pastels and all things spring at the moment and it doesn’t get more pastel or spring like than this gorgeous Easter garland. It is also a great way to use up any scraps of wool you have in your felt box and, if you have needle felted before, there are always plenty of scraps in your felt box.
TOP TIPFOR PERFECT SHAPES EVERY TIME
So here I am with a little golden nugget of a needle felting tip for almost perfectly firm and round needle felted balls; use a wooden BBQ stick. I have been using one for ages to create even, smooth shapes and discovered – after trying many other techniques – that using said stick is by far the fastest and easiest way to make perfectly shaped felted balls, in just 3 to 4 minutes! Who knew?
This gorgeous garland is so easy to make and, teamed with the needle felted bumble bees (also a breeze to make), you have yourself a beautiful piece of spring décor to brighten even the most dullest of days. The bees also make a great brooch, or pin.
1 Small length of wool top or carded wool; mine are approximately 1g (20cm long) but you can make them bigger. Just make sure they weigh approximately the same so your felt balls are all a similar size; unless you prefer odd shaped balls…
2 Felting needle; a size 38 or 36 is best as they are sturdy and less likely to break on the stick
3 Soft felting surface; foam mat, rice filled hessian bag or a piece of flat felt
4 Sewing needle and strong thread to create your garland
Let’s get going!
SCROLL TO THE END IF YOU LOVE A VIDEO TUTORIAL!
1 Select your first piece of wool.
2 Twizzle the end of the wool in your fingers to slightly matt it.
3 Wrap the end firmly around your wooden skewer
4 Continue to wrap the wool around the stick (no need to use your needle yet) and use your thumb and finger to stop it from moving down the stick and becoming too long.
5 Continue until all the wool is wrapped around the stick. TOP TIP:It should be firmly wrapped but also springy to the touch. If it is too firm it will be harder to shape.
6 Start to shape by poking your needle gently into the ends of the wool – avoiding the stick – at a diagonal angle so the needle doesn’t bend. TOP TIP: Keep moving the stick around with your free hand so the shape is even and there are no flattened areas.
7 Repeat for the other end and continue to shape the entire ball until it is quite firm. It won’t be perfectly round yet but that doesn’t matter.
8 Slide off the pointy end of the stick.
9 Continue to firm and shape with your needle. This will also close the hole created by the wooden stick.
10 Finally, roll the ball firmly in your cupped hands (for a few seconds) to create an even round shape and smooth finish.
Once you have enough for your garland string them together with strong cotton. If you are adding bumble bees make sure you push the needle and cotton through the upper part of the bee as they are top heavy and will be upside down when you hang it. Also, it took me longer than I care to admit to work that out. 😳
Hope you enjoyed this and just subscribe at the bottom of the page for instant blog notifications and up-dates. Happy creating 🐝
Penguins hold a special charm that transcends seasons, yet their appeal seems to heighten as the winter frost settles in. Delightfully crafted these adorable needle felted penguins embody the essence of joy and make for a delightful and soothing DIY endeavor.
With their simplistic shapes and straightforward needle felting techniques, creating a ‘Waddle’ of these charming creatures becomes a breeze. Indeed, ‘Waddle’ is the fitting term for a group of penguins, and adding these little cuties to your seasonal decor will spark a sense of homemade warmth. Embrace the magic of crafting as you embark on this delightful journey of bringing these beloved creatures to life, adding a touch of cheer to your home throughout the year, but especially during the cosy embrace of winter.
Felt along with me workshop style below: For video tutorials please visit THE FELT HUB on YouTube and follow the beginner’s series of tutorials to create your basic shapes.
Happy felting!
WATCH THE VIDEO TUTORIAL
In this comprehensive needle felting tutorial, I’ll guide you step by step through the creation of an adorable baby penguin. Whether you’re a seasoned crafter or just dipping your toes into the world of needle felting, this tutorial is perfect for you. I’ll cover everything you need to know, from selecting the right materials to mastering essential needle felting techniques. By the end of this tutorial, you’ll have your very own charming penguin creation to adorn your home or gift to a friend. So grab your felting needles and let’s get crafting!
Subscribe to my YOUTUBE CHANNEL for new tutorial notifications.
This fairy tree topper is sure to be a hit. No more need for those complicated, expensive store-bought ones that never quite look as good as you want them too. This one takes no time at all, is completely sustainable, and even better, is handmade by you! Lincolnshire Fenn Crafts brings you the ultimate in christmas crafts this season. A super easy to follow needle felting workshop.
Join me for 90 minutes of fully festive creative respite. It’s a completely free workshop so if you have your own wool stash then come and join me. It will be a fabulous evening and a great way to get in the festive mood. Why not make a night of it and get the whole family involved. Or, grab a glass of something special and have a Skype craft party. However you do it, I will be there answering your questions and showing you all my favourite felting moves.
You will need:
Pipe cleaners
Wool tops; white and whatever you have in your wool stash
Christmas wouldn’t be fully festive without a needle felted snowman. Perfect for craft enthusiasts, nervous beginners and everyone in-between. A super easy to follow needle felting workshop. Needle felting kits are available on the Lincolnshire Fenn Crafts website Bring wool, felting needles, your favourite tipple and create a cute, super easy needle felted snowman to add to your Christmas décor.
Everything you need to know is covered, from needle felting your basic body shape at the start to putting it all together, in simple bite size chunks that will give you the creative confidence to continue with this fabulously addictive craft.
Within each video tutorial, I meticulously dissect the process of needle felting animals, simplifying each step into easily adaptable body shapes that suit the animal you’re crafting. Whether you’re a beginner eager to dive into the world of needle felting, an improver seeking to enhance your skills, or simply someone craving a creative escape, these tutorials are tailored just for you. Designed in a workshop-style format, each video serves as your personal guide, leading you through every stage of your creative journey. Along the way, I share invaluable tips to streamline the process, ensuring efficiency without sacrificing quality.
From mastering the fundamentals of shaping your basic body outline to seamlessly assembling your creation, every aspect is covered. The content is presented in digestible, bite-sized chunks, giving you with the confidence to persist and thrive in this wonderfully addictive craft. Whether you’re crafting a charming penguin or a needle felted hare, these tutorials provide the foundation and encouragement you need to unleash your creativity and bring your projects animals to life. So, grab your felting supplies, settle in, and let’s start needle felting together.
If you are working from one of my NEEDLE FELTING PATTERNS just follow the written instructions alongside the video tutorials.
1 BASIC BODY SHAPE – 12 minutes
2 BASIC HEAD SHAPE – 12 minutes
Learn to master the creation of a basic and simple head shape for your needle felted animals. Achieving a firm shape is essential for the success of your project, serving as the foundation upon which you’ll build the rest of your creation. Through careful guidance and practice, you’ll learn the techniques necessary to craft a head shape that not only looks great but also provides stability and structure to your final piece.
3 BASIC LEG SHAPES – 21 minutes
Welcome to The Felt Hub series of needle felting projects dedicated to helping beginners master the art of needle felting! In this installment, we’ll focus on creating firm legs every time, without the need for wires. Firm legs are crucial for providing stability and balance to your needle felted creations. Whether you’re new to needle felting or looking to refine your skills, this tutorial will guide you through the process step by step, giving you the skills necessary for you to achieve professional-looking results without any hassle.
4 HARE AND FOX EARS – 15 minutes
Crafting needle felted ears is a breeze once you’ve mastered the right technique. With my straightforward needle felting tutorials, you’ll be up and running in no time, ready to bring your creations to life. Whether you’re aiming for petite and perky or large and floppy, you’ll learn how to craft fabulous ears in any shape or size. So, let’s dive in and start felting those adorable ears!
5 SHEEP EARS – 15 minutes
Discover a quick, effortless, and efficient method for crafting charming needle felted sheep ears in just fifteen minutes.
Grab a cuppa and mince pie and get creative with me, You can felt along with me or just watch and save for later. All you need is a handful of wool, any colours or type, and a felting needle. A cocktail stick will come in useful but it’s not essential.
OK, so maybe her attention is more on the mince pie than the needle felted gnome but, she does love wool and loves watching me needle felt. That counts, right?
VIDEO TUTORIAL Scroll down for written tutorial and materials list.
Nordic and Scandinavian style decor is so popular and I just love it. What I especially love are the charming Nordic gnomes. You may also see them referred to as Nisse, Tomte and Tonttu. Our house is full of them and they are super easy so here’s a tutorial for you.
If you have never needle felted before or are an experienced felter this is a wonderful way to start and get you in the festive mood. It’s simple and relaxing and so much fun to make.
This is just one style to get you started but there are so many variations that soon, like me, you will be tripping over them. So grab a cuppa, mince pie and some festive cheer and get creating.
1 – Hat: Make this first so the body fits the hat; much easier than trying to fit the hat to the body! You can go as small or tall as you like but this hat, when completed, is approx 20cm. The triangle template measurements are approx; base 10cm (slightly curved) and sides 12cm .
Layer your hat wool on your felting mat and pop your hat template on top of your wool, leaving a few extra centimetres of wool around each side. Top tip: Your wool shouldn’t be too thick but make sure you can’t see the felting mat through it
Make sure you can’t see through the wool
2 – ‘Draw’ a line around the triangle with your needle to create a very rough outline
‘Draw’ around the template
3 – Remove template and draw around the line a couple more times. This will be your fold line.
Make sure your line is visible
4 – Fold in the sides one at a time and start to felt to create a triangle; it will be a very rough shape to start with but you will tidy this up as the wool becomes more felted so stop fiddling with it!
Stop at the fold line
5 – Gently fold and felt each side until you have this rough shape; keep the excess at the top of your triangle because this is going to create your lovely pointy hat shape.
Repeat for all three sides
6 – Gently pull away from the base you are using, turn and repeat. Tip; any felting base will do (foam, rice bag etc), whatever your preference.
Keep turning regularly so it doesn’t stick to the base
7 – Keep repeating the process until it starts to firm up.
Continue felting until it holds its shape
8 – Time to tidy up the shape; use your finger to fold in the sides that need straightening (doesn’t have to be perfect). Be slow and careful so as not to stab your finger; you can use a finger guard but I find they just annoy me. However, I have lots of customers who get on with them just fine.
Be careful, the needle is sharp
9 – Your approx finished triangle which should be soft but firm and holds its shape.
Your finished hat shape; it doesn’t have to be perfect
10 – Fold in half and felt along the side to mesh the fibres together. Keep turning and repeating until the hat is now firmly felted along the side so it doesn’t pull apart when you gently pull it.
Fold in half and felt along the seam
11 – Open up the base of the hat and tidy up the line by folding in any rough edges and felting. Keep turning and felting until you are happy with the shape at the base of your Tomte hat.
12 – Roll just the top 2/3 cm of your hat between the palm of your hands to firm up the top and point. This improves the look as well as allowing you to tip the point over to the side at a jaunty angle.
Roll the tip in the palm of your hands to create a pointy hat
Use any colours you want for the hat
Basic Body Shape
Body shapes don’t get much easier than this. Don’t be too precious about needle marks and dimples because most of this will be covered by its big beard.
1 – Roll your wool (I have used natural white Shetland) into a basic barrel shape. It will do this automatically as you start to roll. Start with less than you need and build it up.
Most important! Do not start to felt with your needle until you have rolled at least half of it really tightly; trust me, this will save you a lot of felting time and applies to all body shapes made this way!
2 – Start stabbing all over with your needle (mind your fingers) as you continue to roll and remember to keep it tight. Tip: Check to see if your hat sits on top and if the body is too small add some more wool and felt again. If it’s too big then continue to felt where the hat will sit to reduce the size.
3 – Continue to turn and felt until you have a more even and neater shape. You may end up with a narrower end which is fine because you will pop the hat onto this. Pay particular attention to the base which needs to be flat for stability. Tip; you can also press on the base once felted as the wool is pretty malleable.
4 – Flatten the base until it sits without wobbling.
5 – Pop on your hat and felt, gently, all around the edge until it is felted securely onto the body making sure the hat seam is at the back.
6 – Make the nose by rolling a pinch of white or flesh coloured wool in your hands just to rough it up. Place on your mat and continue to felt with your needle, turning all the time. Now place back into the palm of your hands and roll vigorously until really firm and smooth. Tip; you may have to do this a couple of times to get it right as it is very easy to add too much wool and have a huge nose if you have never needle felted before. Less is always more when it comes to needle felting.
7 – Place the nose on its side, just under the front of the hat and felt the end into the body.
9 – As you do this the nose will naturally rise into its correct position. Continue to felt around the base until it is firmly attached. The base of the hat should be sat just above the nose.
10 – Decide what type of beard you are going to have. I have used grey Jacob but use whatever colour you wish. Curly locks also look really great.
11 – If using a straight wool pull off a small section and fold in half and start by felting it onto the body just under the nose. Don’t worry about it being longer than the body because you will trim it to size (or not) once it is attached.
12 – Continue to felt along the fold and attach it up the side of the nose and along the hat line. Tip; you can push the wool under the hat line with your needle (don’t bend it or you may break the needle) for a neater finish.
13 – Now trim your beard to your desired shape and style. I like mine quite ‘raggy’ so once I have got the length I then snip into the sides.
There you have it. One fabulous Tomte Christmas gnome! You can crease the hat or keep it straight. I like both. Told you it was easy!
Try different wool and add some fabulous locks for a different look. For the gnomes below I have used a lush teal batting with green silk fibres for the hat, and plant dyed, hand spun locks for the beard. The gnome on the right has a beard of grey Masham shot through with white silk.
But why would you stop there when the variations and colours are endless!
Whilst I can’t call this a definitive guide to felting wool, it is based on my years of experience, using a huge range of wool and techniques and is quite extensive; you can find out more about me and my handmade business on the ABOUT page. I have put a lot of my time and knowledge into creating it and hope it answers most of your questions, making your needle felting journey a little easier. Also, at the bottom of this post you will find my list of useful links and tutorials on this blog, plus a few recommended books. In addition to that (I know , I’m spoiling you) I have created a needle felting wool guide in table form which you won’t want to miss. If there is something you want to ask please feel free to leave a comment or email me at: info@lincolnshirefenncrafts.com
It’s All About The Wool
Not all needle felting wool is created equal and for anyone new to needle felting it can be frustratingly confusing. However, all you need is one or two good needle felting wools in your craft box to create a multitude of wonderful needle felting projects. This guide will take away all the painful confusion so you can get started instead of ruminating for hours over which wool is best for needle felting. I have kept it simple and tried to answer the most frequently asked questions. At the bottom of the post you will find my easy guide to wool and my personal favourites. You will see a lot of British wool on the list because, well I live in Britain so it makes sense to use what we have around us. If any shops or books are mentioned it is because I love their products and I highly recommend them. I am not affiliated to them in any way.
Let’s get stuck in!
Did you know?
Worldwide, it is estimated there are 1000 distinct sheep breeds and around 60 of those are in Britain alone, more than anywhere else in the world. No wonder it’s confusing! Read about the history of British wool HERE
Herdwick sheep on the Cumbrian Fells
Can all wool be needle felted?
Short answer is no but most wool can be wet felted, or incorporated into wet felting. You will find my handy guide to needle felting wool at the bottom of this page.
Hands up if you’re confused about core wool?
Core wool means different things to different people and that is where most of the confusion lies. Put simply, it just means what you use for the centre or bulk of your project and it can be any medium/coarse wool. If your top layer is going to be a different colour or you are using a fine wool; Merino Corriedale or similar. Core wool can be used to needle felt your basic shape and then covered with dyed wool. However, for many projects, it isn’t necessary and if I am making a hare or a sheep then the whole thing will be made from natural Jacob, Shetland or Swaledale tops which is coarse and felts really easily. I will then add a few finishing touches and detail with a different colour wool, un-dyed where possible as I like the earthy, natural finish. Where a different core wool is really useful is when you are creating life sized animals, or using a more expensive dyed wool as your top colour for birds, realistic animals, Christmas baubles, fruit, dragons, Easter eggs, gnome hats etc. These types of projects would be much easier to needle felt with a core of coarse wool and then covered with a top layer of bright Shetland, Corriedale or Merino.
Do I need Core Wool?
Short answer is no. Core just means the inside of your project and, because most of my critters are small (usually no bigger than 15-20cm), I just use the same wool inside and out. It’s much less of a faff and it stops the wool, from the different colour core, poking through the top layer. My preference is natural, medium to coarse wool top (sometimes called roving) for most of my animal projects and needle felting kits and I usually encourage new felters to do the same, especially if they are going for a firm shape. For example, if I am making a grey hare or grey sheep then I will use my grey Jacob wool top (or similar) throughout only adding different wool for surface detail and contrast. Core wool is best used for realistic dogs, cats or other animals; for finer top coat of Corriedale or Merino where a different colour or blend of colours is required. Also, larger pieces such as life size hares or other animals would be more cost effective with a cheap core wool to build the bulk of your project. Shetland carded batts are a good option or a loose core. Visit tutorialHERE or watch the short VIDEO TUTORIAL
Brown woodland hare created using Shetland Moorit wool top; no core. White Jacob top and carded batt used for surface details and whiskers.Sheep body using just grey Jacob wool top; no core.
Core wool for stuffing and wrapping
There is actually another type of core wool that is that is used almost like a toy stuffing, made up of shorter, lumpy wool fibres. It is perfect for soft sculpture and bigger rounder shapes and is ideal for wrapping wool batting around to create pumpkins, garden bases , mushroom tops, bee hives and all manner of soft sculpture where you want a particular look. They can be created in no time, are super simple and really effective. It can also be used for spinning and wrapping around a wire frame, although carded slivers may work better for some armature projects.
Life size Snowshoe Hare has a soft core of Shetland carded wool batts.
What is best, wool top or carded wool?
There is no right or wrong answer and it all depends on the wool you are using , what you are making and personal preference. The biggest problem is that a lot of people start their needle felting journey with Merino wool which is just not suitable. It’s is too fine, doesn’t felt easily and makes the whole project hard work – more on Merino below – then, thinking that all wool tops are the same they will change to carded wool (also great for needle felting), or give up on needle felting altogether, which makes me very sad.
Wool tops (AKA roving)
A coarse wool top ( sometimes called roving) is a joy to work with, felts up quickly and easily and is really cost effective. I use it for almost all of my needle felted animals and in the majority of my needle felting kits. I have been doing this for nearly seven years and have yet to find anything better for my needs. My HANDY GUIDE TO WOOL TOPS is further down the page.
Grey Jacob and Shetland Moorit wool both give a beautiful earthy, natural finish to needle felted animals and no need for a separate core wool.
Hares made from Grey Jacob top and Shetland Moorit top
Carded wool and carded slivers
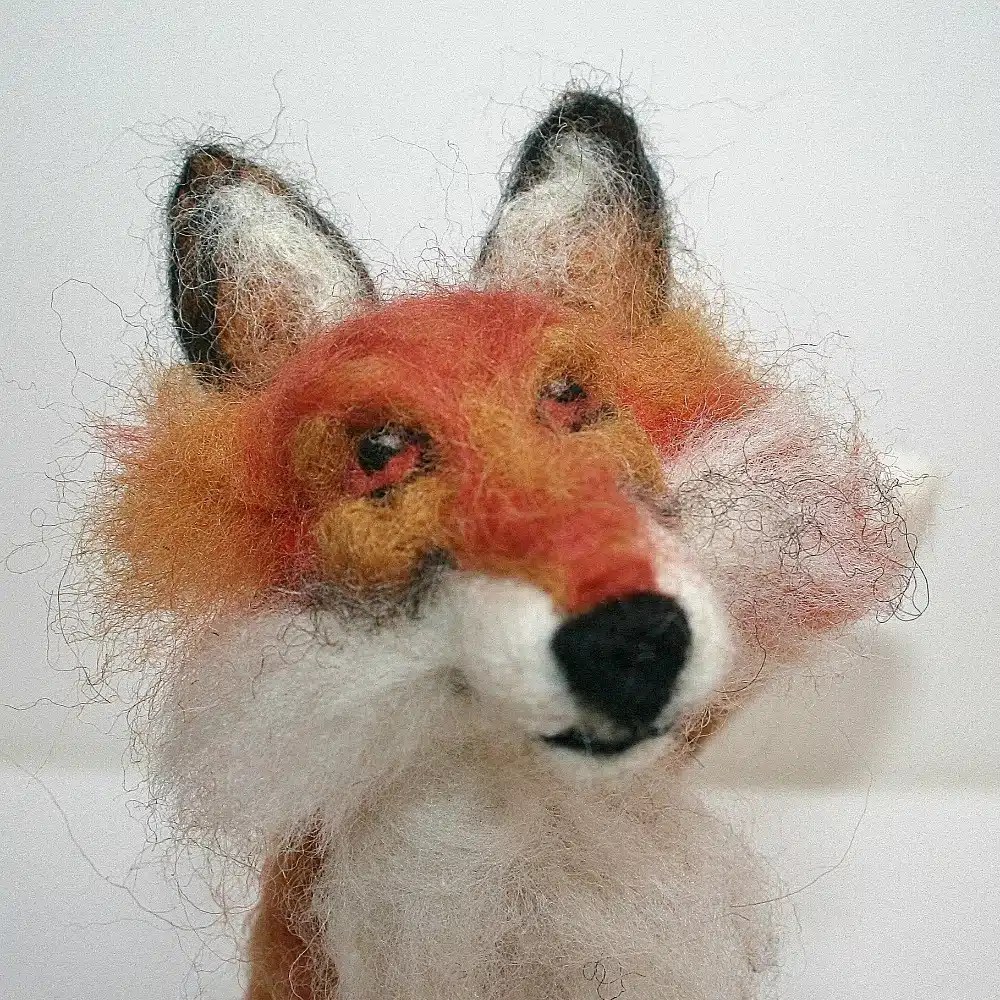
Carded wool is also great for needle felting and carded slivers (long legths) are ideal for working around a wire frame where the finished project tends to be much softer. Carded wool sheets (batting) are also perfect for wrapping around a core base to create lovely soft sculpture like the fox and mouse shown below, pumpkins, gnomes and larger life size pieces. However, I don’t use full wire frames very much and favour wool tops for most of my projects. The fox and mouse below were both created using a wire frame (armature) using carded batting sheets. Mouse is grey Jacob batting and fox is my own blend of Corriedale batting and wool top.
Pumpkins made using a lumpy core wool and covered with carded batting sheets. Traditional and Winter Wonderland Pumpkin needle felting kits are on the WEBSITE
Video tutorial
It’s only nine minutes long and explains the different types of wool (including core wool) and how I like to use them.
What is the difference between wool tops and carded wool?
Same wool, different processes. Wool tops are made in long lengths (usually around the thickness of your wrist), quite dense with the fibres brushed in the same direction. Carded wool fibres are much shorter and brushed in lots of different directions, resulting in a much loftier wool. Click HERE for the wool shop.
Natural wool tops
Carded slivers
Is Merino any good for needle felting?
Not for three dimensional projects or anything with a lot of bulk that needs to be firmly felted. Merino is a beautiful wool, when used for the right application – especially wet felting, top coats, long animal fur and pictures – but I have lost count of new felters that have contacted me asking why their needle felting project isn’t felting properly or is full of needle marks and is taking an age to shape. I can almost guarantee that they are using Merino or have started with a needle felting kit that uses Merino. It saddens me when this happens because it is really disheartening to start a new craft, often with much trepidation, and not be able to complete it. It stops many new would be crafters in their tracks because they think their lack of know how is to blame. Such a confidence shaker and definitely a case of ‘It’s not you it’s the wool’ and I am at a bit of a loss as to why Merino is used in many needle felting kits?
Ethical Merino
I am often asked about Merino and the practice of mulesing. My advice is to check that any Merino you purchase is from a country that doesn’t practice sheep mulesing; a horrible and painful practice used to control fly strike. The fly species that harms sheep only exists in Australia and New Zealand so Merino from non-mulesed sheep is easy to get hold of. Notably South America, South Africa and Spain. My rule is if a supplier doesn’t know where their Merino is from then I don’t buy from them.
Curly wool/locks
Curly locks can be used for almost any project, to add texture and interest. Teesdale and Wensleydale are really popular and come in a raft of colours. You can also make your own out of knitting yarn and I have created a short video HERE on how to create your own. I must admit I am a bit of a curly locks hoarder and I like to open the drawers and just admire my stash; I know I’m not the only one who does this… There are lots of fabulous lock sellers online and I have popped a few of my faves below. Or, why not make your own with simple wool yarn. Click HERE for video tutorial.
If you want to create needle felted (or wet felted) pictures then pre-felt is the perfect base. Pre-felt is partially felted sheets of wool which are lightly carded and felted. It is stretchy and pliable and makes a great base for wet felted and needle felted pictures, allowing you to lay out and layer all your fibres on the top before wet felting or needle felting. You can make your own by wet felting a couple of layers of wool top or carded wool but is is also available to purchase online. My favourite is natural Shetland pre-felt which I add to my picture needle felting kits and use for my own projects. You can find it in my wool shop.
Needle felted onto 25cm pre-feltSimple needle felted picture on Shetland pre-feltThe possibilities for needle felted pictures are endless. I have added pearl beads and French knots to this one, called ‘Asleep Under The Cherry Tree’.
Angora and Alpaca
Too fine for bulky needle felting but, like Merino, good for blending with a coarser wool for different textures, wet felting and top coats.
What’s the best wool for long animal fur
Anything that works, including Merino. My Herdwick sheep, naturally have a long coat of Herdwick but for dogs and cats Merino and Corriedale is good. I spray mine with hairspray to keep everything in place. Some say it can discolour white wool, over time, but I have never found it to be an issue. CLICK FOR TUTORIAL
It makes sense, wherever possible, to buy local or from the country you are in. The carbon foot print is reduced, you are supporting your community and the economy, and traceability is much easier. Much of our wool is from animals that are used for their wool and meat but that doesn’t mean that they are not cared for and, for the overwhelming majority of farmers, animal welfare is a top priority. We do live in an imperfect world so there will always be rotten apples in the barrel. All my wool suppliers are British, family run businesses (some large some small) and I have never had a question on traceability or ethical farming go unanswered.
Where does British wool fit into ethical and sustainable?
In global terms, UK sheep farms are small, having on average approximately 350 sheep. UK sheep are raised naturally outdoors on pasture. As a result, the scale and method of UK lamb production is such that it is not considered an ‘intensive’ farming activity by animal welfare campaigning bodies.
Sheep are required to be shorn of their wool once a year for their own comfort and health. Hence, wool is a naturally occurring by-product. Every year British Wool puts over 800 people in all parts of the UK through our two day shearing training courses that are tailored to their existing level of experience and skill. It goes without saying that shearing in accordance with best practice industry standards ensures that the process is stress free for the animal (as well as maximising the value of producers’ wool). Please visit our Shearing pages for further information.
If you want to inject some colour into your projects then Shetland and Corriedale (a Merino Lincoln cross) are my favourites but there is a huge range available and lately I have been looking for natural plant dyed wool which is not an easy task. These two dyed wools are ideal for any project that needs colour, be it landscapes, brightly coloured Christmas decorations or a vibrant topcoat. You can also blend colours to create different effects using your hands or a blending brush. If you don’t have wool blending brushes, dog slicker brushes work really well. Dyed wool and bundles are available HERE
Corriedale and Shetland pastels
Corriedale and Shetland pumpkin spice
Can I use plant fibres for 3 dimensional needle felting?
You can but it’s a struggle and a chore and the result isn’t nearly as good as wool. Plant fibres, like bamboo, don’t felt well because the fibres are much smoother, whereas wool has tiny scales that interlock when rubbed, agitated or compressed with a felting needle. A few years ago I put together a test ‘vegetarian’ needle felting kit, using only plant fibres, bamboo mostly. I then sent them out to a few customers for testing and each said that it was really difficult to work with and the end result was quite poor. Although plant fibres alone may not needle felt well they are still lovely to use for many other projects, especially when mixed with wool or added to finished wool projects. Bamboo, and especially silk tops add a lovely luxurious texture, contrast and sheen to your project. I use a lot of silk in needle felted pictures, on pumpkins and gnome beards and hats.
Can I buy vegetarian wool?
You can and availability is increasing. Vegetarian wool, also called slaughter free wool, means that the when the animal dies it is not sent to slaughter and does not end up in the food chain. I love the organic, vegetarian wool from the Doulton Border Leicester flock. It is a lovely coarse British breed wool that felts beautifully. Ellie refers to them as ‘sheep that live to grow old’ and even has a seperate area for her OAP sheep. You can find her on ETSY or via her WEBSITE and she also sells the most gorgeous vegetarian knitting yarn. I use Ellie’s wool in my VEGETARIAN NEEDLE FELTING KIT
Can wool be over felted?
Definitely. The more you needle felt the more you are breaking down the wool fibres. If you over felt, by repeatedly poking the wool in the same spot for too long, the fibres will eventually break down and start to go soft. If this happens it is best to start again with fresh wool.
What do I need to start needle felting?
Only four things are needed and you are good to go;
Good quality wool
Felting needle; size 38 or 36 to start with. Both are good all rounders. European needles are the best.
Soft but firm felting base of either foam, wool or a hessian bag filled with rice.
At a glance – My needle felting wool guide in a handy chart
This chart is so useful and if you are ever unsure whether a wool is suitable for needle felting then just look at the micron count. This is the measurement used to determine how fine or coarse the wool is. The lower the micron number the finer the wool. For example: Jacob is 33-35 microns – coarse and perfect for needle felting. Whereas Merino is 23 microns, fine and not so good. Most of my animal needle felting kits use Jacob, Shetland or Swaledale. Of course, as you become more confident, you will develop your own preferences and the best way is to try a few yourself. Here are some of the most popular (although not exclusively) in a handy chart.
My favourites are marked with *
WOOL
ORIGIN
TEXTURE
MICRON
GOOD FOR NEEDLE FELTING
Jacob *
England
Coarse
25-35
Yes. Earthy finish
Shetland*
Scotland
Medium/ Coarse
25-30
Yes
Swaledale*
Northern England
Very Coarse
36-40
Yes – slightly wiry finish
Herdwick
North West England
Very Coarse
36-40
Yes – very wiry finish
Corriedale (Merino and Lincoln cross)
New Zealand
Fine/ Medium
25-30
OK – needs more work. Good for topcoats, pictures, wet felting and blending.
Merino
Spain
Fine
Super Fine
23
18
No – best blended with coarser wool. Good for topcoats, pictures, wet felting and blending.
White* Faced Woodland
England
Coarse
28-38
Yes
Masham
Coarse
34-38
Yes – Smooth finish. Quite slippery.
Blue Faced Leicester
Fine
24-28
Somewhat – smooth finish. More visible needle marks.
Border* Leicester
Northern England
Coarse
30-40
Yes – smooth finish
Manx Loaghtan
Isle Of Man
Medium/ Coarse
27-33
Yes
Lincoln Longwool
England
Coarse
33-45
Yes
Teeswater
England
Coarse
30-36
Yes – smooth finish
Alpaca
South America
Fine
26
No
Gotland
Sweden
Medium/ Coarse
27-35
Yes
Texel
Netherlands
Medium/ Coarse
26-26
Yes
Norweigian
Norway
Coarse
28-35
Yes
How do I know what wool top I am using?
If you are new to needle felting and handling wool you probably won’t be able to tell. It’s easy for me as I have been handling wool for a long time and can even name some of the sheep breeds by running the wool through my hands. If you are finding it difficult to needle felt, and it feels smooth and silky, the chances are it is a Merino or other fine wool with a low micron count.
And Finally…almost. Don’t miss the really useful stuff below!
This is just a guide to impart some of the knowledge I have gained over the last seven years but I hope it helps you in your felting journey. Just experiment and have fun because there really is no right and wrong. Many people start with a needle felting kit which usually has everything you need to complete your first project. Just try not to start with one that uses Merino as it will make the learning curve harder. All my felting kits, wool and accessories are available on the LFC website HERE