How To Needle Felt With Wire? Amazing DIY Crafts!

Learn how To Needle Felt With Wire – Easy step by step guide

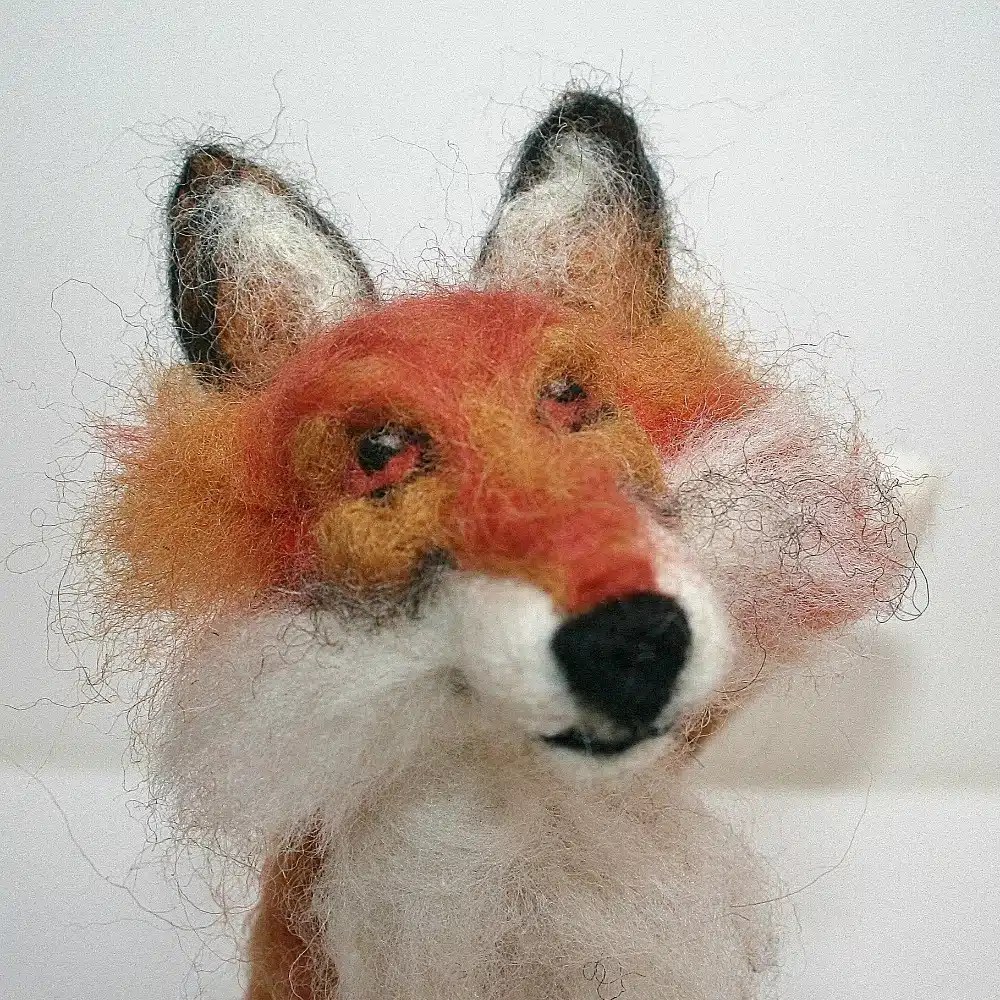
Welcome to The Felt Hub with Lincolnshire Fenn Crafts, here to feed your passion for needle felting! This easy guide to using wire for needle felting will give you a god grasp of what wire to use, and when. From realistic horns, using only wool and a pipe cleaner, to full fox armature.

FREE DOWNLOAD

Links for free download, video tutorials, and felting wire are at the bottom of the post.

YOU DON’T HAVE TO USE WIRE TO BE GOOD AT NEEDLE FELTING

It may seem an odd place to start but it is important to know that many needle felters, including myself, rarely use a full wire armature. Many new needle felters – mistakenly – think that using wire means you are better at needle felting. This is not the case at all, and the truth is, most needle felting projects don’t need it. In fact, the trustee wooden BBQ skewer can completely change the finished look and stability of your needle felting projects, without the need for any wire. Just check out my Parsley Hare needle felting tutorial on YouTube to see how amazing this tool really is.

Image shows a tall brown needle felted hare that has been made without needle felting wire.

NEVER BE WITHOUT A WOODEN BBQ SKEWER

The humble wooden BBQ skewer is in my top 3 needle felting tools. It enables you to quickly, and easily create firm needle parts for your project, without the need for wire. Using one of these will change the way you needle felt. Find out more HERE

An image of lots of different types of needle felting wire.

PIPE CLEANERS CAN BE YOUR QUICK FIX FRIEND

A BBQ skewer wont work for everything though and a pipe cleaner, or two, makes it possible to add some really clever touches to your project. Especially tails and horns, flower stems, or to stop your legs doing the Fandango every time you try to get them to stand, or when your project is top heavy; why do I feel like I am talking about myself?

Shows how floristry wire can be used to make realistic needle felted flowers

ADD STABILITY AND POSEABILITY

Using wire for your needle felting projects will allow you to pose your animal and add more stability. It can be used for just a tail, the legs, neck, or the whole project.

Cute needle felted Herdwick sheep with wire in its neck so it can be posed at different angles.

TINY FINGERS, TOES, PAWS, AND CLAWS

This requires a much finer wire and the paper covered steel wire in your pack is just the job. No need for wax, and the wool sticks well to the paper, allowing you to get those delicate details. It also works well for super thin bird’s legs and claws.

SHAPING YOUR WIRES

Realistic needle felted fox. Fully poseable and needle felted around a wire armature.
Make amazing needle felted animals with easy to follow needle felting tutorials.

WIRE SIZES EXPLAINED

Wire gauge refers to the physical size of the wire; the smaller the wire gauge number, the larger/thicker the wire diameter. 

METAL TYPES

Whilst thicker is usually stronger, the type of metal affects its flexibility. Working on a like for like gauge size, Aluminium is the softest and most flexible, copper a little stronger, and steel (the paper covered wire) is stronger still.

GOOD OLD GARDEN WIRE

The plastic covered garden wire is a great substitute if that’s what you have lying around and can’t wait to try needle felting with wire. The plastic is also quite ‘sticky’ so holds the wool well.

12 GAUGE ALUMINIUM ARMATURE WIRE: 2.00mm

Ideal for medium to large lightweight sculptures. Strong but still easily shaped by hand, and with pliers.

Pipe cleaners can be wrapped around the armature so the wool sticks and does not slip and slide.

18 GAUGE ALUMINIUM WIRE: 1mm x 10 metres

Ideal for medium lightweight sculptures. Strong but still easily shaped by hand, and with pliers. Pipe cleaners can be wrapped around the armature so the wool sticks and does not slip and slide.

A picture containing different types of needle felting wire and pipe cleaners used for needle felting.

20 GAUGE ALUMINIUM ARMATURE WIRE: 0.8mm x 10 metres

Great for smaller projects. A finer wire that can be easily shaped by hand. Pipe cleaners can be wrapped around the armature so the wool sticks and does not slip and slide.

STEEL 0.5mm PAPER COVERED WIRE (approx. 26 gauge)

Ideal for tiny fingers, toes, and claws. Wool sticks well to the paper so you can keep your limbs, hands, and toes as small as possible.

STEEL 1mm PAPER COVERED WIRE (approx. 18 gauge)

A very strong paper covered wire that is ideal for projects that are heavier, or taller, or top heavy.

PIPE CLEANERS

Where would we be without the old faithful pipe cleaners which are perfect for small, lightweight armatures, and especially useful for wrapping around wire armatures so that the wool sticks. Also adds extra strength and stability to neck, back, and limbs, whilst allowing you to felt smaller feet, toes, hands, and claws.

A picture showing a person in a bright pink dress holding a realistic needle felted Hebridean sheep. It is being held in her right hand.

It’s perfect for quick horns and tails, or if you just want part of your project to be poseable or have more stability. Cotton covered pipe cleaners are all pretty much the same with regards to flexibility, unless you opt for a slightly stiffer pipe cleaner.

TOP TIP: DON’T GET HUNG UP ON THE NUMBERS

It really doesn’t matter the size of the wire, as long as it works for your project. It is also very much trial, error, personal preference, and practice.

WATCH THE VIDEO TUTORIALS HERE

Image shows a wire fox frame and text says, visit The Felt Hub on YouTube for video tutorials.

You will find lots in The Felt Hub on YouTube. Just look for the NEEDLE FELTING WITH WIRE playlist.

DON’T BE TOO AMBITIOUS

Start with a small simple project, such as horns or tails, and legs. Get used to wrapping the wool and working around the wire before trying tiny fingers and toes. Even the most competent of needle felters usually has a little sigh before starting on those, and it takes practice to get them right, lots of practice, so be patient. Each time you try those tiny paws and claws you will get better.

A picture showing a grey needle felted mouse wearing a red French beret. It is stood next to a painting easel with paintbrushes in the background.

ALWAYS LEARN THE BASICS OF NEEDLE FELTING FIRST

This is so important, and I can’t tell you the number of people I have seen give up because they have started on a complicated armature project before even using a felting needle for the first time. You have to walk before you run but the basics are quick and easy to learn.

SIMPLICITY CAN BRING OUT THE BEST IN YOUR PROJECTS

The mouse and cat pictured have thin wire in their legs and tail. It is super simple but adds an extra special touch. If in doubt, add a scarf as you can’t go wrong with one of those.

A picture showing a white needle felted mouse carrying a bunch of brightly coloured felted flowers. Second image shows a needle felted cartoon style Siamese cat.

USEFULL LINKS

SHOP: Needle felting wire, tools, and accessories

READ: Ultimate Guide To Needle Felting Wool And Sheep Breeds

JOIN THE VIP FELT CLUB AND GET YOUR FREE DOWNLOAD HERE

Easy template to create an armature for your fox or dog. Making an armature is easy, with the right technique, and you can use almost any flexible wire, or pipe cleaners you already have. This simple template will make sure you get the proportions of your needle felted fox, or dog, right every time.

HAPPY FELTING!

HOW TO USE WIRE FOR NEEDLE FELTING?

DO I EVEN NEED TO USE WIRE FOR NEEDLE FELTING?

I am often asked how to use wire for needle felting, and is it even needed? The short answer is no. In fact I rarely use a full wire armature because I like a firm felt. However, using wire in specific areas can really help you create the shape you need, and create more detail and dimension.

WHEN SHOULD I USE WIRE FOR NEEDLE FELTING?

Use it in the neck of a sheep so you can pose the head, or the horns and tail of an animal to create great shapes. If you want super thin legs or arms then wire is a great solution. Alternatively, make limbs around a BBQ skewer (the ‘farmers friend’ of needle felting), to create smooth legs and perfect symmetry in super fast time. Using the BBQ skewer as a tool negates the need for using wire altogether for many projects.

USING A BBQ SKEWER WILL CHANGE THE WAY YOU NEEDLE FELT!

Parsley, the needle felted hare seen below has no wire anywhere. This gorgeous needle felting project was made, almost entirely, using a wooden BBQ skewer. I started using this method back in 2017 and it has made teaching needle felting, and creating projects, so much easier!

CLICK HERE FOR

PARSLEY HARE NEEDLE FELTING KIT or PATTERN DOWNLOAD AND PRINTABLE

Watch the video tutorial, at the bottom of the post, from our Friday night felt along on the FACEBOOK GROUP, or follow the mini tutorial below, and you will be amazed at how professional the finished result is, even if you have never needle felted before!

Happy Felting!

HOW TO NEEDLE FELT FIRM LEGS WITHOUT WIRE – QUICK AND EASY TUTORIAL

Scroll to bottom of the post for the video tutorial.

Make Time: Super fast! Approximately 20 minutes for both legs plus faffing time…

You will need:

The needle felting kit and pattern are available via the links below and you can join the new FACEBOOK GROUP HERE

LOOK, NO WIRE? Making Perfect Legs Around A Wooden BBQ Skewer

As I mentioned, if string is a ‘farmers friend’ then a wooden BBQ skewer is most definitely a ‘felters friend’. Never be without one as it will change the way you needle felt, drastically reducing the chore of hours spent smoothing and shaping.

This is super easy, but technique is important and you may have a couple of false starts as the legs need to be kept tight and narrow, but that’s ok. Just unravel and start again. When finished they will be firm and smooth and the last couple of centimetres will be built up for the feet/paws. TOP TIP: Remember to keep the top of the legs very loose as they will be attached to the body and should look like they are part of the finished project, not just stuck on.

Let’s get going!

1 Select a length of carded wool or wool top/roving and split down the middle. This means that both legs will use equal amounts of wool and sizes will be more or less the same.

2 Start to wrap the wool tightly around the skewer, starting close to the top of the stick. TOP TIP: Keep the wool flat between your thumb and finger so the wool doesn’t twist and become lumpy and uneven.

3 Keeping the wool tight, continue for a little way then stop and felt around the entire area to secure. TOP TIP: Work at a diagonal angle around the sides of the stick keeping hold of the wool so it doesn’t become loose. If it does, unwrap and start again. This will also avoid bending or breaking the needle.

4 Continue with the process until the leg is approximately two thirds of its final length (you will see why when you remove it from the skewer) and add more wool to the foot to widen it. Continue to felt and shape the foot until it is firm. TOP TIP: A foot/paw that is significantly bigger than the rest of the leg will have more impact when your project is finished.

5 Remove from the stick and felt a little more but avoid the top of the leg as this needs to be kept loose for attaching to the body. TO TIP: Don’t worry if the shape is not perfect as you are going to fix that in a moment.

6 You are now going to roll the leg firmly in your hands to firm and smooth it, which will also lengthen it. When you do this keep the top of the leg sticking out, so the wool remains loose. In just a few seconds of firm rolling you will see how the leg has really firmed up and become even smoother without the need for any wires. TOP TIP: Don’t over roll it as it will become longer than needed.

Here’s what some of the fabulous Facebook group made during the live workshop! It’s a great technique that can be adapted to almost any project. Join the group HERE and come along to the free live events.

I was blown away by the quality, personality and individual styles of the projects from the FACEBOOK GROUP members and the amazing feedback has been so good!

VIDEO TUTORIAL – Felt along with me!

Watch the full tutorial and felt alongside me, workshop style.

Video Tutorials – Needle Felted Animals and Characters

Work alongside me and make these fabulous needle felted characters, step by creative step. I have split the hares and sheep and Highland Cow into several easy parts so you don’t feel overwhelmed plus there’s plenty of time for tea and cake breaks. Put the kettle on and enjoy!

All needle felting kits, wool and accessories are available at: Lincolnshire Fenn Crafts

NEW! BUMBLE BEE BROOCH

HARES AND SHEEP

HEDGEHOGS

HIGHLAND COW PARTS 1-6

NEEDLE FELTED PUMPKINS IN 30 MINUTES!

NEEDLE FELTED MUSHROOMS/FAIRY HOUSES

WINTER WONDERLAND PUMPKINS

PERCY PENGUIN

NEEDLE FELTED TOMTE GNOMES

LIVE WORKSHOPS

I love to keep you entertained with live workshops. They are a lot of fun so make sure you subscribe for notifications as I get to answer all your questions.

LIVE FAIRY WORKSHOP

LIVE GNOME WORKSHOP

LIVE SNOWMAN WORKSHOP

How to make easy needle felted animals from simple shapes

Everything you need to know is covered, from needle felting your basic body shape at the start to putting it all together, in simple bite size chunks that will give you the creative confidence to continue with this fabulously addictive craft.

Within each video tutorial, I meticulously dissect the process of needle felting animals, simplifying each step into easily adaptable body shapes that suit the animal you’re crafting. Whether you’re a beginner eager to dive into the world of needle felting, an improver seeking to enhance your skills, or simply someone craving a creative escape, these tutorials are tailored just for you. Designed in a workshop-style format, each video serves as your personal guide, leading you through every stage of your creative journey. Along the way, I share invaluable tips to streamline the process, ensuring efficiency without sacrificing quality.

From mastering the fundamentals of shaping your basic body outline to seamlessly assembling your creation, every aspect is covered. The content is presented in digestible, bite-sized chunks, giving you with the confidence to persist and thrive in this wonderfully addictive craft. Whether you’re crafting a charming penguin or a needle felted hare, these tutorials provide the foundation and encouragement you need to unleash your creativity and bring your projects animals to life. So, grab your felting supplies, settle in, and let’s start needle felting together.

If you are working from one of my NEEDLE FELTING PATTERNS just follow the written instructions alongside the video tutorials.

1 BASIC BODY SHAPE – 12 minutes

2 BASIC HEAD SHAPE – 12 minutes

Learn to master the creation of a basic and simple head shape for your needle felted animals. Achieving a firm shape is essential for the success of your project, serving as the foundation upon which you’ll build the rest of your creation. Through careful guidance and practice, you’ll learn the techniques necessary to craft a head shape that not only looks great but also provides stability and structure to your final piece.

3 BASIC LEG SHAPES – 21 minutes

Welcome to The Felt Hub series of needle felting projects dedicated to helping beginners master the art of needle felting! In this installment, we’ll focus on creating firm legs every time, without the need for wires. Firm legs are crucial for providing stability and balance to your needle felted creations. Whether you’re new to needle felting or looking to refine your skills, this tutorial will guide you through the process step by step, giving you the skills necessary for you to achieve professional-looking results without any hassle.

4 HARE AND FOX EARS – 15 minutes

Crafting needle felted ears is a breeze once you’ve mastered the right technique. With my straightforward needle felting tutorials, you’ll be up and running in no time, ready to bring your creations to life. Whether you’re aiming for petite and perky or large and floppy, you’ll learn how to craft fabulous ears in any shape or size. So, let’s dive in and start felting those adorable ears!

5 SHEEP EARS – 15 minutes

Discover a quick, effortless, and efficient method for crafting charming needle felted sheep ears in just fifteen minutes.

6 FACE DETAILS – 11 minutes

7 SEWING ON BEADS FOR EYES – 8 minutes

8 PUTTING IT ALL TOGETHER – 35 minutes

Now you can create any size and shape you want

How to add long fur to needle felted animals

A SUPER EASY TECHNIQUE FOR AMAZING EFFECTS!

Adding long fur to needle felted animals adds serious impact as well as adding another element of realism. I have had a lot of requests asking how it’s done and the technique is so easy that even the most nervous beginner will be able to tackle this with ease. Once learned, this technique can be used for so many other animals and projects.

USE THIS TECHNIQUE FOR ANY ANIMAL

Scroll to the bottom of the post for the video tutorial, and see how I created an amazing topcoat for my Highland cow!

YOU WILL NEED:

Any medium to coarse wool top.

Standard felting needle – 36 or 38 gauge are good all rounders.

Foam pad or felting mat to support your project.

Sharp scissors.

TIME TO MAKE

Adding wool top and trimming: 20 minutes

Faff time: how long is a piece of string?

WHAT FELTING WOOL SHOULD I USE?

For full, flowing effect use a wool top for long coats, also known as roving although this isn’t strictly accurate. Carded wool can be used but you just don’t get the same results as the fibres are much shorter and run in different directions. As I am making my favourite, the Herdwick sheep, I have used Herdwick wool top but any medium to coarse wool top will work just as well. Herdwick wool top is very coarse, and sheds a lot so is not entirely suitable for all aspects of needle felting. However, for this application it is perfect and the earthy texture is just what I am looking for.

Herdwick Sheep needle felting kits are available on the website HERE

Lets get creating! Visit the homepage HERE for full list of tutorials

SEPERATE THE WOOL

1) Your ‘naked’ sheep is prepped and ready for it’s top coat. To make this sheep follow the basic shapes video tutorials HERE.

2) If your wool top is quite thick then split it down the middle before starting

1 & 2

3) Cut (or pull) a strip of wool approximately 10cm long, but longer if your sheep is larger than mine which is 9cm from feet to top of its back. Please note: this is one of the few times it is OK to cut wool as the cut ends will not be attached to anything. TOP TIP: Cutting wool for needle felting is generally a no no as it damages the fibres, and prevents them from felting. If you do need to cut a piece away from your needle felting project (head maybe too big or legs not firm enough) make sure you wrap it in fresh, uncut wool before re-attaching.

START ATTACHING TO YOUR ANIMAL

4) Lay your strip of wool on the bottom half of the body of your sheep.

3 & 4

5 & 6 ) Felt across the centre of the strip of wool to keep it in place. Make sure it is firmly attached as you don’t want it to pull away when handled.

5 & 6

7 & 8) Fold the top over to double the thickness

7 & 8

9) Felt along the top to keep it in place.

Fun Herdwick fact: Herdy’s will climb up to 3000ft to graze on the Lakeland high fells, and are fondly known as the ‘gardners’ of the Lake District.

10) Repeat this process around the sheep until you have created a ‘skirt’. Trim around the bottom of the skirt so that the legs are visible and the wool is an even length all the way round.

9 & 10

11 & 12) Repeat steps 1 to 10 and create a second skirt approximately 1 to 2 cm above the first.

11 & 12

13) Once the second skirt is complete lay a strip of wool across the sheeps back.

14) Felt down the centre of the wool strip to secure it. Repeat once or twice more until the back is covered.

13 & 14

15 & 16) Skip this part if your sheep doesn’t have a neck. Add much thinner strips of wool around the neck but leave the top part of the neck visible.

15 & 16

TAME THAT MANE!

17 & 18) Your sheep is looking a bit wild so smooth it down with your hands.

19) Now you have flattened the wool it is looking a bit chunky so time for a trim. You can also snip into it, hairdresser style, to thin it out and give it some layers. TOP TIP: Take your time as you can’t stick it back on once you have cut it and you don’t want to end up with bald spots.

20) Give it a gentle shake to get rid of any loose wool. TOP TIP: You may want to do this outside or in a bag to avoid lots of fibres flying everywhere.

19 & 20

21) I quite like the wild look but, if you want to go for the more traditional then just smooth the coat down and fluff gently with the tips of your fingers.

ADDING THE HERDY ‘BUZZ’ CUT

Now, depending on the sheep you have created you may just want to leave it at that. However, the Herdwick sheep sport a pretty nifty ‘buzz’ cut so continue to the next section to see how it’s done.

21

22) Lay a thin strip of wool across the top of the head

23) Secure by felting across the centre of the wool strip, making sure the eyes are still visible.

22 & 23

24) You now have something of a troll situation going on.

25) Trim quite close to the head, being careful not to snip into the ears.

24 & 25

26) There you have it. Your sheep in all its long coated glory, ready for even the harshest of Cumbrian winters.

For more tutorials clik HERE

For needle felting kits, accessories, wool and handmade sheep click HERE

26

WATCH THE VIDEO TUTORIAL

How to make your own curls for needle felted sheep

So you have spent hours making your fabulous needle felted sheep, only to realise you don’t have any curls to finish it. Grrrr! Not to worry, just grab a ball of wool, yarn or similar and make your own. It’s really easy and creates a whole new look for your needle felted animals; Scroll down for video tutorial.

It is also very calming and saves you sitting by the post box like this, impatiently waiting for your curly wool to arrive.

VIDEO TUTORIAL

Here is a quick video (part 2) showing you how easy it is. I have used a coarse rug yarn but any yarn with an element of wool in it will do.

Use any yarn you have in your craft box; It is easier to apply if it has some wool content. I have used a coarse rug yarn and a really soft Merino for these two gorgeous sheep.

Create beautiful texture with standard yarn

You will also find out how to add this lush, art yarn (video part 1) to your projects. I used a 40 triangle needle as it is a little easier but a standard (usually a 36 or 38 gauge) will do just fine.

Video part 1 – Art yarn application

Sheep needle felting kits using this fabulous art yarn are available on the Lincolnshire Fenn Crafts website

Happy creating. Sandy x

Sewing Eyes Onto Your Needle Felted Animal

In just five minutes and four easy steps!

Needle felted eyes look great but I also love the sparkle and shine you get from a glass bead. I always find it funny that, when some of my students have spent hours creating their needle felted animal, they say they find sewing on the eyes the hardest part. I think it is because they seem a little bit fiddly but here is a quick way of doing it, in five minutes and four easy steps.

1 Use black thread and needle and sew through the side of the face – where your eyes will sit – and repeat a few times until your thread is secure.

2 Pop your bead onto the tip of your needle and pull it through.

3 Push your needle back through to the other side and pop on your second bead.

4 Repeat the process a few times until you can pull quite firmly on your thread, and both beads are secure. Finish by sewing through the back of the head a and cut the thread.

CLICK HERE FOR MORE BEGINNERS TUTORIALS

CLICK FOR NEEDLE FELTING KITS

Shows how to sew eyes onto needle felted animals

Beads can be used for all your needle felted animals.

CLICK FOR VIDEO TUTORIALS

HAPPY FELTING!

Adding Face Details To Your Needle Felted Animals

One of the trickiest things to do when creating face details is getting the really fine lines for the mouth and nose. It’s something I always spend time on with my workshop students so they don’t feel disappointed with the finishing touches. Practice, practice practice is the answer, a firm base on which to work, and less is more when it comes to the wool. When I say less is more, think even less than that. You only need the tiniest strand of wool to create really impactful details, add in a few simple techniques and you will soon be adding those details with confidence.

Top Tip: If it doesn’t look right don’t try and rectify it. Pull the wool off and start again. I often do this and it takes much less time than trying to fix the problem. Also, preparation is key so make sure the head is firm before starting. If the head is soft and squidgy you aren’t going to get the nice straight lines you want to achieve and your sheep or animal will look like they’ve been on the sauce.

Whatever your design, this technique can be applied to your project in many different ways.

Let’s get started and, if you haven’t made your head yet just click the link for the video tutorial: HOW TO CREATE A BASIC HEAD SHAPE

1 Create an impression of the mouth – Do this by ‘drawing’ the mouth onto the face with your felting needle. ‘Draw’ a V for the nose, a line down the centre and two shallow curves each side. Go over the lines you have drawn until they are clearly visible and defined. This is where your wool is going to sit and makes it so much easier to maintain a nice, even shape.

2 Roll a very, very thin wisp of wool between your fingers to gently mat it together (not vital but it helps). If you don’t think it is thick enough you can go over it again later. However, start with too much and it ends up looking like you have drawn it on with a felt tip. Place it on the top left of the V shape you have created and gently tack it down towards the bottom of the V shape. Top Tip: Make sure the wool is at least twice the length you need as it will be pulled into the face as you felt; you can trim it later.

3 Continue back up the V shape and leave the ends loose.

4 Use another thin strand of wool (longer than you will need) to create the line down the centre. Top Tip: Keep the wool taught with your free hand. This will help create a straight, even line and avoid a drunken grin.

5 Leave all the strands loose until you have completed the mouth.

6 As before, use a very thin strand of wool and felt along the mouth. Repeat for the other side.

Top Tip: Don’t be precious over the shape of the curve as this can be teased into shape before you finish.

7 Make sure the wool is secure before trimming and shape the mouth by gently rubbing the tip of you finger on the wool – in the centre – to pull it down slightly.

8 Your head is now ready for the eyes and that’s another easy tutorial. You can watch it Here or keep scrolling for the written tutorial.

Top Tip: Sometimes the mouth can look a little off centre or lopsided. This is easily fixed by squeezing, and moving the head in your fingers – wool is still quite pliable, even when felted – until the features straighten out.

Create fabulous features for all your needle felted creations.

How to sew eyes onto your needle felted animal

Needle felted eyes look great but I also love the sparkle and shine you get from a glass bead. I always find it funny that, when some of my students have spent hours creating their needle felted animal, they say they find sewing on the eyes the hardest part. I think it is because they seem a little bit fiddly but here is a quick way of doing it, in five minutes and four easy steps.

1 Use black thread and needle and sew through the side of the face – where your eyes will sit – and repeat a few times until your thread is secure.

2 Pop your bead onto the tip of your needle and pull it through.

3 Push your needle back through to the other side and pop on your second bead.

4 Repeat the process a few times until you can pull quite firmly on your thread, and both beads are secure. Finish by sewing through the back of the head a and cut the thread.

needle felted herdwick sheep

Herdwick Sheep And Winnie The Pooh

Herdwick three ways. My favourite sheep. Natural, sustainable and completely biodegradable; what more do you want from a craft…

Have a fabulous week everyone and always remember that crafts are the perfect, instant respite when the stresses and strains of daily life start to get on top of you. So, today is officially my ‘Crafts As Therapy’ Monday. Failing that, just read a few Winnie The Pooh quotes; if that doesn’t work then we are all doomed and should stay in bed for the rest of our lives…

“I am not lost, for I know where I am. But however, where I am may be lost.” —Winnie-the-Pooh

Use the basic shapes video or tutorial to make the head and body then be as creative as you like. Sheep are the easiest way to start needle felting and you don’t even need to add the legs: BASIC SHAPE VIDEO 

If you fancy something more seasonal then the NEEDLE FELTED PUMPKIN VIDEO is perfect!

IMG_4752IMG_4755IMG_4799IMG_4734

For more craft inspiration follow me on PINTEREST