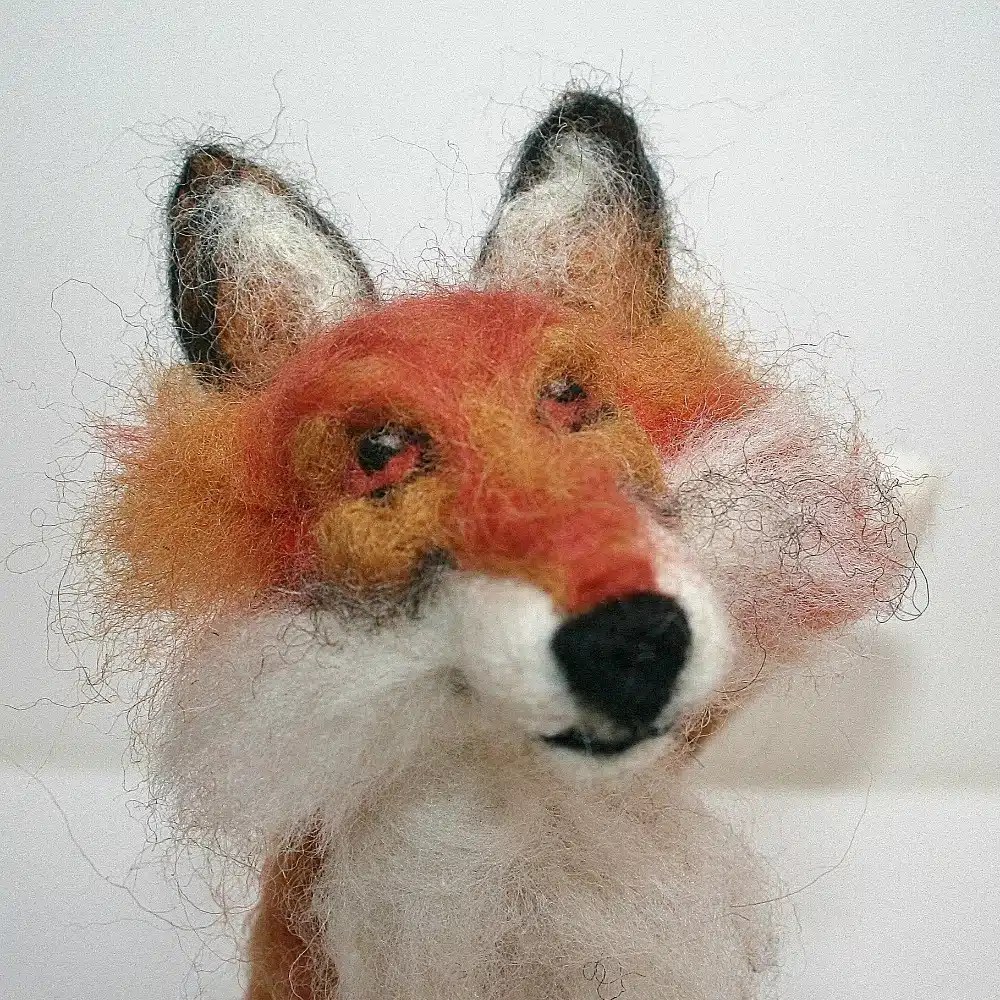
Needle Felting Made Easy! How to Needle Felt Animals

Needle felting, a delightful crafting pursuit, grants you the joy of turning raw wool into enchanting sculptures. Whether you’re venturing into this craft as a complete novice or honing your expertise as a seasoned needle felter, this blog post is ready to provide you with a wealth of valuable insights and tips. Within its pages, discover a treasure trove of knowledge to aid you in the creation of truly splendid felted masterpieces. Immerse yourself in this informative read for top-notch guidance, promising to elevate your skills and have you crafting marvelous felted wonders with ease and finesse in practically no time at all. Happy felting crafters!

Needle Felting Made Easy Key Points:

Choosing the Right Materials:

  • High-quality felting needles: Invest in fine and coarse felting needles for different tasks.
  • Wool roving: Select natural wool roving in various colors to bring your creations to life.
  • Felting pad or mat: A soft surface to work on and protect your needles.
  • Optional extras: Consider wire armatures, felting handles, and googly eyes for more complex projects.

Understanding Your Tools

  • Learn about the different types of felting needles and their uses.
  • Understand the purpose of your felting pad or mat and how it helps in the felting process.
  • Experiment with optional tools to see what works best for your projects.

Mastering The Basics

  • Learn how to properly hold and use felting needles to avoid accidents.
  • Practice the basic poking and stabbing motions to shape and sculpt your wool.
  • Start with simple shapes like balls and cylinders to get a feel for the process.

Creating Sculptures with Depth

  • Gradually add layers of wool to build up your sculpture’s volume and form.
  • Pay attention to proportions and symmetry for realistic results.
  • Use reference images or real-life objects for inspiration and guidance.

Adding Details and Textures

  • Experiment with different felting needle sizes to achieve varying levels of detail.
  • Create textures like fur, feathers, or scales by altering your poking technique.
  • Blend and mix colors of wool roving to achieve realistic shading and highlights.

Troubleshooting Common Issues

  • Learn how to fix loose or unevenly felted areas by reworking them with your needles.
  • Address fuzziness by gently felting the surface with a fine needle.
  • If your sculpture becomes too firm, use a coarser needle to soften it.

Improving Your Techniques

  • Once you’ve mastered the basics of needle felting and crafted your fair share of adorable animals, it’s time to elevate your skills to the next level. Exploring advanced techniques can open up a world of creative possibilities.
  • Consider delving into the art of wire armature construction, a method that allows for more intricate and poseable creations.
  • Multiple-needle felting is another exciting option, enabling you to work on larger projects efficiently while achieving a smoother finish. Layering techniques provide a way to add depth and realism to your creations, as you blend colors and textures with finesse.
  • These advanced techniques will not only challenge your abilities but also empower you to bring your needle-felted masterpieces to life in new and captivating ways.

Following the Step-by-Step Video Tutorials

  • To make learning needle felting even more accessible and enjoyable, I’ve put together an extensive library of step-by-step video tutorials. Whether you’re seeking quick tips or want to follow the entire process of crafting an animal from start to finish, my videos are designed to replicate the experience of a live workshop. They’re unhurried, ensuring you grasp each technique, and they’re fantastic for boosting your confidence and skills with every completed project. You can easily follow along with the videos, pausing and rewinding as needed, allowing you to master each aspect of needle felting. With over a decade of teaching and curating inspiring kits since 2014, you’re bound to discover the perfect projects that pique your creative interests.

To sum it all up, needle felting isn’t just a craft; it’s a wonderfully satisfying journey into the realm of creativity. Regardless of whether you’re a newbie embarking on this fluffy adventure or a seasoned felter perfecting your skills, the treasure trove of insights, tips, and those comprehensive video tutorials we’ve discussed here will undoubtedly work their magic, boosting your felting prowess and enabling you to create wonderful needle felted animals. And let’s not forget our trusty companions : practice and patience. They’re the unsung heroes, steering us toward confidence and proficiency in the world of needle felting.

So, just go for it! Enjoy turning simple, soft wool into beautiful needle felted animals. Let your imagination run wild in this fascinating world of needle felting. Your artistic potential isn’t limited to the sky; think of it as a canvas, and your creativity guides the way!

Ready To Start? You will love these as well!

Want to Start needle felting today?

Instantly download a needle felting pattern and get started straight away! On the hunt for inspiring needle felting patterns? There are patterns for all abilities on the website, from nervous beginners to confident needle felters, there is a pattern and video tutorial for you.

EASIEST EVER NEEDLE FELTED SHEEP VIDEO TUTORIAL!

Felt along with me, workshop style. Step by creative step.

How To Needle Felt With Wire? Amazing DIY Crafts!

Learn how To Needle Felt With Wire – Easy step by step guide

Welcome to The Felt Hub with Lincolnshire Fenn Crafts, here to feed your passion for needle felting! This easy guide to using wire for needle felting will give you a god grasp of what wire to use, and when. From realistic horns, using only wool and a pipe cleaner, to full fox armature.

FREE DOWNLOAD

Links for free download, video tutorials, and felting wire are at the bottom of the post.

YOU DON’T HAVE TO USE WIRE TO BE GOOD AT NEEDLE FELTING

It may seem an odd place to start but it is important to know that many needle felters, including myself, rarely use a full wire armature. Many new needle felters – mistakenly – think that using wire means you are better at needle felting. This is not the case at all, and the truth is, most needle felting projects don’t need it. In fact, the trustee wooden BBQ skewer can completely change the finished look and stability of your needle felting projects, without the need for any wire. Just check out my Parsley Hare needle felting tutorial on YouTube to see how amazing this tool really is.

Image shows a tall brown needle felted hare that has been made without needle felting wire.

NEVER BE WITHOUT A WOODEN BBQ SKEWER

The humble wooden BBQ skewer is in my top 3 needle felting tools. It enables you to quickly, and easily create firm needle parts for your project, without the need for wire. Using one of these will change the way you needle felt. Find out more HERE

An image of lots of different types of needle felting wire.

PIPE CLEANERS CAN BE YOUR QUICK FIX FRIEND

A BBQ skewer wont work for everything though and a pipe cleaner, or two, makes it possible to add some really clever touches to your project. Especially tails and horns, flower stems, or to stop your legs doing the Fandango every time you try to get them to stand, or when your project is top heavy; why do I feel like I am talking about myself?

Shows how floristry wire can be used to make realistic needle felted flowers

ADD STABILITY AND POSEABILITY

Using wire for your needle felting projects will allow you to pose your animal and add more stability. It can be used for just a tail, the legs, neck, or the whole project.

Cute needle felted Herdwick sheep with wire in its neck so it can be posed at different angles.

TINY FINGERS, TOES, PAWS, AND CLAWS

This requires a much finer wire and the paper covered steel wire in your pack is just the job. No need for wax, and the wool sticks well to the paper, allowing you to get those delicate details. It also works well for super thin bird’s legs and claws.

SHAPING YOUR WIRES

Realistic needle felted fox. Fully poseable and needle felted around a wire armature.
Make amazing needle felted animals with easy to follow needle felting tutorials.

WIRE SIZES EXPLAINED

Wire gauge refers to the physical size of the wire; the smaller the wire gauge number, the larger/thicker the wire diameter. 

METAL TYPES

Whilst thicker is usually stronger, the type of metal affects its flexibility. Working on a like for like gauge size, Aluminium is the softest and most flexible, copper a little stronger, and steel (the paper covered wire) is stronger still.

GOOD OLD GARDEN WIRE

The plastic covered garden wire is a great substitute if that’s what you have lying around and can’t wait to try needle felting with wire. The plastic is also quite ‘sticky’ so holds the wool well.

12 GAUGE ALUMINIUM ARMATURE WIRE: 2.00mm

Ideal for medium to large lightweight sculptures. Strong but still easily shaped by hand, and with pliers.

Pipe cleaners can be wrapped around the armature so the wool sticks and does not slip and slide.

18 GAUGE ALUMINIUM WIRE: 1mm x 10 metres

Ideal for medium lightweight sculptures. Strong but still easily shaped by hand, and with pliers. Pipe cleaners can be wrapped around the armature so the wool sticks and does not slip and slide.

A picture containing different types of needle felting wire and pipe cleaners used for needle felting.

20 GAUGE ALUMINIUM ARMATURE WIRE: 0.8mm x 10 metres

Great for smaller projects. A finer wire that can be easily shaped by hand. Pipe cleaners can be wrapped around the armature so the wool sticks and does not slip and slide.

STEEL 0.5mm PAPER COVERED WIRE (approx. 26 gauge)

Ideal for tiny fingers, toes, and claws. Wool sticks well to the paper so you can keep your limbs, hands, and toes as small as possible.

STEEL 1mm PAPER COVERED WIRE (approx. 18 gauge)

A very strong paper covered wire that is ideal for projects that are heavier, or taller, or top heavy.

PIPE CLEANERS

Where would we be without the old faithful pipe cleaners which are perfect for small, lightweight armatures, and especially useful for wrapping around wire armatures so that the wool sticks. Also adds extra strength and stability to neck, back, and limbs, whilst allowing you to felt smaller feet, toes, hands, and claws.

A picture showing a person in a bright pink dress holding a realistic needle felted Hebridean sheep. It is being held in her right hand.

It’s perfect for quick horns and tails, or if you just want part of your project to be poseable or have more stability. Cotton covered pipe cleaners are all pretty much the same with regards to flexibility, unless you opt for a slightly stiffer pipe cleaner.

TOP TIP: DON’T GET HUNG UP ON THE NUMBERS

It really doesn’t matter the size of the wire, as long as it works for your project. It is also very much trial, error, personal preference, and practice.

WATCH THE VIDEO TUTORIALS HERE

Image shows a wire fox frame and text says, visit The Felt Hub on YouTube for video tutorials.

You will find lots in The Felt Hub on YouTube. Just look for the NEEDLE FELTING WITH WIRE playlist.

DON’T BE TOO AMBITIOUS

Start with a small simple project, such as horns or tails, and legs. Get used to wrapping the wool and working around the wire before trying tiny fingers and toes. Even the most competent of needle felters usually has a little sigh before starting on those, and it takes practice to get them right, lots of practice, so be patient. Each time you try those tiny paws and claws you will get better.

A picture showing a grey needle felted mouse wearing a red French beret. It is stood next to a painting easel with paintbrushes in the background.

ALWAYS LEARN THE BASICS OF NEEDLE FELTING FIRST

This is so important, and I can’t tell you the number of people I have seen give up because they have started on a complicated armature project before even using a felting needle for the first time. You have to walk before you run but the basics are quick and easy to learn.

SIMPLICITY CAN BRING OUT THE BEST IN YOUR PROJECTS

The mouse and cat pictured have thin wire in their legs and tail. It is super simple but adds an extra special touch. If in doubt, add a scarf as you can’t go wrong with one of those.

A picture showing a white needle felted mouse carrying a bunch of brightly coloured felted flowers. Second image shows a needle felted cartoon style Siamese cat.

USEFULL LINKS

SHOP: Needle felting wire, tools, and accessories

READ: Ultimate Guide To Needle Felting Wool And Sheep Breeds

JOIN THE VIP FELT CLUB AND GET YOUR FREE DOWNLOAD HERE

Easy template to create an armature for your fox or dog. Making an armature is easy, with the right technique, and you can use almost any flexible wire, or pipe cleaners you already have. This simple template will make sure you get the proportions of your needle felted fox, or dog, right every time.

HAPPY FELTING!

HOW TO USE WIRE FOR NEEDLE FELTING?

DO I EVEN NEED TO USE WIRE FOR NEEDLE FELTING?

I am often asked how to use wire for needle felting, and is it even needed? The short answer is no. In fact I rarely use a full wire armature because I like a firm felt. However, using wire in specific areas can really help you create the shape you need, and create more detail and dimension.

WHEN SHOULD I USE WIRE FOR NEEDLE FELTING?

Use it in the neck of a sheep so you can pose the head, or the horns and tail of an animal to create great shapes. If you want super thin legs or arms then wire is a great solution. Alternatively, make limbs around a BBQ skewer (the ‘farmers friend’ of needle felting), to create smooth legs and perfect symmetry in super fast time. Using the BBQ skewer as a tool negates the need for using wire altogether for many projects.

USING A BBQ SKEWER WILL CHANGE THE WAY YOU NEEDLE FELT!

Parsley, the needle felted hare seen below has no wire anywhere. This gorgeous needle felting project was made, almost entirely, using a wooden BBQ skewer. I started using this method back in 2017 and it has made teaching needle felting, and creating projects, so much easier!

CLICK HERE FOR

PARSLEY HARE NEEDLE FELTING KIT or PATTERN DOWNLOAD AND PRINTABLE

Watch the video tutorial, at the bottom of the post, from our Friday night felt along on the FACEBOOK GROUP, or follow the mini tutorial below, and you will be amazed at how professional the finished result is, even if you have never needle felted before!

Happy Felting!

HOW TO NEEDLE FELT FIRM LEGS WITHOUT WIRE – QUICK AND EASY TUTORIAL

Scroll to bottom of the post for the video tutorial.

Make Time: Super fast! Approximately 20 minutes for both legs plus faffing time…

You will need:

The needle felting kit and pattern are available via the links below and you can join the new FACEBOOK GROUP HERE

LOOK, NO WIRE? Making Perfect Legs Around A Wooden BBQ Skewer

As I mentioned, if string is a ‘farmers friend’ then a wooden BBQ skewer is most definitely a ‘felters friend’. Never be without one as it will change the way you needle felt, drastically reducing the chore of hours spent smoothing and shaping.

This is super easy, but technique is important and you may have a couple of false starts as the legs need to be kept tight and narrow, but that’s ok. Just unravel and start again. When finished they will be firm and smooth and the last couple of centimetres will be built up for the feet/paws. TOP TIP: Remember to keep the top of the legs very loose as they will be attached to the body and should look like they are part of the finished project, not just stuck on.

Let’s get going!

1 Select a length of carded wool or wool top/roving and split down the middle. This means that both legs will use equal amounts of wool and sizes will be more or less the same.

2 Start to wrap the wool tightly around the skewer, starting close to the top of the stick. TOP TIP: Keep the wool flat between your thumb and finger so the wool doesn’t twist and become lumpy and uneven.

3 Keeping the wool tight, continue for a little way then stop and felt around the entire area to secure. TOP TIP: Work at a diagonal angle around the sides of the stick keeping hold of the wool so it doesn’t become loose. If it does, unwrap and start again. This will also avoid bending or breaking the needle.

4 Continue with the process until the leg is approximately two thirds of its final length (you will see why when you remove it from the skewer) and add more wool to the foot to widen it. Continue to felt and shape the foot until it is firm. TOP TIP: A foot/paw that is significantly bigger than the rest of the leg will have more impact when your project is finished.

5 Remove from the stick and felt a little more but avoid the top of the leg as this needs to be kept loose for attaching to the body. TO TIP: Don’t worry if the shape is not perfect as you are going to fix that in a moment.

6 You are now going to roll the leg firmly in your hands to firm and smooth it, which will also lengthen it. When you do this keep the top of the leg sticking out, so the wool remains loose. In just a few seconds of firm rolling you will see how the leg has really firmed up and become even smoother without the need for any wires. TOP TIP: Don’t over roll it as it will become longer than needed.

Here’s what some of the fabulous Facebook group made during the live workshop! It’s a great technique that can be adapted to almost any project. Join the group HERE and come along to the free live events.

I was blown away by the quality, personality and individual styles of the projects from the FACEBOOK GROUP members and the amazing feedback has been so good!

VIDEO TUTORIAL – Felt along with me!

Watch the full tutorial and felt alongside me, workshop style.

Video Tutorials – Needle Felted Animals and Characters

Work alongside me and make these fabulous needle felted characters, step by creative step. I have split the hares and sheep and Highland Cow into several easy parts so you don’t feel overwhelmed plus there’s plenty of time for tea and cake breaks. Put the kettle on and enjoy!

All needle felting kits, wool and accessories are available at: Lincolnshire Fenn Crafts

NEW! BUMBLE BEE BROOCH

HARES AND SHEEP

HEDGEHOGS

HIGHLAND COW PARTS 1-6

NEEDLE FELTED PUMPKINS IN 30 MINUTES!

NEEDLE FELTED MUSHROOMS/FAIRY HOUSES

WINTER WONDERLAND PUMPKINS

PERCY PENGUIN

NEEDLE FELTED TOMTE GNOMES

LIVE WORKSHOPS

I love to keep you entertained with live workshops. They are a lot of fun so make sure you subscribe for notifications as I get to answer all your questions.

LIVE FAIRY WORKSHOP

LIVE GNOME WORKSHOP

LIVE SNOWMAN WORKSHOP

Needle felted sheep and hares – Step by step video tutorials

Each video tutorial breaks down every step of needle felting your animals into simple body shapes and can easily be can be adapted for whatever animal you are making. They are perfect for beginners, improvers or anyone wanting some creative respite and I have created each video to guide you step by step – workshop style – on your creative journey, sharing my top tips to make it even quicker and easier.

Everything you need to know is covered, from needle felting your basic body shape at the start to putting it all together, in simple bite size chunks that will give you the confidence to continue with this fabulously addictive craft.

If you are working from one of my NEEDLE FELTING KITS just follow the written instructions alongside the video tutorials.

1 BASIC BODY SHAPE – 12 minutes

2 BASIC HEAD SHAPE – 12 minutes

3 BASIC LEG SHAPES – 21 minutes

4 HARE AND FOX EARS – 15 minutes

5 SHEEP EARS – 15 minutes

6 FACE DETAILS – 11 minutes

7 SEWING ON BEADS FOR EYES – 8 minutes

8 PUTTING IT ALL TOGETHER – 35 minutes

Now you can create any size and shape you want

How to make your own curls for needle felted sheep

So you have spent hours making your fabulous needle felted sheep, only to realise you don’t have any curls to finish it. Grrrr! Not to worry, just grab a ball of wool, yarn or similar and make your own. It’s really easy and creates a whole new look for your needle felted animals; Scroll down for video tutorial.

It is also very calming and saves you sitting by the post box like this, impatiently waiting for your curly wool to arrive.

VIDEO TUTORIAL

Here is a quick video (part 2) showing you how easy it is. I have used a coarse rug yarn but any yarn with an element of wool in it will do.

Use any yarn you have in your craft box; It is easier to apply if it has some wool content. I have used a coarse rug yarn and a really soft Merino for these two gorgeous sheep.

Create beautiful texture with standard yarn

You will also find out how to add this lush, art yarn (video part 1) to your projects. I used a 40 triangle needle as it is a little easier but a standard (usually a 36 or 38 gauge) will do just fine.

Video part 1 – Art yarn application

Sheep needle felting kits using this fabulous art yarn are available on the Lincolnshire Fenn Crafts website

Happy creating. Sandy x

Adding Face Details To Your Needle Felted Animals

One of the trickiest things to do when creating face details is getting the really fine lines for the mouth and nose. It’s something I always spend time on with my workshop students so they don’t feel disappointed with the finishing touches. Practice, practice practice is the answer, a firm base on which to work, and less is more when it comes to the wool. When I say less is more, think even less than that. You only need the tiniest strand of wool to create really impactful details, add in a few simple techniques and you will soon be adding those details with confidence.

Top Tip: If it doesn’t look right don’t try and rectify it. Pull the wool off and start again. I often do this and it takes much less time than trying to fix the problem. Also, preparation is key so make sure the head is firm before starting. If the head is soft and squidgy you aren’t going to get the nice straight lines you want to achieve and your sheep or animal will look like they’ve been on the sauce.

Whatever your design, this technique can be applied to your project in many different ways.

Let’s get started and, if you haven’t made your head yet just click the link for the video tutorial: HOW TO CREATE A BASIC HEAD SHAPE

1 Create an impression of the mouth – Do this by ‘drawing’ the mouth onto the face with your felting needle. ‘Draw’ a V for the nose, a line down the centre and two shallow curves each side. Go over the lines you have drawn until they are clearly visible and defined. This is where your wool is going to sit and makes it so much easier to maintain a nice, even shape.

2 Roll a very, very thin wisp of wool between your fingers to gently mat it together (not vital but it helps). If you don’t think it is thick enough you can go over it again later. However, start with too much and it ends up looking like you have drawn it on with a felt tip. Place it on the top left of the V shape you have created and gently tack it down towards the bottom of the V shape. Top Tip: Make sure the wool is at least twice the length you need as it will be pulled into the face as you felt; you can trim it later.

3 Continue back up the V shape and leave the ends loose.

4 Use another thin strand of wool (longer than you will need) to create the line down the centre. Top Tip: Keep the wool taught with your free hand. This will help create a straight, even line and avoid a drunken grin.

5 Leave all the strands loose until you have completed the mouth.

6 As before, use a very thin strand of wool and felt along the mouth. Repeat for the other side.

Top Tip: Don’t be precious over the shape of the curve as this can be teased into shape before you finish.

7 Make sure the wool is secure before trimming and shape the mouth by gently rubbing the tip of you finger on the wool – in the centre – to pull it down slightly.

8 Your head is now ready for the eyes and that’s another easy tutorial. You can watch it Here or keep scrolling for the written tutorial.

Top Tip: Sometimes the mouth can look a little off centre or lopsided. This is easily fixed by squeezing, and moving the head in your fingers – wool is still quite pliable, even when felted – until the features straighten out.

Create fabulous features for all your needle felted creations.

How to sew eyes onto your needle felted animal

Needle felted eyes look great but I also love the sparkle and shine you get from a glass bead. I always find it funny that, when some of my students have spent hours creating their needle felted animal, they say they find sewing on the eyes the hardest part. I think it is because they seem a little bit fiddly but here is a quick way of doing it, in five minutes and four easy steps.

1 Use black thread and needle and sew through the side of the face – where your eyes will sit – and repeat a few times until your thread is secure.

2 Pop your bead onto the tip of your needle and pull it through.

3 Push your needle back through to the other side and pop on your second bead.

4 Repeat the process a few times until you can pull quite firmly on your thread, and both beads are secure. Finish by sewing through the back of the head a and cut the thread.

needle felted pig

How To Make A Needle Felted Pig

IMG_9412.JPG

As I sat down to make a sheep at the weekend I decided to take some of my own advice and step out of my comfort zone. I have been wanting to make a pig for months but time, as always, ran away with me and other aspects of the business demanded my attention. So, I changed tack and pulled up various images of pigs on Google; even if your creations are not true to life a photo is always great for reference, proportions etc.

Now, you would think pigs, with their simple shapes and obvious snout wouldn’t be too hard… Not so. Their perceived simplicity means that there is nowhere to hide when it comes to making mistakes and that body and head shape took way longer than I expected. However, now I know what I would change for the next one. Overall I am pretty pleased with the end result but I would definitely do a few things differently next time; bigger snout; change how I assembled it; more work on the face.

IMG_9390

As far as technique is concerned I tend not to use full body armatures*, preferring to work with a much more solid shape and my favourite British wool tops. Instead, I used 1mm paper covered wire for the legs only to aid stability and create a leaner leg. I prefer paper covered wire as the wool holds much better when wrapping and negates the need for any messy waxes or glue. I wrapped each leg in a base layer of white Jacob top then added another layer of carded Corriedale flesh leaving the trotters exposed for contrast.

*Some pieces require a full armature, especially if you want to pose your piece when it’s finished. Carded wool usually works best for this and creates a much softer sculpture requiring much less use of the felting needle.

The body core is grey Jacob top which is a lovely coarse wool top that felts really easily and is still one of my favourites after six years of working with it. Felting the core really firmly allowed me to shape the wool once it was finished creating a nice curve along the back. See video tutorial: HOW TO CREATE A FIRM BODY

I actually made the body, head and snout as one piece but would definitely make the snout separately next time because it lost a lot of its definition and I had to build it up again.  I then covered the whole piece in a lovely carded Corriedale flesh, felting just until it held using my 38 needle at a diagonal angle to reduce needle marks.

You may be wondering why the core colour is a complete contrast to the top layer; this enabled me to create that lovely dark wiry detail that you will see on many pig breeds which sits in dark contrast to the really light top coat. This contrast is achieved by using a 32 reverse needle to pull through the dark grey Jacob wool top, enabling it to sit on top of the flesh colour. Wool tops work really well for this as they have a much longer fibre length than carded wool which allows them to be pulled through the body without breaking off.

IMG_9394

Ears were the easy part and using a photograph for reference makes it much easier to get the correct shape and proportions. My needle felted ears tutorial shows you my favourite, super easy technique for creating animal ears: TAKE ME TO THE TUTORIAL

IMG_9413.JPG

Finally, I covered a short piece of 0.5mm paper wrapped wire in carded flesh to create the curly tail; roll vigorously in the palm of your hands once the wool is attached. This will create a lovely firm finish which stops the wool from ‘sagging’ when it is curled.

IMG_9426.JPG

Add a couple of glass beads for eyes and hello Twiggy The Piggy*

*I claim no responsibility for the name. Blame lies solely with my good friend, Nancy (author of the amazing Maine Coon cat tutorial) who named her ‘Twiggy The Piggy’. I told her it was only marginally better than Babe but she insisted… 

Needle felting kits for all abilities are available on the website and Etsy:

TAKE ME TO NEEDLE FELTING KITS

IMG_9403 - Copy (3).JPG

Est. 2013
© 2013 Lincolnshire Fenn Crafts

Needle Felted Maine Coon Cat

I was beyond excited when my good friend and talented artist, Nancy Sullivan, agreed to be a guest on the blog and put together a needle felting tutorial for you all. What I wasn’t prepared for though was an advanced tutorial that is so detailed that I have yet to see anything to match it. This beautiful life-size version of her own cat, Scout, has taken many, many, many hours to complete and is beautifully written in Nancy’s typically charming and funny way. Whilst it is a very advanced tutorial, Nancy’s writing style and presentation still make it easy to understand as she skillfully and seamlessly moves you from one section to the next, introducing techniques I have never seen used.  Thank you so much for all your hard work, time and generosity Nancy xxx

COPYRIGHT LAW APPLIES!

YOU MUST NOT:

  • Copy and sell/promote this tutorial as your own
  • Share the link and password for this tutorial on any social media, Facebook groups or via any other forms of communication
  • Print tutorial for use at workshops
  • Tutorial is for personal use only and cannot be used for any other purpose

However, sharing photographs of your sculpture on social media, Facebook groups and giving as gifts is acceptable but please make sure to credit your source of information and inspiration.

Failure to comply with the above would be viewed as copyright infringement. 

All link content on this post is the property of Nancy Sullivan.
All content appearing on this blog is the property of:
Lincolnshire Fenn Crafts
Copyright © 2019 Lincolnshire Fenn Crafts. All rights reserved.


About The Artist

My name is Nancy Sullivan. I was born in Oklahoma City, Oklahoma in
1950, moved to New York in 1988, and have been here in Southern
California since 2002. Yes, I am 68 years old!
My interest in art began in the 2nd grade when my teacher told my mother
that I had talent. Because of that, my parents worked hard to give me as
many opportunities for special art student programs as were available
through my youth. Later, in high school, I entered a statewide competition
in Oklahoma and won the first place prize, a small scholarship for college.
Since then I have managed to work art into everything I do.
I started working in Medicine at age 26, and before long my first
“secretarial” job included working in eye surgery, designing and editing
medical publications and doing medical illustrations of surgical techniques
and graphically presenting research results for journals, textbooks, and
international medical symposia. My mentors paved the way for me to
attend workshops and special courses in anatomy and illustration. I was
very fortunate to be able to create a situation where I could get this
education as a part of my job. I also had the opportunity to attend and
observe human head and neck dissections with Ophthalmology Residents.
I also designed training manuals for non-medical employees so they would
understand the basics of ophthalmology.
I learned the most about anatomy from Joseph Sheppard, a celebrated
sculptor and painter from Baltimore, who now lives in Italy. His training
and publications gave me the knowledge to take my work to a higher level
of accuracy. He teaches drawing human figures from the skeleton out –
which is exactly how I approach the animals that I needle felt.

nancy life drawing

Needle felting is only the most recent of a life-long progression of crafts
that I have enjoyed practicing. It started with making “outfits” for my
Barbie doll when I was very young, which evolved into making my own
clothes when I got a bit older. I used to make plastic car models with my
oldest brother when we were young, and he was meticulous with tiny
details, which seemed to rub off on me. My Grandmother encouraged me
to take up quilt-making, which I did for many years with her, and
continued to do on my own after she died.
In my career, most of my “craft” involved technical illustration, but I still
managed to do some quilting and other projects on the weekends. While
in New York, I was exposed to the most wonderful variation of arts and
crafts, attending shows and Museum exhibits as often as I possibly could.
I was surrounded with inspiration from all kinds of art and music.
The best time I’ve had has been since retiring, being able to choose how I
spend my time – I have taken up genealogy of my family and created
many volumes of information and images, and “scrapbooks” to be handed
down to future generations. Paper crafts have taken over the landscape of
my life, since there is no limit to the creativity you can translate into
tangible pieces you can hold in your hands and share with others. Stained
glass was also very exciting and rewarding. Recently I have enjoyed doing
hand-bound books; stamping, mixed media and watercolor remain some
of my favorite crafts. I make hand-crafted gifts for Christmas each year,
and design greeting cards for all occasions.

I’d like to share with you some words that I have learned are true
enough to live by, and they are certainly relevant when you think of
how our artistic endeavors can enhance our enjoyment of life… the
older you get, the more meaningful these words become!

“We act as though comfort and luxury were the chief
requirements of life, when all that we need to make us
really happy is something to be enthusiastic about.”
Charles Kingsley

Thanks to Sandy at Lincolnshire Fenn Crafts, I have added needle
felting to my growing list of interests, and enjoy it more than
anything else I have done – wool sculpture – it’s the best!
All these artistic endeavors have enriched my life enormously, and I
am very pleased to have this opportunity of sharing that with you.

TAKE ME TO THE TUTORIAL: Needle Felting a Maine Coon Cat Advanced Tutorial – By Nancy Sullivan February 2019

nancy maine coon 6