Image shows a needle felted gnome in bright orange and turqoise. The body is a needle felted pumpkin

Easy DIY Autumn Crafts To Make Your Home Feel Handmade

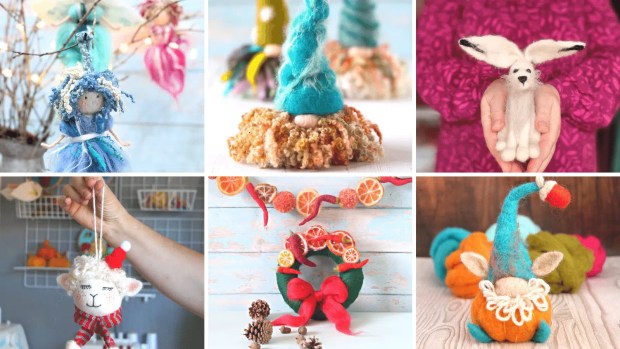
FILL YOUR HOME WITH HANDMADE NEEDLE FELTED DECORATIONS

As soon as Autumn arrives I am already full-blown, pumpkin spice latte sweater dresses and jumper mode. It is my absolute favourite time of year as we start to hibernate and get really creative, filling our homes with cosy homemade fall and autumn décor! Without doubt, nothing says it better than pumpkins filling the rooms of your home, especially the ones you have made yourself, and there is no better time than now to grab a cuppa, and start creating with me.

MAKE A NEEDLE FELTED GNUMPKIN WITH ME

Make time: 90 minutes (20 minutes for the pumpkin)

It is full on pumpkin season, or should I say Gnumpkin season. Basically, it is a pumpkin, gnome hybrid but, and I am sure you will agree, they are a match made in heaven. It is my absolute favourite needle felting project at the moment, and I love it more because it can stay up as part of your DIY Christmas décor. This one has a full on Autumnal flavour but I am already making one in cool winter colours.

NO CRAFT OR DRAWING SKILLS NEEDED

This super easy needle felting tutorial will have you creating your own needle felted Gnumpkin in no time at all! Making needle felting easy is what it is all about, and you don’t need any craft or drawing skills. This step by step needle felting tutorial will help build your creative confidence, whilst teaching you all the needle felting basics, and no sewing, I promise! My easy techniques tips and hacks will have you felting in no time!

DO YOU NEED THE WOOL OR FELTING KIT?

Image shows a needle felted gnome. Text reads: New to needle felting? Click to order the kit.

If you have just started needle felting, kits are an especially great way to get started so you can get a real feel for a new craft. In addition to this, you are only spending a small amount to get going. The website is full of inspiring kits and inspiration for every ability.

Find it HERE on the Lincolnshire Fenn Crafts website.

THE NEEDLE FELTED GNOME

The pumpkins alone are really fabulous but let’s take it up a notch and turn it into this super stylish, Gnumpkin. In addition, the full video tutorial is at the bottom of the page – my easy step, by step, felt along with me guide. I had so much fun designing and making these, and I know you are going to love it just as much!

A bright orange needle felted pumpkin sat in the palm of a hand to show a size comparison.

NEEDLE FELTED PUMPKIN

This forms the body of the gnome and is one of the easiest ever needle felting projects; you can make one of these in just 20 minutes, even complete beginners. Scroll to the bottom of the page for the video tutorial.

MAKE THE PUMPKIN BODY FIRST

Image shows what you need to start this needle felting project

LET’S GET STARTED – YOU WILL NEED:

Carded needle felting wool and wool tops – Felting needle – Felting mat – Wooden BBQ skewer or similar; this makes creating shapes so much easier.

Shows how to start needle felting your pumpkin

1 Lay a handful of core wool on your felting mat and create a rough bread roll shape with your hands. With your free hand start to felt with your needle.

2 Continue the process until your wool retains its size and shape.  TIP: It needs to be secure but very soft.

TIME TO ADD THE CARDED WOOL BATTING

3 Sit your shape on top of your piece of wool batting and start to wrap the batting sheet around it, pulling towards the centre of, what will be, the bottom of your pumpkin.

4 Felt the batting into the centre of the wool until it holds. Continue the process until all the core wool is covered and pull away any excess. Tip: White patches are fine as they add contrast

5 Pumpkin ready for shaping, smooth side up.

6 Using your felting needle ‘draw’ a clearly defined line around the entire pumpkin, starting from middle centre and finishing where your line started.

7 Repeat until your pumpkin is divided into eight sections.

8 Take a long, thin piece of contrasting wool top and felt securely into the lines you have just created. Again, work from centre top and finish where you started, leaving any loose strands. TIP: Any loose strands can be trimmed for neatness, but also look good as decoration. Your pumpkin is ready. Time to make a Gnumpkin.

MAKING THE PERFECT GNOME HAT

I tried a few techniques before deciding which one would give me the best result in the most simple way. I found using the trustee wooden skewer allowed me to create the perfect cone shape that didn’t flop around. The needle felted acorn is the perfect finishing touch and only takes minutes to make.

WATCH THE VIDEO TUTORIALS BELOW

GNUMPKIN VIDEO TUTORIAL

PUMPKIN VIDEO TUTORIAL

ACORN VIDEO TUTORIAL

Last but not least, learn how to add a super seasonal acorn to your Gnumpkin hat; the cherry on the cake so to speak.

Save to your Pinterest board for a daily dose of Pinspiration.

WANT MORE GNOME TUTORIALS?

Want more gnome tutorials, and seasonal inspiration? Just click below to discover all of the amazing Christmas DIY projects you can create with just a felting needle and a handful of wool.

Image shows a needle felted gnome and hare as part of an invitation to join The Felt Club

Join the VIP Felt Club and never miss out on the creativity!

Image shows a cartoon female with a strong arm and an needle felting project being completed. Text reads: learn to needle felt with confidence

DO YOU LOVE A CREATIVE COMMUNITY? JOIN THE FELT HUB ON FACEBOOK

Join me on Facebook. It’s completely free and you will have access to live workshops, free patterns, downloads, and so many more resources, all in one place. A group created inspire, nurture, and develop your needle felting confidence (whatever level you are at), in a more private space.

HOW TO NEEDLE FELT A CHICKEN – EASY DIY PROJECT

FUN AND COLOURFUL NEEDLE FELTED CHICKEN

Improve your needle felting techniques and add a needle felted chicken to your creative menu. Calorie and guilt free but hours of fun! You will also learn how to needle felt a perfectly smooth finish; the Holy Grail of needle felting

The key to this project is getting a good shape and perfectly smooth finish and I am going to show you exactly how to achieve it, with easy step by step instructions and more photographs than you can shake a tail feather at. Suitable for confident beginners and more experienced needle felters.

SHOP PATTERN DOWNLOAD

Scroll to bottom of page for video tutorials.

Daphne is wonderfully adorable and so much fun to make. Detailed instructions (more than 4,500 words), 110 step by step full colour photographs, plus lots of different needle felting techniques; including perfecting your shapes and getting a super smooth finish.

Makes one large chicken (approximately 13cmH x 18L) or two smaller ones.

PURCHASE THE PATTERN

To purchase pattern separately CLICK HERE

MAKE TIME: 4-5 hours. See description below for more details.

YOU WILL NEED:

  • Downloadable pattern
  • White core wool approx. 20-25g for body, head, and neck.
  • 10g white carded batting for covering the body and making the wings
  • Pinch light brown wool for eyes and eyebrows
  • Pinch of orange for the beak
  • 2g of contrasting colour for the crown and waddle
  • 5 thin pieces of wool tops (bright colours) for the tail
  • 2 x Standard felting needle – size 38 is a good all-rounder
  • 1 x Fine felting needle – size 40
  • Wooden BBQ skewer (or similar) for shaping the head – optional
  • Felting mat

WATCH THE VIDEO TUTORIALS

PART 1 – BODY
PART 2 – WINGS
PART 3 – FACE, CROWN, WATTLE AND TAIL FEATHERS

HOW TO NEEDLE FELT A CUTE GNOME – EASY TUTORIAL!

GNOMES ARE NOT JUST FOR CHRISTMAS

Join me for this easy needle felted gnome craft project. Felt alongside me and create this beautiful gnome in a hoop, which is so much fun to make and beyond cute. It is such a simple needle felting project, made easy by my step by step needle felting tips and techniques. I will also show you how to make the easiest needle felted hearts, without a cookie cutter! You can adapt it to your own style, using whatever felting wool you have to hand, keeping it simple or embellish the heck out of it. Materials list and video tutorial is below and it only takes around 90 minutes from start to finish, and imagine this as a beautiful homemade Valentine’s gift… 💜

MAKE TIME: 90 minutes

MATERIALS LIST

  • 1 x 38 star or triangular felting needle
  • Felting mat/base
  • Wool tops and carded wool
  • 15cm Embroidery hoop (optional)
  • 20cm piece of flat felt Yarn for decoration (optional)

CREATE YOUR OWN DESIGNS

This gorgeous project could just as easily be made on a piece of felt (just as in the tutorial) and popped in a lovely frame. It would look so lovely as a cushion design, or sew the finished project onto a jacket or bag. The options are endless so don’t be afraid to experiment, and swap the colours to suit.

NEEDLE FELTED GNOME VIDEO TUTORIAL

5 TOP NEEDLE FELTING KITS AND HOW TO START NEEDLE FELTING?

NEEDLE FELTING IS SO EXCITING!

So don’t be nervous. Starting a new craft can be exciting but also a little confusing. Needle felting is no different and the array of wool, tools and accessories can send you into a confusing tailspin.

The truth is, you don’t need a lot to get started with needle felting, and it is also a budget friendly hobby. That is until you become addicted, which you will, and then no amount of felting wool will ever be enough!

That’s why I always recommend a needle felting starter kit to get you going, so you can test the needle felting waters. They are inexpensive and have absolutely everything you need to complete each project from start to finish. It avoids you feeling overwhelmed and helps to build your creative confidence. All you have to do is open the box and add enthusiasm.

MY TOP 5 FELTING KIT RECOMMENDATIONS

Here are my top 5 recommendations for beginners kits. They all come beautifully boxed and are perfect for storing your supplies! No sewing, no tricky patterns and they take just a few hours of your time! They also use our gorgeous British wool, carefully selected for its excellent needle felting properties.

GREY HARE NEEDLE FELTING KIT

Make time: 3-4 hours

If you love ETSY you can find me HERE

Complete stunner and he knows it! This, along with the Herdwick Sheep, is the most popular beginners kit. It is such fun to make and you can follow the instructions to the letter, or add your own touches. As well as detailed instructions you can felt along on YOUTUBE by following the beginners playlist.

HERDWICK SHEEP NEEDLE FELTING KIT

Make time: 2-3 hours

My favourite sheep from the Lake District is an ever popular needle felting kit. Great for building your needle felting confidence, this super kit will soon have you warmed up and ready for your next project. As well as detailed instructions you can felt along on YOUTUBE by following the beginners playlist.

RUSTIC ROBINSHOP NEEDLE FELTING KIT

Make time: 2-3hours

A gorgeous little project that has enough wool to make two of our favourite UK garden birds. A perfect project to create with your bestie or, one for you and one to give away. There is also a great video tutorial HERE showing you how easy it is to create a perfect wing shape without the need for a cookie cutter.

JACK RUSSELLSHOP NEEDLE FELTING KIT

Make Time: 3-4 hours

What’s not to love with this design? Even better, you can change the markings to represent your own four legged friend. As well as detailed instructions you can felt along on YOUTUBE by following the beginners playlist.

SHROOM’ WITH A VIEWSHOP NEEDLE FELTING KIT

Make time: 3-4 hours

If you are looking for a home for the wee little fairies and forest dwellers, then this is right up your street. Lot’s of different techniques and a great needle felting kit for beginners. Any self respecting gnome or fairy would be thrilled to have the keys to this house! As well as detailed instructions you can felt along to the video tutorial HERE

WANT TO KNOW MORE ABOUT NEEDLE FELTING?

Join the THE FELT HUB with Lincolnshire Fenn Crafts

HOW TO USE WIRE FOR NEEDLE FELTING?

DO I EVEN NEED TO USE WIRE FOR NEEDLE FELTING?

I am often asked how to use wire for needle felting, and is it even needed? The short answer is no. In fact I rarely use a full wire armature because I like a firm felt. However, using wire in specific areas can really help you create the shape you need, and create more detail and dimension.

WHEN SHOULD I USE WIRE FOR NEEDLE FELTING?

Use it in the neck of a sheep so you can pose the head, or the horns and tail of an animal to create great shapes. If you want super thin legs or arms then wire is a great solution. Alternatively, make limbs around a BBQ skewer (the ‘farmers friend’ of needle felting), to create smooth legs and perfect symmetry in super fast time. Using the BBQ skewer as a tool negates the need for using wire altogether for many projects.

USING A BBQ SKEWER WILL CHANGE THE WAY YOU NEEDLE FELT!

Parsley, the needle felted hare seen below has no wire anywhere. This gorgeous needle felting project was made, almost entirely, using a wooden BBQ skewer. I started using this method back in 2017 and it has made teaching needle felting, and creating projects, so much easier!

CLICK HERE FOR

PARSLEY HARE NEEDLE FELTING KIT or PATTERN DOWNLOAD AND PRINTABLE

Watch the video tutorial, at the bottom of the post, from our Friday night felt along on the FACEBOOK GROUP, or follow the mini tutorial below, and you will be amazed at how professional the finished result is, even if you have never needle felted before!

Happy Felting!

HOW TO NEEDLE FELT FIRM LEGS WITHOUT WIRE – QUICK AND EASY TUTORIAL

Scroll to bottom of the post for the video tutorial.

Make Time: Super fast! Approximately 20 minutes for both legs plus faffing time…

You will need:

The needle felting kit and pattern are available via the links below and you can join the new FACEBOOK GROUP HERE

LOOK, NO WIRE? Making Perfect Legs Around A Wooden BBQ Skewer

As I mentioned, if string is a ‘farmers friend’ then a wooden BBQ skewer is most definitely a ‘felters friend’. Never be without one as it will change the way you needle felt, drastically reducing the chore of hours spent smoothing and shaping.

This is super easy, but technique is important and you may have a couple of false starts as the legs need to be kept tight and narrow, but that’s ok. Just unravel and start again. When finished they will be firm and smooth and the last couple of centimetres will be built up for the feet/paws. TOP TIP: Remember to keep the top of the legs very loose as they will be attached to the body and should look like they are part of the finished project, not just stuck on.

Let’s get going!

1 Select a length of carded wool or wool top/roving and split down the middle. This means that both legs will use equal amounts of wool and sizes will be more or less the same.

2 Start to wrap the wool tightly around the skewer, starting close to the top of the stick. TOP TIP: Keep the wool flat between your thumb and finger so the wool doesn’t twist and become lumpy and uneven.

3 Keeping the wool tight, continue for a little way then stop and felt around the entire area to secure. TOP TIP: Work at a diagonal angle around the sides of the stick keeping hold of the wool so it doesn’t become loose. If it does, unwrap and start again. This will also avoid bending or breaking the needle.

4 Continue with the process until the leg is approximately two thirds of its final length (you will see why when you remove it from the skewer) and add more wool to the foot to widen it. Continue to felt and shape the foot until it is firm. TOP TIP: A foot/paw that is significantly bigger than the rest of the leg will have more impact when your project is finished.

5 Remove from the stick and felt a little more but avoid the top of the leg as this needs to be kept loose for attaching to the body. TO TIP: Don’t worry if the shape is not perfect as you are going to fix that in a moment.

6 You are now going to roll the leg firmly in your hands to firm and smooth it, which will also lengthen it. When you do this keep the top of the leg sticking out, so the wool remains loose. In just a few seconds of firm rolling you will see how the leg has really firmed up and become even smoother without the need for any wires. TOP TIP: Don’t over roll it as it will become longer than needed.

Here’s what some of the fabulous Facebook group made during the live workshop! It’s a great technique that can be adapted to almost any project. Join the group HERE and come along to the free live events.

I was blown away by the quality, personality and individual styles of the projects from the FACEBOOK GROUP members and the amazing feedback has been so good!

VIDEO TUTORIAL – Felt along with me!

Watch the full tutorial and felt alongside me, workshop style.

Improve Your Needle Felting Techniques

Parsley hare is one of my favourite hare designs and, with a touch of whimsy and a dash of folk art, you can’t fail to be charmed by him. This is such a great project that is perfect if you want to build on your existing needle felting skills. It’s a project that requires some previous experience of needle felting and assumes you have completed at least two beginners needle felting projects.

The ‘Magic’ Tool

Everything is made around a wooden skewer (apart from the ears) and is the tool that no self respecting needle felter should be without. If you haven’t used one before it is a complete needle felting revelation and you will wonder how you ever managed without one. It is also a great way to make perfect needle felted balls and acorn shapes in just three minutes.

Banish Saggy Legs Forever

Using the wooden BBQ skewer negates the need for using wire but still ensures that you have really firm body parts.

Create A Perfect Finish

Using this technique also allows you to get great symmetry, with ease, and a beautifully smooth finish. You can also create a perfectly shaped head every time, no lumps or bumps.

The Wool

Use a good coarse wool top or, as I have done with mine, use carded wool in long lengths.

Materials List:

  • Coarse brown wool top or long carded lengths
  • White accent wool
  • 1 Felting needle – size 38 is a good all rounder
  • 1 Wooden skewer
  • 2 Beads for eyes
  • Lace ruffle
  • Felting mat

The needle felting kit, wool and accessories can be found on the Lincolnshire Fenn Crafts WEBSITE and the kit comes with everything you need including the lovely antique style ruffle.

Video Tutorials

Below are five step by step, easy to follow video tutorials. If you prefer to work with written instructions the pattern is also available for instant download HERE

Happy Felting!

Video Introduction


Video 1 – Body And Head

Video 2 – Legs

Video 3 – Ears

Video 4 – Putting It Together

How To start Needle Felting – Easy Needle Felted Cactus

I adore this season in my garden, eagerly anticipating the possibility of my 19-year-old Cordyline blooming for the third time. The wait for this magnificent plant to flower, starting as a humble shrub, has been considerable, but the aroma it emits is simply divine—reminiscent of Jasmine with subtle notes of caramel.

MAKE YOUR OWN NEEDLE FELTED PLANTS

With plants and gardening at the forefront of my thoughts, I’ve designed a selection of super cool needle felted cacti you can make yourself, perfect as pin cushions, or for your felting needles. Plus, they promise to never exhibit any unpredictable or inexplicable signs of fading away, ensuring endless crafting enjoyment.

Just like always, I put a ton of effort into the design phase, crafting projects that I’m sure you’ll fall in love with. I enjoy passing on the techniques I’ve picked up since 2013, and I’m meticulous about choosing the perfect wool and fibers for each piece. It took me about six tries to get the cacti design just right! So, rest assured knowing that every time you start a new project, you’ve got top-notch materials lists and instructions to guide you along. Go ahead and dive into your crafting adventures with confidence – puns included!

YOU WILL NEED

  • CORE WOOL
  • WHITE AND GREEN CARDED WOOL
  • WOOLTOPS FOR FLOWERS – VARIOUS COLOURS
  • WHITE WOOL TOP FOR SPIKES
  • 2 X TERACOTTA POTS
  • 1 X WOODEN SKEWER

Download the full pattern

WATCH THE VIDEO TUTORIAL

Ready To Start Needle Felting? You will love these as well!

Want to Start needle felting today?

Instantly download a needle felting pattern and get started straight away! On the hunt for inspiring needle felting patterns? There are patterns for all abilities on the website, from nervous beginners to confident needle felters, there is a pattern and video tutorial for you.


Needle Felted Macarons In 15 Minutes

These needle felted Macarons will be the most fabulous calorie free cakes you have ever had. My no fail needle felting recipe will have you filling plates and making summer garlands in no time. Each macaron takes a mere 15 minutes to make and all you need are a few scraps of wool and a bucketful of enthusiasm!

It is the perfect needle felting project to kick back and relax with and, if you are a nervous beginner, then this super easy needle felting project has your name all over it. Just imagine a few garlands of these beauties swinging in the summer breeze. The perfect garden party décor and wouldn’t they look brilliant with my bumble bee garland? Video tutorials for both are below.

Happy Creating!

YOU WILL NEED:

  • Scraps of carded wool
  • Core wool (optional)
  • Felting needle
  • Felting base

Yummy Macarons

Busy Bees

Needle Felting Kits And Punch Needle Embroidery

See the full range of needle felting kits, punch needle kits, accessories and handmade items over at the WEBSITE 

Meet the family. Well, some of them…

Over 40 carefully and lovingly designed needle felting kits to choose from. Each kit is a complete starter kit and so, contains everything you need including detailed instructions, lots of colour photographs, an actual size template as your size guide, quality wool (mostly British) and everything you need to complete each project. Kits are suitable for absolute beginners and advanced beginners.

No sewing. No wires. No glue. No stuffing. Open the box and get started…
All you need to add is a little patience and enthusiasm!

SHOP NEEDLE FELTING KITS

NEW ADDITIONS! HEATHER THE HIGHLAND COW AND PARSLEY HARE

BUMBLE BEE BROOCH WOOL PACK AND VIDEO TUTORIAL

BUMBLE BEE VIDEO TUTORIAL

SHOP PUNCH NEEDLE EMBROIDERY KITS

PUNCH NEEDLE VIDEO TUTORIALS FOR BEGINNERS

How To Needle Felt A Cute Penguin – For Beginners

Penguins hold a special charm that transcends seasons, yet their appeal seems to heighten as the winter frost settles in. Delightfully crafted these adorable needle felted penguins embody the essence of joy and make for a delightful and soothing DIY endeavor.

With their simplistic shapes and straightforward needle felting techniques, creating a ‘Waddle’ of these charming creatures becomes a breeze. Indeed, ‘Waddle’ is the fitting term for a group of penguins, and adding these little cuties to your seasonal decor will spark a sense of homemade warmth. Embrace the magic of crafting as you embark on this delightful journey of bringing these beloved creatures to life, adding a touch of cheer to your home throughout the year, but especially during the cosy embrace of winter.

Skill Level – Beginners

YOU WILL NEED

Time to make: 60 minutes

Start needle felting today and download the easy penguin pattern

Felt along with me workshop style below: For video tutorials please visit THE FELT HUB on YouTube and follow the beginner’s series of tutorials to create your basic shapes.

Happy felting!

WATCH THE VIDEO TUTORIAL

In this comprehensive needle felting tutorial, I’ll guide you step by step through the creation of an adorable baby penguin. Whether you’re a seasoned crafter or just dipping your toes into the world of needle felting, this tutorial is perfect for you. I’ll cover everything you need to know, from selecting the right materials to mastering essential needle felting techniques. By the end of this tutorial, you’ll have your very own charming penguin creation to adorn your home or gift to a friend. So grab your felting needles and let’s get crafting!

Subscribe to my YOUTUBE CHANNEL for new tutorial notifications.

MORE GREAT CHRISTMAS DIY PROJECTS YOU WILL LOVE!

  • Fairy Tree Topper
  • Nordic Gnome
  • Pumpkin Gnome
  • Christmas Wreath
  • Sheep Bauble
  • Snowman
  • Winter Wonderland Pumpkins

For needle felting patterns visit the Lincolnshire Fenn Crafts website

How to make easy needle felted animals from simple shapes

Everything you need to know is covered, from needle felting your basic body shape at the start to putting it all together, in simple bite size chunks that will give you the creative confidence to continue with this fabulously addictive craft.

Within each video tutorial, I meticulously dissect the process of needle felting animals, simplifying each step into easily adaptable body shapes that suit the animal you’re crafting. Whether you’re a beginner eager to dive into the world of needle felting, an improver seeking to enhance your skills, or simply someone craving a creative escape, these tutorials are tailored just for you. Designed in a workshop-style format, each video serves as your personal guide, leading you through every stage of your creative journey. Along the way, I share invaluable tips to streamline the process, ensuring efficiency without sacrificing quality.

From mastering the fundamentals of shaping your basic body outline to seamlessly assembling your creation, every aspect is covered. The content is presented in digestible, bite-sized chunks, giving you with the confidence to persist and thrive in this wonderfully addictive craft. Whether you’re crafting a charming penguin or a needle felted hare, these tutorials provide the foundation and encouragement you need to unleash your creativity and bring your projects animals to life. So, grab your felting supplies, settle in, and let’s start needle felting together.

If you are working from one of my NEEDLE FELTING PATTERNS just follow the written instructions alongside the video tutorials.

1 BASIC BODY SHAPE – 12 minutes

2 BASIC HEAD SHAPE – 12 minutes

Learn to master the creation of a basic and simple head shape for your needle felted animals. Achieving a firm shape is essential for the success of your project, serving as the foundation upon which you’ll build the rest of your creation. Through careful guidance and practice, you’ll learn the techniques necessary to craft a head shape that not only looks great but also provides stability and structure to your final piece.

3 BASIC LEG SHAPES – 21 minutes

Welcome to The Felt Hub series of needle felting projects dedicated to helping beginners master the art of needle felting! In this installment, we’ll focus on creating firm legs every time, without the need for wires. Firm legs are crucial for providing stability and balance to your needle felted creations. Whether you’re new to needle felting or looking to refine your skills, this tutorial will guide you through the process step by step, giving you the skills necessary for you to achieve professional-looking results without any hassle.

4 HARE AND FOX EARS – 15 minutes

Crafting needle felted ears is a breeze once you’ve mastered the right technique. With my straightforward needle felting tutorials, you’ll be up and running in no time, ready to bring your creations to life. Whether you’re aiming for petite and perky or large and floppy, you’ll learn how to craft fabulous ears in any shape or size. So, let’s dive in and start felting those adorable ears!

5 SHEEP EARS – 15 minutes

Discover a quick, effortless, and efficient method for crafting charming needle felted sheep ears in just fifteen minutes.

6 FACE DETAILS – 11 minutes

7 SEWING ON BEADS FOR EYES – 8 minutes

8 PUTTING IT ALL TOGETHER – 35 minutes

Now you can create any size and shape you want

How to add long fur to needle felted animals

A SUPER EASY TECHNIQUE FOR AMAZING EFFECTS!

Adding long fur to needle felted animals adds serious impact as well as adding another element of realism. I have had a lot of requests asking how it’s done and the technique is so easy that even the most nervous beginner will be able to tackle this with ease. Once learned, this technique can be used for so many other animals and projects.

USE THIS TECHNIQUE FOR ANY ANIMAL

Scroll to the bottom of the post for the video tutorial, and see how I created an amazing topcoat for my Highland cow!

YOU WILL NEED:

Any medium to coarse wool top.

Standard felting needle – 36 or 38 gauge are good all rounders.

Foam pad or felting mat to support your project.

Sharp scissors.

TIME TO MAKE

Adding wool top and trimming: 20 minutes

Faff time: how long is a piece of string?

WHAT FELTING WOOL SHOULD I USE?

For full, flowing effect use a wool top for long coats, also known as roving although this isn’t strictly accurate. Carded wool can be used but you just don’t get the same results as the fibres are much shorter and run in different directions. As I am making my favourite, the Herdwick sheep, I have used Herdwick wool top but any medium to coarse wool top will work just as well. Herdwick wool top is very coarse, and sheds a lot so is not entirely suitable for all aspects of needle felting. However, for this application it is perfect and the earthy texture is just what I am looking for.

Herdwick Sheep needle felting kits are available on the website HERE

Lets get creating! Visit the homepage HERE for full list of tutorials

SEPERATE THE WOOL

1) Your ‘naked’ sheep is prepped and ready for it’s top coat. To make this sheep follow the basic shapes video tutorials HERE.

2) If your wool top is quite thick then split it down the middle before starting

1 & 2

3) Cut (or pull) a strip of wool approximately 10cm long, but longer if your sheep is larger than mine which is 9cm from feet to top of its back. Please note: this is one of the few times it is OK to cut wool as the cut ends will not be attached to anything. TOP TIP: Cutting wool for needle felting is generally a no no as it damages the fibres, and prevents them from felting. If you do need to cut a piece away from your needle felting project (head maybe too big or legs not firm enough) make sure you wrap it in fresh, uncut wool before re-attaching.

START ATTACHING TO YOUR ANIMAL

4) Lay your strip of wool on the bottom half of the body of your sheep.

3 & 4

5 & 6 ) Felt across the centre of the strip of wool to keep it in place. Make sure it is firmly attached as you don’t want it to pull away when handled.

5 & 6

7 & 8) Fold the top over to double the thickness

7 & 8

9) Felt along the top to keep it in place.

Fun Herdwick fact: Herdy’s will climb up to 3000ft to graze on the Lakeland high fells, and are fondly known as the ‘gardners’ of the Lake District.

10) Repeat this process around the sheep until you have created a ‘skirt’. Trim around the bottom of the skirt so that the legs are visible and the wool is an even length all the way round.

9 & 10

11 & 12) Repeat steps 1 to 10 and create a second skirt approximately 1 to 2 cm above the first.

11 & 12

13) Once the second skirt is complete lay a strip of wool across the sheeps back.

14) Felt down the centre of the wool strip to secure it. Repeat once or twice more until the back is covered.

13 & 14

15 & 16) Skip this part if your sheep doesn’t have a neck. Add much thinner strips of wool around the neck but leave the top part of the neck visible.

15 & 16

TAME THAT MANE!

17 & 18) Your sheep is looking a bit wild so smooth it down with your hands.

19) Now you have flattened the wool it is looking a bit chunky so time for a trim. You can also snip into it, hairdresser style, to thin it out and give it some layers. TOP TIP: Take your time as you can’t stick it back on once you have cut it and you don’t want to end up with bald spots.

20) Give it a gentle shake to get rid of any loose wool. TOP TIP: You may want to do this outside or in a bag to avoid lots of fibres flying everywhere.

19 & 20

21) I quite like the wild look but, if you want to go for the more traditional then just smooth the coat down and fluff gently with the tips of your fingers.

ADDING THE HERDY ‘BUZZ’ CUT

Now, depending on the sheep you have created you may just want to leave it at that. However, the Herdwick sheep sport a pretty nifty ‘buzz’ cut so continue to the next section to see how it’s done.

21

22) Lay a thin strip of wool across the top of the head

23) Secure by felting across the centre of the wool strip, making sure the eyes are still visible.

22 & 23

24) You now have something of a troll situation going on.

25) Trim quite close to the head, being careful not to snip into the ears.

24 & 25

26) There you have it. Your sheep in all its long coated glory, ready for even the harshest of Cumbrian winters.

For more tutorials clik HERE

For needle felting kits, accessories, wool and handmade sheep click HERE

26

WATCH THE VIDEO TUTORIAL

Free Printable – Needle Felted Mushrooms – Unlock your inner creative!

If you are ready to dip your needle felting toe into the water this super easy needle felting pattern is a great place to begin. Perfect for even the most nervous of beginners this step by step guide will have you confidently creating fabulous needle felted characters in no time. Grab your free printable below. Just click for access, no purchase or subscription necessary. 

TAKE ME TO THE FREE PRINTABLE 

If you don’t have wool or needles then a needle felting kit is the perfect way to get started. There are more than 30 to choose from on the website. All you have to do is open the box and add enthusiasm!

TAKE ME TO NEEDLE FELTING KITS

Inspiring needle felting kits for beginners and beyond

How To Needle Felt Cute Animal Faces

LEARN TO NEEDLE FELT WITH CONFIDENCE

I love creating new needle felting video tutorials for you all, and anything that gives you the confidence to try this amazing craft is a win win for me. You can felt along with or without a a Lincolnshire Fenn Crafts Needle Felting Kit and all you need is a cuppa, felting needle, mat and your wool stash. My videos are perfect for even the most nervous of beginners and this one shows how to create really simple, but super cute, details for your animal faces, in just ten minutes! I’m not kidding, it really is only ten minutes.

KEEP IT SIMPLE

This has always been my mantra and the video tutorials on this blog and YouTube are designed to do just that. They are the building blocks of needle felting; a perfect beginners introduction on how to get it right from the very start.

As well as standalone video tutorials they also perfectly compliment my range of needle felting kits; if you have purchased a kit then you can happily needle felt along with each tutorial as you work through the different stages of your project.

I hope these short videos will help you build confidence as you needle felt along with me, workshop style. It’s such a wonderfully addictive craft. No sewing, wires or tricky patterns and all you need is enthusiasm.

Click For All YouTube Video Tutorials

JUST STARTED NEEDLE FELTING?

Then there is so much on this blog to help you get needle felting with confidence. My Dos And Don’ts For Beginners is a great place to start!

DO YOU NEED A FELTING KIT, TOOLS, OR WOOL?

If you don’t have any needle felting supplies at all then my online shop has everything you need. From wool, to felting needles, and complete starter kits; for nervous beginners to confident needle felters. I have designed and put together every single kit myself, and there is a huge range to choose from.

VIDEO TUTORIAL – HOW TO NEEDLE FELT SHEEP FACES

These techniques can be used on almost any animal, from sheep, dogs, seals, rabbits… the list is endless. It’s not hard but just takes practice and, if it goes wrong, don’t worry. Just pull it off and start again; that’s what learning a new craft or technique is all about.

The Lincolnshire Fenn Crafts Sheep

Est. 2013
© 2013 Lincolnshire Fenn Crafts