Make your creative dreams come to life with free needle felting tutorials, downloads, tips, ideas, and inspiration. Start your needle felting journey today!
Category: Video Tutorials
Easy video projects to guide you through the needle felting basics
These needle felted Macarons will be the most fabulous calorie free cakes you have ever had. My no fail needle felting recipe will have you filling plates and making summer garlands in no time. Each macaron takes a mere 15 minutes to make and all you need are a few scraps of wool and a bucketful of enthusiasm!
It is the perfect needle felting project to kick back and relax with and, if you are a nervous beginner, then this super easy needle felting project has your name all over it. Just imagine a few garlands of these beauties swinging in the summer breeze. The perfect garden party décor and wouldn’t they look brilliant with my bumble bee garland? Video tutorials for both are below.
Mini Bunny needle felting video tutorial – for even the most nervous beginners. With supporting printable pattern download on the website.
This is the easiest of easiest needle felting projects, only takes around 30-40 minutes and is just a whole heap of relaxing fun. Whether you are a nervous first time needle felter/crafter, just want to have some relaxing creative fun or want to fill the house with gorgeous handmade bunny decorations, this is a great project. The process and technique for this pattern is really easy and straightforward. Your secret weapon is the BBQ stick you will be using which makes creating the body shape so much easier and super fast. It really is the needle felting tool you never knew you needed but was in your kitchen drawer all the time.
I was surprised how much I enjoyed making these because cute and cartoony normally isn’t my thing. But, it seems I am a cute and colourful convert just because of how relaxing it was and, there’s no denying, those pastel colours are pretty lush. Even as a seasoned needle felter it is incredibly satisfying to complete something quickly and easily, knowing what the end result will be, and then repeating the process again. I was completely focused and really just felted away in quiet contemplation. There is something immensely calming about creating simple projects and repeating a task – part of the human psyche I guess – so much so that I ended up making four of them and will be making more for an Easter garland.
YOU WILL NEED:
Needle felting wool – Approx. 5g, any type or colour.
Standard felting needle – size 38 is a good all-rounder.
Wooden BBQ skewer (or similar) for shaping
Felting mat
Click HERE for the downloadable pattern at a special price of just £1.50.
Work alongside me and make these fabulous needle felted characters, step by creative step. I have split the hares and sheep and Highland Cow into several easy parts so you don’t feel overwhelmed plus there’s plenty of time for tea and cake breaks. Put the kettle on and enjoy!
I love to keep you entertained with live workshops. They are a lot of fun so make sure you subscribe for notifications as I get to answer all your questions.
I don’t know about you but I am desperate for Spring. What am I talking about?? The whole country is desperate for the new season so we can get back into our gardens and forget about world events for a while. Crafts of any kind, whether that be needle felting, sewing, knitting, flower arranging, gardening, are more important now than they have ever been but there is nothing like the spring sunshine to get our hearts fluttering. Even better though is crafting in the Spring sunshine and I have just the project for you.
LET’S SPRING INTO CREATIVITY
I have put together an easy video tutorial showing you how to create this fabulously fuzzie bumble bee and all you need is wool, a felting needle and a BBQ skewer… A BBQ skewer you say? Trust me, you will wonder how you ever managed without one in your felting tool box!
VIDEO TUTORIAL HERE
The whole project should only take around 45 minutes and you will get faster the more you make. Pop on a brooch back and you have the loveliest accessory or gift for Mother’s day and I can’t think of anything nicer to adorn a jacket, scarf or hat than a unique piece you have made yourself.
What’s better than a handmade accessory?
Make half a dozen and you have a beeutiful (had to get that in somewhere) Spring display, garland or cute mobile.
I have also put together a BUMBLE BEE WOOL PACK to create two bees which includes two brooch backs and a BBQ skewer. Available on the WEBSITE
Don’t forget to tag me in you project photographs @lincolnshirefenn and, if you’re not on social media you can email them to me at: info@lincolnshirefenncrafts.com I love adding photos to the gallery!
So excited to tell you that Heather The Highland Cow Needle Felting Kit is now available on the website. Over 3,500 words, 90 full colour photographs, lots of different techniques and a whole load of Highland, what’s not to love. If you don’t need the tools it is also available as a wool refill pack. You will learn how to create long fur, wrap wire around pipe cleaners for perfect shaped legs and stability, build up the head and body to create that typical highland chunkiness and create those beautiful finishing touches. Every part is needle felted and no need for any glue. It’s just you, your needle and lush British wool. BTW, the wool topcoat is a Lincolnshire Fenn Crafts specially dyed Shetland, only available from yours truly; not to orange and not too brown.
VIDEO TUTORIAL – Links below.
Not only that, but the full video tutorial is now live on my YouTube channel and it is epic and no needle felted stone has been left unturned. Just grab your wool and felting need and join me on YouTube for a workshop style tutorial. It’s in 6 parts so you can work methodically with me through each step. I have put them in a playlist so each step starts after the previous, working towards the finale of the fabulous top coat!
I always approach a new kit and video tutorial as if the person using it has never heard of needle felting and is new to crafts making it accessible to as many people as possible. And, let’s face it, crafts now more than ever are a great coping mechanism when life gets a little too much. So add some creativity to your list of self care tools. All my video tutorials are free so if you have a handful of wool and a felting needle just find a project and make something, if only to lighten the mental load for a while.
Before and after. Ta-Da!!!
COMING SOON!
Two more needle felting kits and video tutorials; whimsical hare and forest folk. I can’t wait!
Everything you need to know is covered, from needle felting your basic body shape at the start to putting it all together, in simple bite size chunks that will give you the creative confidence to continue with this fabulously addictive craft.
Within each video tutorial, I meticulously dissect the process of needle felting animals, simplifying each step into easily adaptable body shapes that suit the animal you’re crafting. Whether you’re a beginner eager to dive into the world of needle felting, an improver seeking to enhance your skills, or simply someone craving a creative escape, these tutorials are tailored just for you. Designed in a workshop-style format, each video serves as your personal guide, leading you through every stage of your creative journey. Along the way, I share invaluable tips to streamline the process, ensuring efficiency without sacrificing quality.
From mastering the fundamentals of shaping your basic body outline to seamlessly assembling your creation, every aspect is covered. The content is presented in digestible, bite-sized chunks, giving you with the confidence to persist and thrive in this wonderfully addictive craft. Whether you’re crafting a charming penguin or a needle felted hare, these tutorials provide the foundation and encouragement you need to unleash your creativity and bring your projects animals to life. So, grab your felting supplies, settle in, and let’s start needle felting together.
If you are working from one of my NEEDLE FELTING PATTERNS just follow the written instructions alongside the video tutorials.
1 BASIC BODY SHAPE – 12 minutes
2 BASIC HEAD SHAPE – 12 minutes
Learn to master the creation of a basic and simple head shape for your needle felted animals. Achieving a firm shape is essential for the success of your project, serving as the foundation upon which you’ll build the rest of your creation. Through careful guidance and practice, you’ll learn the techniques necessary to craft a head shape that not only looks great but also provides stability and structure to your final piece.
3 BASIC LEG SHAPES – 21 minutes
Welcome to The Felt Hub series of needle felting projects dedicated to helping beginners master the art of needle felting! In this installment, we’ll focus on creating firm legs every time, without the need for wires. Firm legs are crucial for providing stability and balance to your needle felted creations. Whether you’re new to needle felting or looking to refine your skills, this tutorial will guide you through the process step by step, giving you the skills necessary for you to achieve professional-looking results without any hassle.
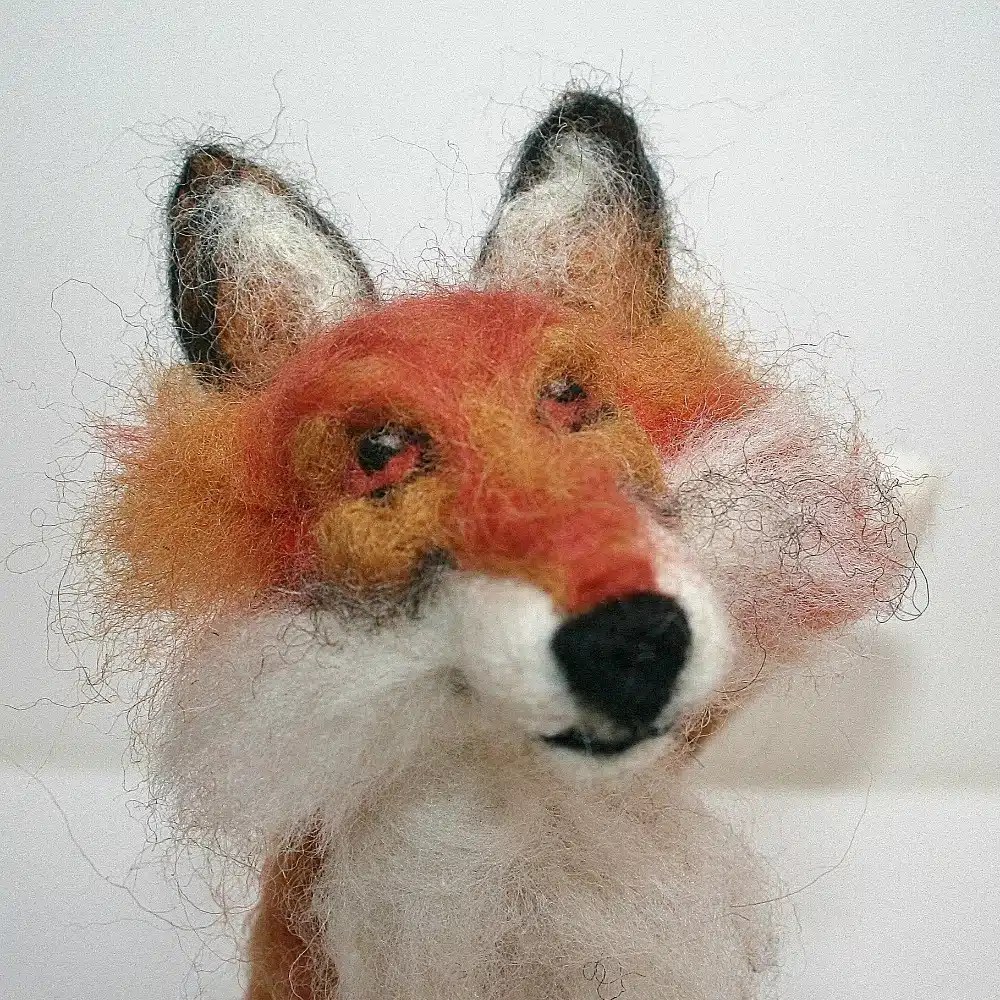
4 HARE AND FOX EARS – 15 minutes
Crafting needle felted ears is a breeze once you’ve mastered the right technique. With my straightforward needle felting tutorials, you’ll be up and running in no time, ready to bring your creations to life. Whether you’re aiming for petite and perky or large and floppy, you’ll learn how to craft fabulous ears in any shape or size. So, let’s dive in and start felting those adorable ears!
5 SHEEP EARS – 15 minutes
Discover a quick, effortless, and efficient method for crafting charming needle felted sheep ears in just fifteen minutes.
Grab a cuppa and mince pie and get creative with me, You can felt along with me or just watch and save for later. All you need is a handful of wool, any colours or type, and a felting needle. A cocktail stick will come in useful but it’s not essential.
OK, so maybe her attention is more on the mince pie than the needle felted gnome but, she does love wool and loves watching me needle felt. That counts, right?
VIDEO TUTORIAL Scroll down for written tutorial and materials list.
Nordic and Scandinavian style decor is so popular and I just love it. What I especially love are the charming Nordic gnomes. You may also see them referred to as Nisse, Tomte and Tonttu. Our house is full of them and they are super easy so here’s a tutorial for you.
If you have never needle felted before or are an experienced felter this is a wonderful way to start and get you in the festive mood. It’s simple and relaxing and so much fun to make.
This is just one style to get you started but there are so many variations that soon, like me, you will be tripping over them. So grab a cuppa, mince pie and some festive cheer and get creating.
1 – Hat: Make this first so the body fits the hat; much easier than trying to fit the hat to the body! You can go as small or tall as you like but this hat, when completed, is approx 20cm. The triangle template measurements are approx; base 10cm (slightly curved) and sides 12cm .
Layer your hat wool on your felting mat and pop your hat template on top of your wool, leaving a few extra centimetres of wool around each side. Top tip: Your wool shouldn’t be too thick but make sure you can’t see the felting mat through it
Make sure you can’t see through the wool
2 – ‘Draw’ a line around the triangle with your needle to create a very rough outline
‘Draw’ around the template
3 – Remove template and draw around the line a couple more times. This will be your fold line.
Make sure your line is visible
4 – Fold in the sides one at a time and start to felt to create a triangle; it will be a very rough shape to start with but you will tidy this up as the wool becomes more felted so stop fiddling with it!
Stop at the fold line
5 – Gently fold and felt each side until you have this rough shape; keep the excess at the top of your triangle because this is going to create your lovely pointy hat shape.
Repeat for all three sides
6 – Gently pull away from the base you are using, turn and repeat. Tip; any felting base will do (foam, rice bag etc), whatever your preference.
Keep turning regularly so it doesn’t stick to the base
7 – Keep repeating the process until it starts to firm up.
Continue felting until it holds its shape
8 – Time to tidy up the shape; use your finger to fold in the sides that need straightening (doesn’t have to be perfect). Be slow and careful so as not to stab your finger; you can use a finger guard but I find they just annoy me. However, I have lots of customers who get on with them just fine.
Be careful, the needle is sharp
9 – Your approx finished triangle which should be soft but firm and holds its shape.
Your finished hat shape; it doesn’t have to be perfect
10 – Fold in half and felt along the side to mesh the fibres together. Keep turning and repeating until the hat is now firmly felted along the side so it doesn’t pull apart when you gently pull it.
Fold in half and felt along the seam
11 – Open up the base of the hat and tidy up the line by folding in any rough edges and felting. Keep turning and felting until you are happy with the shape at the base of your Tomte hat.
12 – Roll just the top 2/3 cm of your hat between the palm of your hands to firm up the top and point. This improves the look as well as allowing you to tip the point over to the side at a jaunty angle.
Roll the tip in the palm of your hands to create a pointy hat
Use any colours you want for the hat
Basic Body Shape
Body shapes don’t get much easier than this. Don’t be too precious about needle marks and dimples because most of this will be covered by its big beard.
1 – Roll your wool (I have used natural white Shetland) into a basic barrel shape. It will do this automatically as you start to roll. Start with less than you need and build it up.
Most important! Do not start to felt with your needle until you have rolled at least half of it really tightly; trust me, this will save you a lot of felting time and applies to all body shapes made this way!
2 – Start stabbing all over with your needle (mind your fingers) as you continue to roll and remember to keep it tight. Tip: Check to see if your hat sits on top and if the body is too small add some more wool and felt again. If it’s too big then continue to felt where the hat will sit to reduce the size.
3 – Continue to turn and felt until you have a more even and neater shape. You may end up with a narrower end which is fine because you will pop the hat onto this. Pay particular attention to the base which needs to be flat for stability. Tip; you can also press on the base once felted as the wool is pretty malleable.
4 – Flatten the base until it sits without wobbling.
5 – Pop on your hat and felt, gently, all around the edge until it is felted securely onto the body making sure the hat seam is at the back.
6 – Make the nose by rolling a pinch of white or flesh coloured wool in your hands just to rough it up. Place on your mat and continue to felt with your needle, turning all the time. Now place back into the palm of your hands and roll vigorously until really firm and smooth. Tip; you may have to do this a couple of times to get it right as it is very easy to add too much wool and have a huge nose if you have never needle felted before. Less is always more when it comes to needle felting.
7 – Place the nose on its side, just under the front of the hat and felt the end into the body.
9 – As you do this the nose will naturally rise into its correct position. Continue to felt around the base until it is firmly attached. The base of the hat should be sat just above the nose.
10 – Decide what type of beard you are going to have. I have used grey Jacob but use whatever colour you wish. Curly locks also look really great.
11 – If using a straight wool pull off a small section and fold in half and start by felting it onto the body just under the nose. Don’t worry about it being longer than the body because you will trim it to size (or not) once it is attached.
12 – Continue to felt along the fold and attach it up the side of the nose and along the hat line. Tip; you can push the wool under the hat line with your needle (don’t bend it or you may break the needle) for a neater finish.
13 – Now trim your beard to your desired shape and style. I like mine quite ‘raggy’ so once I have got the length I then snip into the sides.
There you have it. One fabulous Tomte Christmas gnome! You can crease the hat or keep it straight. I like both. Told you it was easy!
Try different wool and add some fabulous locks for a different look. For the gnomes below I have used a lush teal batting with green silk fibres for the hat, and plant dyed, hand spun locks for the beard. The gnome on the right has a beard of grey Masham shot through with white silk.
But why would you stop there when the variations and colours are endless!
There is no denying that Autumn is my absolute favourite time of year. I have just enough time to pause and take a deep breath before the busy season is upon me. In fact, my Autumn mode usually starts at the beginning of August, when you can just about smell the change of season. So, what better way to kick off the season than with a perfect pumpkin project. It is so easy and you can go from wool to pumpkin in just 30 relaxing minutes.
YOU WILL NEED: 15g core wool for a medium sized pumpkin: approx 15cm. 10/15g wool batting sheet or wool top in any colour you like. Contrasting wool colour: For pumpkin lines. OPTIONAL: Embellishments: Wool locks, silk fibres, discarded jewellery, lace, ribbon etc
I promise that pumpkins are one of the easiest things to needle felt so, even if you are the most nervous of beginners, I have every confidence of your pumpkin success! For those of you lucky enough to have beautiful weather this Autumn you can really make an outside impact, whether that be on tables or porches, with a ‘pile’ of pumpkins. Trust me when I say that you will soon be plonking pumpkins on every surface! They really are that addictive!
If you are lucky enough to have fabulous autumnal weather you can create a beautiful garden display.
Why not grab some friends or family members and have yourself a pumpkin party. Even if you are socially distancing you can have an amazing creative gathering through Skype, Zoom or other social media outlets that I know absolutely nothing about???
Don’t hold back with the colour or embellishments. Just fly in the face of tradition and have some creative fun!
Embellish…
embellish…
embellish some more!
The pumpkin possibilities are endless
Pumpkins are not just for Fall and Autumn so why not give them a Winter wonderland feel and enjoy them for even longer. I am in love with these Winter pastels and mine will be staying up right through Christmas.
Gnomes and pumpkins are a match made in heaven and my go to quick and easy projects if I need to just chill and relax. If you have been following my Nordic Gnome tutorial you will already know that gnomes are as easy as pumpkins to make. I CAN’T WAIT, TAKE ME TO GNOME TUTORIAL
Hopefully I have given you enough ideas to inspire your Autumn/Fall creativity so, just grab a felting needle and whatever is in your wool stash! Most important, it doesn’t matter what you make as long as you are creating something that makes you happy whilst doing it.
So you have spent hours making your fabulous needle felted sheep, only to realise you don’t have any curls to finish it. Grrrr! Not to worry, just grab a ball of wool, yarn or similar and make your own. It’s really easy and creates a whole new look for your needle felted animals; Scroll down for video tutorial.
It is also very calming and saves you sitting by the post box like this, impatiently waiting for your curly wool to arrive.
VIDEO TUTORIAL
Here is a quick video (part 2) showing you how easy it is. I have used a coarse rug yarn but any yarn with an element of wool in it will do.
Use any yarn you have in your craft box; It is easier to apply if it has some wool content. I have used a coarse rug yarn and a really soft Merino for these two gorgeous sheep.
Create beautiful texture with standard yarn
You will also find out how to add this lush, art yarn (video part 1) to your projects. I used a 40 triangle needle as it is a little easier but a standard (usually a 36 or 38 gauge) will do just fine.
A question I am often asked by new or beginner felters is how to complete the more fiddly finishing touches of a needle felting project. The small size and need for symmetry is something many struggle with when felting sheep ears, but it really doesn’t need to be a complicated process. The below video tutorial will show you all the techniques, tips, and tricks you need to create perfect sheep ears in just 15 minutes; or just 10 if you cut out the waffle.
Tiny ears are simple once armed with the right technique.
This video tutorial builds upon the written tutorial to show the entire process of creating and attaching sheep ears to your creation. If, like me, you are a visual learner and prefer to follow along with someone else, this real-time video tutorial is the one for you!
I love creating new needle felting video tutorials for you all, and anything that gives you the confidence to try this amazing craft is a win win for me. You can felt along with or without a a Lincolnshire Fenn Crafts Needle Felting Kit and all you need is a cuppa, felting needle, mat and your wool stash. My videos are perfect for even the most nervous of beginners and this one shows how to create really simple, but super cute, details for your animal faces, in just ten minutes! I’m not kidding, it really is only ten minutes.
KEEP IT SIMPLE
This has always been my mantra and the video tutorials on this blog and YouTube are designed to do just that. They are the building blocks of needle felting; a perfect beginners introduction on how to get it right from the very start.
If you don’t have any needle felting supplies at all then my online shop has everything you need. From wool, to felting needles, and complete starter kits; for nervous beginners to confident needle felters. I have designed and put together every single kit myself, and there is a huge range to choose from.
VIDEO TUTORIAL – HOW TO NEEDLE FELT SHEEP FACES
These techniques can be used on almost any animal, from sheep, dogs, seals, rabbits… the list is endless. It’s not hard but just takes practice and, if it goes wrong, don’t worry. Just pull it off and start again; that’s what learning a new craft or technique is all about.
Following on the success of my needle felted Nordic Gnomes tutorial, I decided to add a video tutorial to go with it. I mean, Nothing shouts Christmas louder than Nordic gnomes! Well, maybe Noddy Holder, he’s really loud!
Tomte, Nisse, Tonntu or however you refer to them are now firmly established as part of our Christmas gnome decor , and I was introduced to them a few years ago by my Finnish pal, Anna. Let’s face it, there’s nothing like a bit of Nordic flavour to get us in the festive, hygge mood.
My video tutorials, like my written ones, are kept simple, informal and relaxed and I want you to feel like you have just popped into one of my workshops. So, wrap up warm, grab a cuppa (or mulled wine), your wool and needles or Gnome felting kit and join me for 25 minutes of easy, peasy, unadulterated craft respite. Now where’s those woolly socks?
Hedgehog needle felting kits are available on the Website
So excited to introduce Colin Hedgehog, the prickliest member of the Lincolnshire Fenn Crafts tribe. The full needle felting kit to accompany this video is also available on the Lincolnshire Fenn Crafts website.
This is my version of our beloved hedgehog. More fun than you can shake a stick at? Not sure what that means but it is definitely a lot of fun.
Skill level: Complete beginners to intermediate
What you need: Enthusiasm!
So, make a cuppa, cut yourselves a slice of cake and join me for a full tutorial teaching you new tips, tricks and techniques as well as trying new wool and needles.
Bonus! if you are using the kit you get to make at least 3 Colin hedgehogs! What better way to spend a crafternoon…
A short video (only 12 minutes) to help you improve your needle felting techniques.
When needle felting a head (animals or people) it is important to make sure you have a really firm shape. If you have a soft head then when you start to add the features you will distort or flatten the wool.
It is one of the most common mistakes (apart from floppy legs) but very easy to get right. As with all things, practice makes perfect, but needle felting does allow for mistakes because you can just add another layer. Just remember the golden rule: Start smaller and build your shape up and you can add but not take away. If you start too big and have to keep adding you will end up with a head the size of a football and then have to make a body to match! We are now talking life size sheep or giant hares that will just scare everyone, especially the dog or cat…
My best advice: Be patient. Don’t try to run before you can walk. Get the basics right and the rest will follow. Yes, I know your bestie, family member or work colleague wants a sculpture of their dog making after seeing a flower brooch you made? However, anything worth doing takes time. If it didn’t we would all be taking David Bailey quality photographs after an hours tutorial, or be able to put in a whole plumbing system after fixing a leaky tap… Most definitely, very soon we would all be very bored of hearing about each others achievements and stop making the effort.